background image

4

CONTENTS

Preparation ............................................................................................................ 6

Setting the MW (AM) Tuning Increment ........................................................... 6
Installing Back-Up Batteries ............................................................................. 6
Connecting to Primary Power ........................................................................... 7

Internal Battery Power  .............................................................................. 7
AC Power  .................................................................................................. 8
DC Power .................................................................................................. 8

Using the Folding Stand and Memo Pad .......................................................... 9

Using the Receiver.............................................................................................. 10

Turning the Receiver On/Off........................................................................... 10
Tuning............................................................................................................. 10

Selecting the Band  .................................................................................. 10
Direct-Access Tuning  .............................................................................. 10
Using the Rotary Dial  ..............................................................................  11
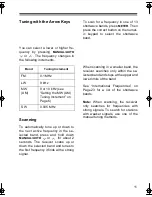
Tuning with the Arrow Keys ..................................................................... 12
Scanning  ................................................................................................. 12
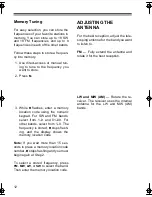
Memory Tuning  ....................................................................................... 13

Adjusting the Antenna .................................................................................... 13
Connecting an External Antenna .................................................................... 14
Adjusting Special Tuning Controls.................................................................. 14

FM Mono/FM Stereo  ............................................................................... 14
AM Narrow/AM Wide  .............................................................................. 14
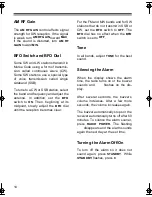
AM RF Gain  ............................................................................................ 15
BFO Switch and BFO Dial  ...................................................................... 15
Tone ........................................................................................................ 15

Using the Clock Radio ........................................................................................ 16

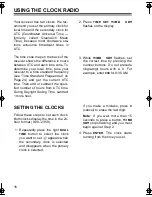
Setting the Clocks........................................................................................... 16

Changing the Clock Display  .................................................................... 17

Using the Alarm (Standby) Feature ................................................................ 17

Setting the Alarm  .................................................................................... 17
Silencing the Alarm  ................................................................................. 18
Turning the Alarm Off/On  ........................................................................ 18

Using the Sleep Timer .................................................................................... 18

Making a Recording ............................................................................................ 19

Loading a Cassette Tape ................................................................................ 19
Playing a Cassette Tape................................................................................. 19

Fast-Forward and Rewind ....................................................................... 20
Cue and Review ...................................................................................... 20

20-219.fm  Page 4  Wednesday, August 4, 1999  9:23 AM

Содержание 20-219B

Страница 1: ...Cat No 20 219B OWNER S MANUAL PLL ALL BAND PORTABLE RECEIVER Please read before using this equipment DX 392 WITH CASSETTE RECORDER ...

Страница 2: ...ponse Display lets you quickly and easily view the time band and frequency signal strength and other indicators Dual Time lets you set a primary clock to your local time and a second ary clock to another time zone so you can quickly check the time in another part of the world Scan Tuning lets you quickly find stations Memory Tuning stores up to 54 fre quencies in memory so you can quick ly select ...

Страница 3: ...tling sound sometimes heard when recording AM broadcasts Built In Condenser Microphone lets you make live recordings Three Power Options let you choose from internal batteries stan dard household AC power requires an AC adapter or DC vehicle battery power requires a DC adapter so you can use the receiver just about any where Battery Power Indicator lets you know when the batteries need to be re pl...

Страница 4: ... Arrow Keys 12 Scanning 12 Memory Tuning 13 Adjusting the Antenna 13 Connecting an External Antenna 14 Adjusting Special Tuning Controls 14 FM Mono FM Stereo 14 AM Narrow AM Wide 14 AM RF Gain 15 BFO Switch and BFO Dial 15 Tone 15 Using the Clock Radio 16 Setting the Clocks 16 Changing the Clock Display 17 Using the Alarm Standby Feature 17 Setting the Alarm 17 Silencing the Alarm 18 Turning the A...

Страница 5: ...Frequency Conversion 25 Band Allocations 25 Amateur Radio Frequencies 25 International Frequencies 26 Aircraft Frequencies 27 Ships and Coastal Station Frequencies 27 Time Standard Frequencies 27 Longwave Band 27 Listening Guide 28 Birdies 33 Tape Tips and Techniques 34 Storing Your Cassettes 34 Erasing Tapes 34 Accidental Erasure Prevention 34 Tape Tension 35 Cleaning the Tape Mechanism 35 Troubl...

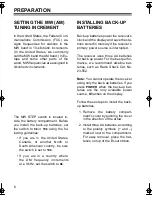
Страница 6: ...quency increments are 9 kHz set the switch to 9k INSTALLING BACK UP BATTERIES Back up batteries power the receiver s clock and the display and save the sta tions stored in memory if the receiver s primary power source is interrupted The receiver uses three AA batteries for back up power For the best perfor mance we recommend alkaline bat teries such as Radio Shack Cat No 23 552 Note You cannot ope...

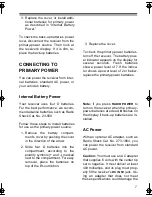
Страница 7: ...partment according to the polarity symbols and marked next to the compartment For easy removal place the batteries on top of the lift out ribbon 3 Replace the cover To check the primary power batteries turn off the receiver The battery pow er indicator appears on the display for several seconds Fresh batteries show a power level of 7 If the indica tor shows a power level of 2 or below replace the ...

Страница 8: ...he center tip set to negative It must deliver at least 400 milliamps and its plug must properly fit the receiver s DC IN 6V jack Using an adapter that does not meet these specifica tions could damage the receiver or the adapter To protect your vehicle s electrical system be sure the adapter is connected to the cigarette lighter socket only when it is also con nected to the receiver Follow these st...

Страница 9: ...R TURNING THE RECEIVER ON OFF Press RADIO POWER to turn on the re ceiver then adjust the volume The display shows the band frequen cy and signal strength A reading of 7 indicates the strongest signal Press RADIO POWER again to turn off the receiver TUNING Selecting the Band Press FM MW LW or SW to select the band Press MW for AM To select a smaller band within the SW band press METER then enter th...

Страница 10: ...E LOCK to select the rota ry tuning increments or to lock the RO TARY TUNING dial If you select FAST the rotary tuning increments are the same as when you use the MANUAL AUTO or keys If you select FINE the tuning increments are small er so you can fine tune the frequency as shown in the following table You can also set FAST FINE LOCK to lock the ROTARY TUNING dial This prevents you from accidental...

Страница 11: ...requency in one of 13 shortwave bands press METER Then press the correct button on the numer ic keypad to select the shortwave band When scanning in a smaller band the receiver searches only within the se lected band and stops at the upper and lower limits of the band See International Frequencies on Page 23 for a list of the shortwave bands Note When scanning the receiver only searches for freque...

Страница 12: ...m 1 9 and 01 09 For other bands select from 1 9 The frequency is stored M stops flash ing and the display shows the memory location code Note If you wait more than 15 sec onds to press a memory location code number M stops flashing and you must begin again at Step 2 To select a stored frequency press FM MW LW or SW to select the band Then enter the memory location code ADJUSTING THE ANTENNA For th...

Страница 13: ...s supplied instruc tions to connect the receiver to the an tenna ADJUSTING SPECIAL TUNING CONTROLS Several controls affect the receiver s sound This section explains how to adjust these controls FM Mono FM Stereo To improve reception for weak FM ste reo stations set FM MONO FM STEREO to FM MONO The signal becomes monaural but the sound might im prove To return to a stereo signal set FM MONO FM STE...

Страница 14: ...n becomes clear For the FM and MW bands and for SW stations that do not transmit in SSB or CW set the BFO switch to OFF The BFO dial has no effect when the BFO switch is set to OFF Tone In all bands adjust TONE for the best sound Silencing the Alarm When the display shows the alarm time the radio turns on or the buzzer sounds and flashes on the dis play After several seconds the buzzer s volume in...

Страница 15: ...utes appears on the display 3 Tune to the desired station After the amount of time you set in Step 2 the receiver turns itself off To turn off the receiver sooner press RA DIO POWER MAKING A RECORDING LOADING A CASSETTE TAPE 1 Press STOP EJECT to open the cassette compartment s door 2 Use your finger or a pencil to turn the cassette s hub and take up any slack Note Avoid touching the tape Finger p...

Страница 16: ...ime During Daylight Saving Time subtract 1 more hour SETTING THE CLOCKS Follow these steps to set each clock Both clocks display the time in the 24 hour format 0 00 23 59 1 Repeatedly press the right DUAL TIME button to select the clock you want to set appears when the secondary clock is selected and disappears when the primary clock is selected 2 Press TIME SET TIME SET flashes on the display 3 W...

Страница 17: ... time ar rives For example you can use the alarm to remind you to tune to a foreign broad cast Set the secondary clock for UTC set the alarm for the UTC broadcast time and be sure the display shows the secondary clock Setting the Alarm 1 Press STANDBY STANDBY flash es on the display and the current alarm time appears 2 While STANDBY flashes press the number buttons to enter the alarm time If you m...

Страница 18: ...ay the other side turn the cassette tape over Fast Forward and Rewind Press CUE FAST F to rapidly ad vance a tape Press REVIEW REWIND to quickly rewind a tape When the tape reaches the desired point press STOP EJECT Caution To avoid damaging the tape do not go directly from rewind to fast forward or from fast forward to rewind without pressing STOP EJECT first Cue and Review Holding down CUE FAST ...

Страница 19: ... tape reaches the end To record the other side turn the tape over Caution Never attempt to force down RECORD If you have removed your cassette s erase protection tabs you cannot press RECORD See Accidental Era sure Prevention on Page 32 7 To temporarily stop recording press PAUSE Press PAUSE again to resume recording 8 When the recording is complete press STOP EJECT twice and remove the cassette f...

Страница 20: ...e preset time and the recorder starts recording The tape stops automatically at the end of the tape but the radio keeps playing until you turn it off Recording AM Broadcasts Sometimes you might hear a hum or whistling sound when recording an AM broadcast To reduce or eliminate this sound set the BEAT CUT switch to the position that gives you the best record ing Recording Using the Built In Microph...

Страница 21: ...ns steady Listening Safely To protect your hearing follow these guidelines when you use headphones Set the volume to the lowest set ting before you begin listening After you begin listening adjust the volume to a comfortable level Do not listen at extremely high volume levels Extended high volume listening can lead to per manent hearing loss Once you set the volume do not increase it Over time you...

Страница 22: ...s about shortwave listening are available through your local library or news stand Consult sources such as the World Radio Handbook Radio Ama teur s Handbook Passport to World Band Radio Monitoring Times and Popular Communications These pub lications can help you learn about the conditions that make long distance re ception possible and provide up to date listings for shortwave broadcasts in Engli...

Страница 23: ... of these bands are set aside for continuous wave CW Morse code communication or for single sideband SSB voice com munication as shown below 160 meters 1 800 2 000 kHz SSB 80 meters 3 500 3 800 kHz CW 3 800 4 000 kHz SSB 40 meters 7 000 7 150 kHz CW 7 150 7 300 kHz SSB 20 meters 14 000 14 200 kHz CW 14 200 14 350 kHz SSB 15 meters 21 000 21 250 kHz CW 21 250 21 450 kHz SSB 10 meters 28 000 28 500 ...

Страница 24: ... Frequencies Most transmissions from ships and coastal stations are in SSB and CW You can hear these transmissions in the following bands 2 000 2 300 kHz 4 063 4 139 kHz 4 361 4 438 kHz 8 195 8 181 kHz 12 330 12 420 kHz 13 107 13 200 kHz 16 460 16 565 kHz The Coast Guard and small boats use this band with 2 182 kHz set aside as the international distress and emer gency channel Time Standard Freque...

Страница 25: ...ission for weather broad casts LISTENING GUIDE The following list contains some of the more frequently heard stations All sta tions broadcast in English unless oth erwise specified You can hear these stations through out North America However recep tion varies based on the season time of day and a number of other condi tions This information can change at any time For sources of yearly up to date ...

Страница 26: ...se kHz Station Location Remarks kHz Station Location Remarks 4 890 National Broadcasting Commission Papua New Guinea 4 915 Voice Kenya Nairobi Kenya 4 920 Australian Broadcasting Commission Brisbane Australia 4 945 Radio Colosal Neiva Colombia Programs in Spanish 4 965 Radio Santa Fe Bogota Colombia Programs in Spanish 4 980 Ecos del Torbes San Cristobal Venezuela Programs in Spanish 5 020 Solomon...

Страница 27: ...s in Japanese kHz Station Location Remarks 6 060 Radio Nacional Buenos Aires Argentina Programs in Spanish 6 075 Radio Sutatenza Bogota Colombia Programs in Spanish 6 090 Radio Luxembourg Ville Louvigny Luxembourg 6 095 Polskie Radio Warsaw Poland 6 105 Radio New Zealand Wellington New Zealand 7 140 Trans World Radio Monte Carlo Monaco 7 170 Radio Noumea Noumea New Caledonia Programs in French 7 3...

Страница 28: ...adio Berlin International Berlin Germany kHz Station Location Remarks 9 645 Radio Norway Oslo Norway 9 720 Radio Iran Tehran Iran Programs in Farsi 9 745 HCJB Quito Ecuador 9 770 Austrian Radio Vienna Austria 9 800 Radio Kiev Kiev Ukraine 9 835 Radio Budapest Budapest Hungary 10 040 Voice of Vietnam Hanoi Vietnam 11 655 Israel Radio Jerusalem Israel 11 690 Radio Kuwait Kuwait City Kuwait 11 705 Ra...

Страница 29: ...0 Radio RSA Johannesburg South Africa 11 910 BBC London England kHz Station Location Remarks 11 930 Radio Havana Cuba Havana Cuba 11 935 Radio Portugal Lisbon Portugal 11 945 Radio Beijing Beijing China 11 955 Voice of Turkey Ankara Turkey 11 980 Radio Moscow Moscow Russia 15 038 Saudi Arabian Broadcasting Service Riyadh Saudi Arabia Programs in Arabic 15 084 Voice of Iran Tehran Iran Programs in ...

Страница 30: ...d 15 275 Radio Sweden Stockholm Sweden 15 305 Swiss Radio International Berne Switzerland 15 310 Radio Japan Tokyo Japan 15 320 Radio Australia Melbourne Australia 15 400 BBC London England 15 430 Radio Mexico Mexico City Mexico Programs in Spanish 15 465 Radio Pakistan Islamabad Pakistan Programs in Urdu kHz Station Location Remarks ...

Страница 31: ...ation Remarks 17 720 Radio France International Paris France 17 825 Vatican Radio Vatican City 17 860 Austrian Radio Vienna Austria 21 495 Israel Radio Jerusalem Israel 21 525 Radio Australia Melbourne Australia 21 625 Israel Radio Jerusalem Israel 21 645 Radio France International Paris France 21 735 Radio TV Morocco Rabat Morocco Programs in Arabic 25 790 Radio RSA Johannesburg South Africa 450 ...

Страница 32: ...If you want to erase a tape without making a new recording load the tape into the cassette compartment and press RECORD The deck erases the tape as the tape passes the record head If you want to quickly erase a tape you might prefer to use a bulk tape eraser available at your local Radio Shack store It erases both sides of an entire tape in a few seconds Note The built in microphone records any so...

Страница 33: ...a cassette tape several times the tape might become tightly wound on the reels This can cause playback sound quality to deteriorate To restore the sound quality fast forward the tape from the beginning to the end of one side then completely rewind it Then loosen the tape reels by gently tapping each side of the cassette s outer shell on a flat surface Caution Be careful not to damage the cassette ...

Страница 34: ...sms For the best perfor mance and sound quality clean the record play heads pinch rollers cap stans and erase head after approxi mately every 20 hours of use You can use recorder cleaner and cleaning swabs or a convenient head cleaner cassette All these cleaning products are available at your local Radio Shack store ...

Страница 35: ...ary power batteries are weak Antenna needs adjusting Metal is blocking the signal Move the receiver near a window when you use it inside a vehicle or metal frame building Frequency needs fine tuning See Tuning on Page 9 Scan stops when there is no clear sig nal This is caused by birdies See Bird ies on Page 31 Using an outdoor an tenna might reduce these signals Frequency does not change when you ...

Страница 36: ...ars all information you stored in the radio s memory Reset the radio only when you are sure it is not working properly 1 Remove the battery compartment s cover by pushing the cover in the direction of the arrow 2 Insert a pointed object such as a straightened paper clip into the RESET hole inside the battery compartment Then gently press then release RESET ...

Страница 37: ...stic parts Keep the receiver away from dust and dirt which can cause premature wear of parts Wipe the receiver with a damp cloth occasionally to keep it looking new Do not use harsh chemicals cleaning solvents or strong detergents to clean your re ceiver Modifying or tampering with your re ceiver s internal components can cause a malfunction and might invali date the receiver s warranty and void y...

Страница 38: ...1 450 21 750 MHz 13 meters 7 100 7 350 MHz 41 meters 25 600 26 100 MHz 11 meters 9 400 9 990 MHz 31 meters Antenna LW MWBuilt In Ferrite SWTelescoping or Optional Exter nal FMTelescoping Output700 mW 10 THD Recorder Tape Speed17 8 ips 4 76 cm s 3 Recording SystemAC Bias Erasing SystemMagnetic Erasing Frequency Response125 8000 Hz Signal to Noise Ratio Play Normal 46 dB Limit 40 dB Jacks External P...

Страница 39: ... Days Primary 75 Hours Continuous Operation 50 mW Dimensions HWD 71 2 117 8 27 8 Inches 192 300 75 mm Weight 3 2 lbs 1 4 kg without batteries Specifications are typical individual units might vary Specifications are subject to change and improvement without notice ...

Страница 40: ... a product defect during the warranty period take the product and the Radio Shack sales re ceipt as proof of purchase date to any Radio Shack store Radio Shack will at its option unless otherwise provided by law a correct the defect by product repair without charge for parts and labor b replace the product with one of the same or similar design or c refund the purchase price All replaced parts and...

Отзывы: