12
CONNECTING THE CD
CHANGER
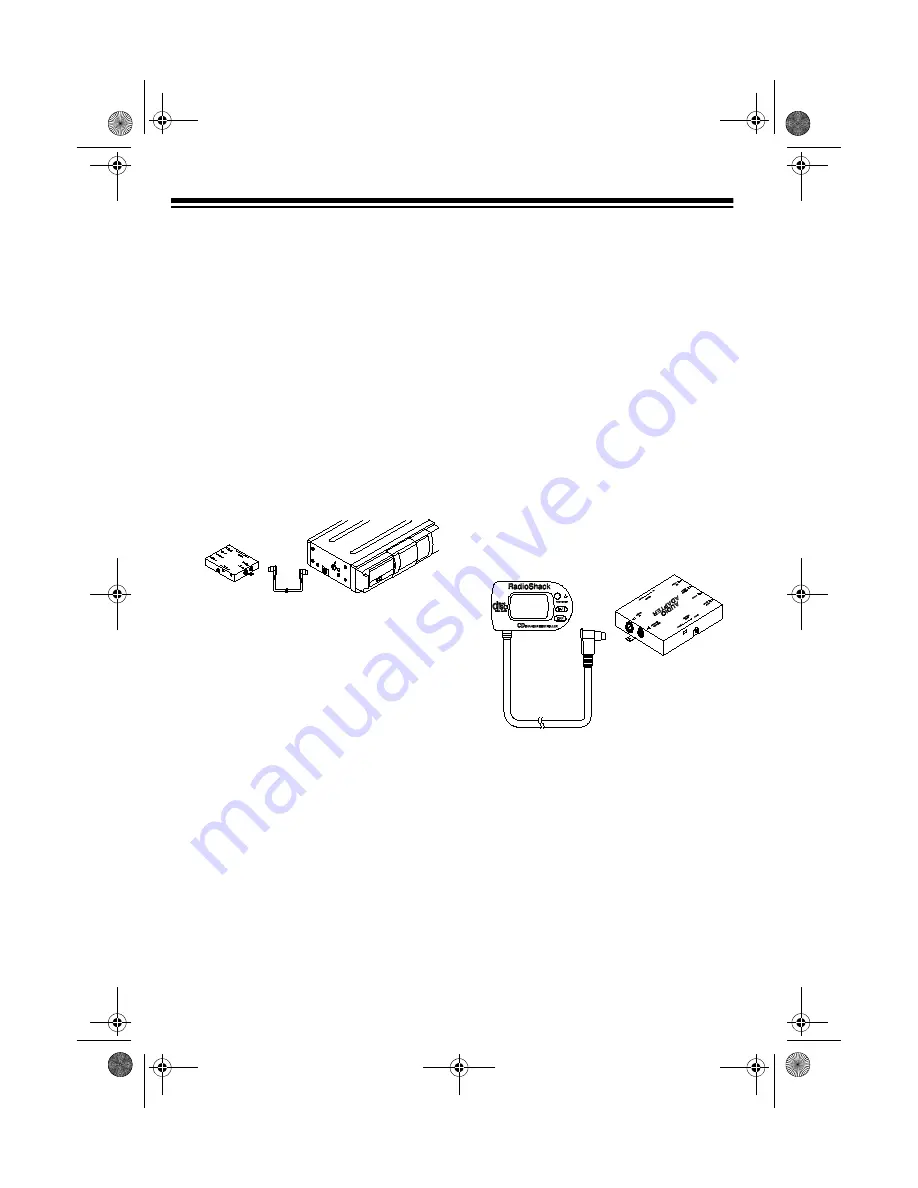
1. Disconnect the cable from your
vehicle battery’s negative (–) termi-
nal.
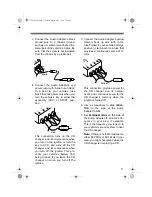
2. Connect the CD changer to the
Audio Adapter by inserting the plug
on one end of the CD changer cable
into the 8-pin
CD CHANGER
jack on
the Audio Adapter. Then insert the
plug on the cable’s other end into
the
DIN 8PIN
jack on the left side of
the CD changer.
3. Connect the black ground wire to a
chassis ground, such as a metal
screw attached to a metal part of the
vehicle’s frame. Be sure that the
screw is not insulated from the
chassis by a plastic part.
4. Connect the yellow memory back up
wire (with in-line fuse holder) to your
vehicle battery’s positive (+) termi-
nal or to a fuse that provides a con-
tinuous source of 12 volts.
This connection provides power for the
CD changer and its components, and
continuous power for the CD changer’s
memory when the ignition is turned off.
Cautions:
• The CD changer cable’s plugs fit
only one way into the Audio Adapter
and CD changer. Do not force them.
The recess mark on the metal rim of
the DIN plug should face down.
• To disconnect the CD changer cable
from the Audio Adapter and CD
changer, squeeze each plug, then
gently pull it out.
• Never pull on the CD changer cable.
CONNECTING THE CD
CHANGER CONTROLLER
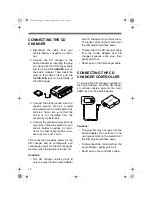
To connect the CD changer controller to
the Audio Adapter, insert the CD chang-
er controller cable’s plug into the 6-pin
CONT.
jack on the Audio Adapter.
Cautions:
• The plug fits only one way into the
Audio Adapter. Do not force it. The
oval recess mark on the metal rim of
the DIN plug should face down.
• To disconnect the controller from the
Audio Adapter, gently pull it out.
• Never pull on the controller’s cable.
ADAPTER
AUDIO
Ra
dio
Sh
ac
k
12-2182.fm Page 12 Friday, September 3, 1999 7:31 AM


