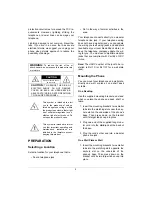
background image

3

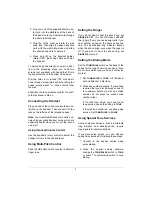
2. Plug one end of the supplied short modu-

lar cord into the 

LINE

 jack at the back of

the base. Route the modular cord through
the strain relief channel.

3. Plug the cord’s other end into the wall

plate jack, then align the base’s keyhole
slots with the wall plate studs and slide
the phone downward to secure it.

4. Press and lift up the handset holder,

rotate it 180°, then snap it back so it holds
the handset.

To mount the phone directly on a wall, in addi-
tion to the preceding steps, you need two
screws (not supplied) with heads that fit into
the keyhole slots on the bottom of the base.

Drill two holes 3

15

/

16

 inches (100 mm) apart.

Then thread a screw into each hole, letting the
heads extend about 

5

/

16

 inches (8mm) from

the wall.

Substitute the long modular cord for the short
cord mentioned in step 2.

Connecting the Handset

Plug one end of the coiled cord into the modu-
lar jack on the handset. Then connect it to the
jack on the left side of the telephone base.

Note: Your local RadioShack store sells a va-
riety of longer coiled handset cords, which are
especially useful when you mount the phone
on a wall.

Using Handset Volume Control

Use the handset’s rotary control to adjust the
handset volume to the desired level.

Using Multi-Pitch Control

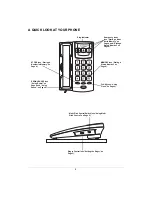
Slide the 

1/2/3

 pitch switch to select a different

ringer tone.

Setting the Ringer

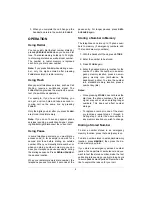
If you do not want to hear the phone ring, set

RINGER

 to 

OFF

. You can still make calls with

the ringer off, and you can answer calls if you
hear another phone on the same phone line
ring. The bar-shaped ring indicator flashes
when the phone rings, even when the ringer is
off. If you want to hear the phone ring, set

RINGER

 to 

HI

 or 

LO

Setting the Dialing Mode

Set the

 TONE/PULSE

 switch on the back of the

phone for the type of service you have. If you
are not sure which type you have, do this sim-
ple test.

1. Set

 TONE/PULSE 

to 

TONE

. Lift the hand-

set and listen for a dial tone.

2. Press any number except 

0

. If your phone

requires that you dial an access code (9,
for example) before you dial an outside
number, do not press the access code
number either.

If the dial tone stops, you have touch-
tone service. Leave the setting to

 TONE

If the dial tone continues, you have pulse
service. Set 

TONE/PULSE

 to 

PULSE

.

Using Special Tone Services

Some computer services, such as alternate
long distance and bank-by-phone, require
tone signals for communications.

If you have pulse service, you can still use
special tone service by following these steps.

1. Connect to the special service using

pulse dialing.

2. When the special service answers,

change the 

TONE/PULSE 

switch to 

TONE

,

or press 

*

 to temporarily switch to tone

dialing.

Содержание 02A01

Страница 1: ...al regulations and you can con nect it to most telephone lines However each device such as a telephone or answer ing machine that you connect to the tele phone line draws power from the telephone line We refer to this power draw as the de vice s ringer equivalence number or REN on the bottom of your telephone If you use more than one phone or other de vice on the line add up all of the RENs If the...

Страница 2: ...stand when you place the phone on a desk shelf or table 1 Insert the mounting bracket s two smaller tabs into the matching slots near the key hole slot on the underside of the phone s base Then press down on the bracket until its larger tabs snap into place 2 Plug one end of the supplied long modu lar cord into the LINE jack at the back of the base 3 Plug the cord s other end into a modular phone ...

Страница 3: ...vel Using Multi Pitch Control Slide the 1 2 3 pitch switch to select a different ringer tone Setting the Ringer If you do not want to hear the phone ring set RINGER to OFF You can still make calls with the ringer off and you can answer calls if you hear another phone on the same phone line ring The bar shaped ring indicator flashes when the phone rings even when the ringer is off If you want to he...

Страница 4: ...ing sequence Press REDIAL PAUSE at the desired location When you redial or memory dial a number the telephone pauses for about 2 seconds at the pause entry For longer pauses press REDI AL PAUSE again Storing a Number in Memory The telephone can store up to 13 phone num bers in memory 3 emergency numbers and 10 standard memory numbers 1 With the handset off hook press STORE 2 Enter the number to be...

Страница 5: ...e voltage Hang up the other phones to correct the prob lem If other telephone devices have been added at or about the time the phone s performance diminished recalculate the REN see FCC Statement on Page 1 If you still have problems disconnect the phone If other phones on the same line work properly the fault is in this phone or its instal lation If you cannot find the problem take your phone to y...

Страница 6: ...e 4 STORE see Storing a Number in Memory on Page 4 MEMORY see Dialing a Stored Number on Page 4 Ring Indicator FLASH see Using Flash on Page 4 REDIAL PAUSE see Using Redial on Page 4 and Using Pause on Page 4 Multi Pitch Control Switch see Using Multi Pitch Control on Page 3 Ringer Control see Setting the Ringer on Page 3 ...

Страница 7: ...7 NOTES ...

Страница 8: ...a product defect during the warranty period take the product and the RadioShack sales receipt as proof of purchase date to any RadioShack store RadioShack will at its option un less otherwise provided by law a correct the defect by product repair without charge for parts and labor b replace the product with one of the same or similar design or c refund the purchase price All replaced parts and pro...

Отзывы: