background image

This unit is compatible with Caller ID. To use this feature, you must 
subscribe to the appropriate service offered by your service provider.

Please read these Operating Instructions before using the unit and save 
for future reference.

For assistance, visit our website: 

http://www.panasonic.com

 for 

customers in the U.S.A. or Puerto Rico.

Charge the battery for 6 hours before initial use.

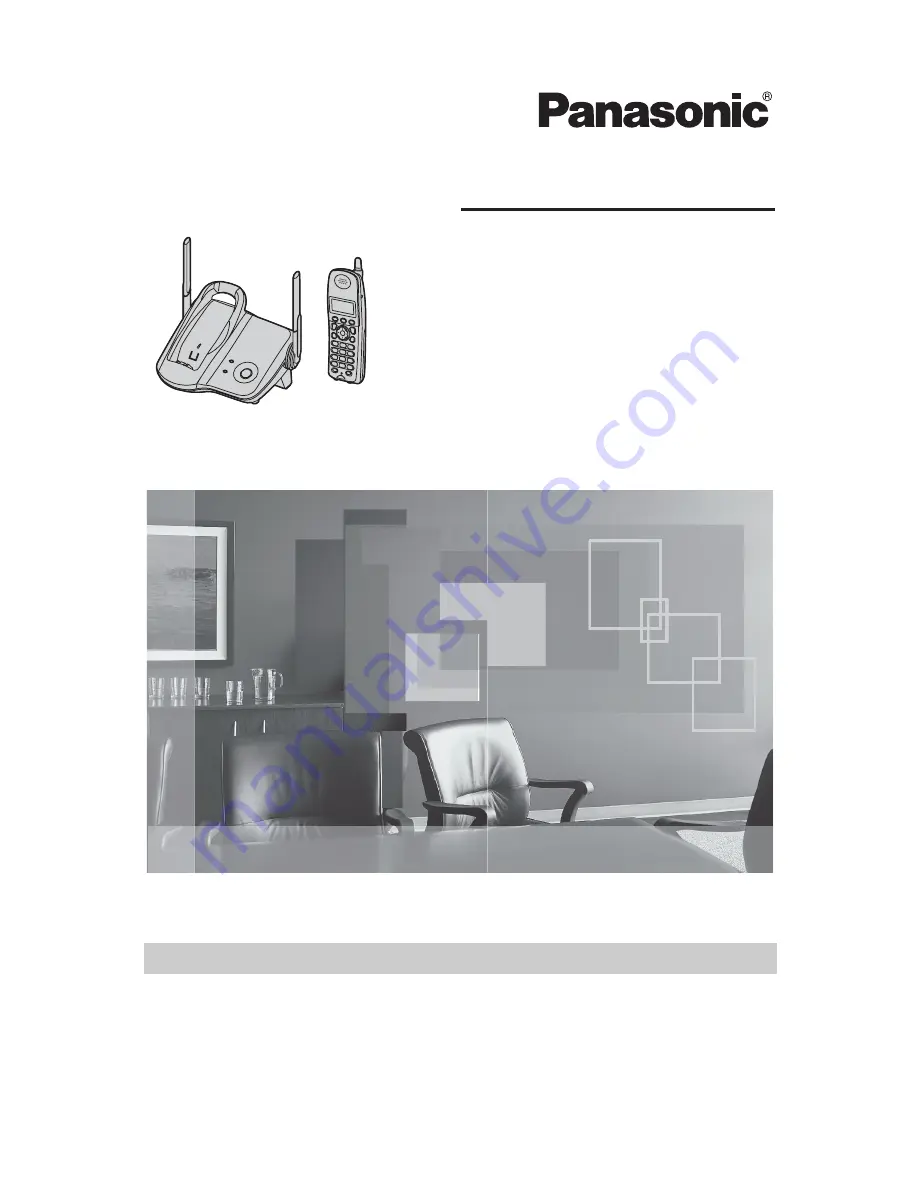
5.8 GHz Digital Cordless Phone

Model No. 

KX-TG5421

Operating Instructions

5.8 GHz Digital Cordless Phone 

 with Dual Handsets

Model No. 

KX-TG5422

5.8 GHz Digital Cordless Phone 

 with Three Handsets

Model No. 

KX-TG5423

Model shown is KX-TG5421.

Содержание KX-TG5421

Страница 1: ...e for future reference For assistance visit our website http www panasonic com for customers in the U S A or Puerto Rico Charge the battery for 6 hours before initial use 5 8 GHz Digital Cordless Phon...

Страница 2: ...ers 23 For KX TG5423 users 24 Caller ID Service Using Caller ID service 25 Ringer ID and light up ID 25 Caller list 26 Viewing the caller list and calling back 26 Editing a caller s phone number befor...

Страница 3: ...l mounting 44 Base unit 44 Charger unit KX TG5422 and KX TG5423 only 46 Error messages 47 Troubleshooting 48 General use 48 Programmable settings 48 Making answering calls Intercom 49 Phonebook 49 Cal...

Страница 4: ...ur phone L References in these operating instructions to the charger and to the multiple handsets are for KX TG5422 and KX TG5423 users only Serial No Date of purchase found on the bottom of the unit...

Страница 5: ...for base unit PQLV1Z 1 1 1 1 2 Telephone line cord PQJA10075Z 1 1 1 1 3 Wall mounting adaptor PQKL10068Z1 1 PQKL10068Z2 1 1 PQKL10068Z3 1 4 Battery HHR P104 1 1 2 3 5 Handset cover PQYNTG5421SR 1 PQYN...

Страница 6: ...ll any liquid on the unit 11 To reduce the risk of electric shock do not disassemble this unit Take the unit to an authorized service center when service is required Opening or removing covers may exp...

Страница 7: ...ts or keys to touch the battery ies otherwise a short circuit may cause the battery ies and or the conductive material to overheat and cause burns L Charge the battery ies provided with or identified...

Страница 8: ...the unit away from electrical noise generating devices such as fluorescent lamps and motors L The unit should be kept free from excessive smoke dust high temperature and vibration L The unit should n...

Страница 9: ...unted AC outlet Do not connect the AC adaptor to a ceiling mounted AC outlet as the weight of the adaptor may cause it to become disconnected L The unit will not work during a power failure We recomme...

Страница 10: ...tween the base unit and the telephone line jack in the event of the following Noise is heard during conversations Caller ID features page 25 do not function properly Battery installation 1 Insert the...

Страница 11: ...loth once a month Clean more often if the unit is subject to grease dust or high humidity Battery strength You can confirm the battery strength on the handset display Recharging the battery Recharge t...

Страница 12: ...imize the battery life Battery replacement If battery performance diminishes make sure you have cleaned the charge contacts and fully charged the battery The battery needs to be replaced if any of the...

Страница 13: ...PANA 7262 13 Controls and displays Controls Base unit A HANDSET LOCATOR1 B HANDSET LOCATOR2 C HANDSET LOCATOR3 D HANDSET LOCATOR E Antenna F IN USE indicator G Charge contacts H CHARGE indicator KX T...

Страница 14: ...tor Message indicator L Receiver M Display N MENU O OFF P MUTE CLEAR Q HOLD R HOLD INTERCOM Charger unit KX TG5422 and KX TG5423 only A Charge contacts B CHARGE indicator Using the navigator key The h...

Страница 15: ...soft key has no function Soft key examples 1 KX TG5422 and KX TG5423 only Backlit display and handset keypad The handset display and dialing buttons will light for a few seconds after pressing any of...

Страница 16: ...ase unit or charger Note L Talk alternately with the caller in a quiet room L If the other party has difficulty hearing you press V to decrease the speaker volume L While on a call you can switch from...

Страница 17: ...ng received the ringer indicator flashes rapidly 1 Lift the handset and press C or s L You can also answer a call by pressing any button except V or OFF Any key talk feature 2 When finished talking pr...

Страница 18: ...After 4 additional minutes on hold the call will be disconnected MUTE button You can mute your voice during a conversation While mute is turned on you will be able to hear the other party but the othe...

Страница 19: ...ened page 12 Call share KX TG5422 and KX TG5423 only When another handset is on an outside call this feature allows you to join that call To join a conversation press C or s when the other handset is...

Страница 20: ...answer the 2nd call L The 1st call is put on hold while you answer the 2nd call L To switch between calls press Flash Note L Please contact your telephone company for details and availability of this...

Страница 21: ...tep 2 8 Press OFF Note L Caller ID subscribers can use ringer ID and light up ID features page 25 Character table The dial keys can be used to enter characters To enter a character press the appropria...

Страница 22: ...A Press 5 repeatedly to display any name with the initial L L If there is no item corresponding to the letter you selected the next item will be displayed 3 Press V repeatedly to display the desired i...

Страница 23: ...ressing MENU in step 1 to change the dialing mode temporarily to tone Copying phonebook items KX TG5422 and KX TG5423 only You can copy one or all of the phonebook items from one handset to another Im...

Страница 24: ...n press Next L You can also select the extension number by pressing 1 to 3 5 Press V or repeatedly to display the desired item L To search for the item by initial see page 22 6 Press Send L When the i...

Страница 25: ...to a PBX system caller information may not be received properly Consult your PBX supplier Call Waiting Caller ID display If you subscribe to both Caller ID and Call Waiting with Caller ID services th...

Страница 26: ...use this list to return missed calls L Caller information includes caller names and phone numbers the date and time of calls and the number of times the caller called Missed calls If a call is not ans...

Страница 27: ...long distance code 1 1 Press V or to enter the caller list 2 Press V or repeatedly to display the desired item 3 Press Edit repeatedly until the phone number is shown in the desired format Each time y...

Страница 28: ...display the desired item L To edit the number press Edit repeatedly until the number is shown in the desired format page 27 step 3 3 Press Save L If there is no name information for the caller Enter...

Страница 29: ...r KX TG5422 users 1 Base unit Press HANDSET LOCATOR1 or HANDSET LOCATOR2 to page the handset L The IN USE indicator will flash rapidly L The handset will beep for 1 minute 2 Base unit To stop paging p...

Страница 30: ...l beep for 1 minute To stop paging press OFF 2 Handset 2 Press C s or INTERCOM to answer 3 When finished talking press OFF or place the handset on the base unit or charger For KX TG5423 users From one...

Страница 31: ...essing C s or INTERCOM L If there is no answer press C or s to return to the outside call 4 To complete the transfer press OFF Transferring a call without speaking to the paged party 1 KX TG5422 users...

Страница 32: ...ndset 1 or handset 2 KX TG5423 users To page another handset press HS 1 HS 2 or HS 3 3 When the paged party answers press Conf on your handset to establish a conference call L Conference will be displ...

Страница 33: ...ling press PAUSE where needed page 19 6 Press Save then press OFF Note L When storing your Voice Mail access number and your mailbox password press PAUSE to add pauses page 19 between the access numbe...

Страница 34: ...still remains on the display even after you have listened to new messages turn it off by pressing and holding OFF until the handset beeps L If your Voice Mail service uses Voice Mail tones and the mes...

Страница 35: ...of the handsets you will not need to program the same item using the other handset KX TG5422 and KX 5423 only Note L To exit programming press OFF at any time L To go back to the previous menu press...

Страница 36: ...and 4 melodies The default setting is Tone 1 1 Press MENU 2 Scroll to Ringer setting by pressing V or then press 3 Scroll to Ringer tone by pressing V or then press 4 Press V or repeatedly to select t...

Страница 37: ...hen press 4 Press V or repeatedly to select the desired setting 5 Press Save then press OFF Call options Auto talk When this feature is turned on you can answer a call by lifting the handset off the b...

Страница 38: ...Save then press OFF Display options Handset LCD contrast You can adjust the handset display contrast There are 6 levels The default setting is level 3 1 Press MENU 2 Scroll to Initial setting by press...

Страница 39: ...by pressing V or then press 3 Scroll to Set tel line by pressing V or then press 4 Scroll to Set flash time by pressing V or then press 5 Press V or repeatedly to select the desired setting 6 Press Sa...

Страница 40: ...ther handset s extension number to it the other extension will stop functioning 1 Handset Press MENU 2 Scroll to Initial setting by pressing V or then press 3 Scroll to Registration by pressing V or t...

Страница 41: ...ss Save 5 Press OFF to exit programming mode Direct commands chart Feature Feature code Setting code Page Ringer volume 1 1 1 Low 2 Medium 3 High 0 Off page 36 Ringer tone 1 2 1 3 Tone pattern 1 3 4 7...

Страница 42: ...flash time 0 5 2 1 700 ms 2 600 ms 3 400 ms 4 300 ms 5 250 ms 6 110 ms 7 100 ms 8 90 ms page 39 Set line mode 0 5 3 1 A 2 B page 39 Store VM access 0 7 1 Go to step 5 on page 33 page 33 VM tone detec...

Страница 43: ...f the clip 1 pull the right edge in the direction of the arrow 2 Headset optional Connecting an optional headset to the handset allows hands free phone conversations Please use only a Panasonic headse...

Страница 44: ...an be mounted on a wall phone plate 1 Connect the AC adaptor 2 Tuck the telephone line cord inside the wall mounting adaptor 1 Connect the telephone line cord 2 3 Insert the hooks on the wall mounting...

Страница 45: ...ptor to hold the base unit then push it in the direction of the arrow until it clicks into place 5 Connect the telephone line cord Mount the unit then slide it down L Raise the antennas To remove the...

Страница 46: ...harger can be wall mounted as shown below 1 Connect the AC adaptor 2 Drive the screws not included into the wall using the wall mount template see below 3 Mount the charger 1 4 Slide it down 2 and to...

Страница 47: ...opying stopped Press OFF to exit Erase items from the other handset s phonebook page 22 When phonebook memory is available you can copy all phonebook items page 24 or individual items one by one page...

Страница 48: ...t s AC adaptor L Raise the base unit antennas L If the above remedies do not solve the problem the handset may have lost communication with the base unit Register the handset again page 40 I cannot he...

Страница 49: ...a call Try again later I cannot redial by pressing REDIAL L If the last number dialed was more than 48 digits long the number will not be redialed correctly L If you press REDIAL after you have starte...

Страница 50: ...we recommend connecting a noise filter between the base unit and the telephone line jack Contact your xDSL provider for details L The name display service may not be available in some areas Contact yo...

Страница 51: ...arge for 6h and 8 are displayed L Clean the charge contacts and charge again page 11 L The battery may need to be replaced page 12 If you install a new battery fully charge it page 11 The CHARGE indic...

Страница 52: ...Voice Mail you must first contact your telephone company and subscribe to the desired service L For more information contact your telephone company If the Call Waiting Caller ID CWID feature does not...

Страница 53: ...by are the REN without a decimal point e g 03 is a REN of 0 3 If this equipment causes harm to the telephone network the telephone company will notify you in advance that temporary discontinuance of s...

Страница 54: ...to operate this device NOTE This equipment has been tested and found to comply with the limits for a Class B digital device pursuant to Part 15 of the FCC Rules These limits are designed to provide re...

Страница 55: ...ust be installed and operated with its antenna located 20 cm or more between antenna and all person s body excluding extremities of hands wrist and feet The handset unit may be carried and operated wi...

Страница 56: ...C 41 F 104 F Frequency 5 76 GHz 5 84 GHz Dimensions Approx height 173 mm x width 48 mm x depth 33 mm 613 16 x 17 8 x 15 16 Mass Weight Approx 170 g 0 37 lb Power supply Ni MH battery 3 6 V 830 mAh Sec...

Страница 57: ...uct during the Limited Warranty period This Limited Warranty excludes both parts and labor for batteries antennas and cosmetic parts cabinet This Limited Warranty only applies to products purchased an...

Страница 58: ...ANTOR IS NOT LIABLE FOR INCIDENTAL OR CONSEQUENTIAL DAMAGES RESULTING FROM THE USE OF THIS PRODUCT OR ARISING OUT OF ANY BREACH OF THIS LIMITED WARRANTY As examples this excludes damages for lost time...

Страница 59: ...peech impaired users can call 1 877 833 8855 TTY users hearing or speech impaired users can call 1 866 605 1277 Purchase Parts Accessories and Instruction Books online for all Panasonic Products by vi...

Страница 60: ...ay 15 Display language 38 E Error messages 47 Extension number 30 F FCC and other information 53 Flash button 19 Flash time 39 Function menu Direct commands 41 Table 35 H Handset locator 29 Headset op...

Страница 61: ...er ID 50 General use 48 Making answering calls Intercom 49 Phonebook 49 Power failure 51 Programmable settings 48 TTY 5 V VE voice enhancer 18 VM Voice Mail 33 Voice enhancer 18 38 Voice Mail access n...

Страница 62: ...your unit to Panasonic Consumer Electronics Company listed below or to executive or regional sales offices These locations do not repair consumer products Copyright This material is copyrighted by Pan...

Страница 63: ......

Страница 64: ......

Страница 65: ......

Страница 66: ......

Страница 67: ......

Страница 68: ......

Отзывы: