background image

Rev. JUL-02 

 
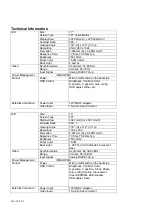
Technical Information  

 Size 

 17” 

 Screen Type 

 TFT Active Matrix 

 Display Area 

 337.92mm(H) x 270.336mm(V) 

 Contrast Ratio 

 350 : 1 

 Viewing Angle 

 150

{

 (H) x 125

{

 (V) Typ. 

 Resolution 

 XGA 1280 x 1024  

 Pixel pitch 

 0.264mm (H) x 0.264mm (W) 

 Response Time 

 Tr=5ms, Tf=20ms Typ 

 Brightness 

 250 cd/m2  

 Panel Color 

 16.7M Colors 

LCD 

 Back Light 

 4 Lamps 

 Synchronization 

 Horizontal : 31-69 KHz 

 Range 

 Vertical : 56-75 Hz 

 Video 

 Input Signal 

 Analog RGB 0.7Vp-p 

 Power Management 

                        VESA DPMS  
 Power 

 Micro on/off switch on the backside 

 Control 

 OSD Control 

 Brightness, Contrast, Color, 
 H position, V position, Auto config,  
 OSD adjust, Dither, etc. 

 Power Input 

 12V/5A DC adapter 

 External Connection 

 Video Input 

 15-pin D-Sub connector 


 Size 

 15” 

 Screen Type 

 TFT 

 Display Area 

 304.1mm(H) x 228.1mm(V) 

 Contrast Ratio 

 300 : 1 

 Viewing Angle 

 130

{

 (H) x 110

{

 (V) Typ 

 Resolution 

 1024 x 768  

 Pixel pitch 

 0.297mm (H) x 0.297mm (W) 

 Response Time 

 Tr=5ms, Tf=20ms Typ 

 Brightness 

 250 cd/m2  

 Panel Color 

 16.2M 

LCD 

 Back Light 

 4 CCFTs (Cold Cathode Fluorescent 
tube) 

 Synchronization 

 Horizontal : 48.36-60 KHz 

 Range 

 Vertical : 56-75 KHz 

 Video 

 Input Signal 

 Analog RGB 0.7Vp-p 

 Power Management 

                        VESA DPMS  
 Power 

 Micro on/off switch on the backside 

 Control 

 OSD Control 

 Brightness, Contrast, Color, 
 H position, V position, Clock, Phase, 
 Auto config, Scaling, Input select, 
 Clear EEPROM, Multi window,  
 OSD adjust, Save 

 Power Input 

 12V/5A DC adapter 

 External Connection 

 Video Input 

 15-pin D-Sub connector 


Содержание RKP21x-208KVM Series

Страница 1: ...RKP21x 208KVM Series RKP241x 208KVM Series USER S MANUAL WHERE TO BUY http www rackmountnet com 1933 O Toole Ave A107 San Jose CA 95131 USA Toll Free Tel 866 955 0598 email sales rackmountnet com...

Страница 2: ...etween 650mm and 1000mm Lightweight aluminum construction with a black anodize finish High quality keyboard with integrated trackball Keyboard options supporting twelve languages Side to side wide ang...

Страница 3: ...s of excessive dust dirt heat water moisture and vibration z Convenience for connecting the LCD Keyboard Drawer with KVM switch to the related facilities should be well considers too Unpacking The LCD...

Страница 4: ...ith KVM switch is stored outside the safe range z Unplug the LCD Keyboard Drawer witch KVM switch immediately and call a qualified service personnel under the following conditions 1 The VGA signal cor...

Страница 5: ...Rev JUL 02 LCD Session...

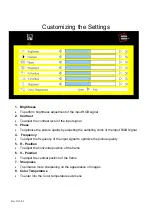
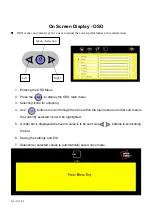
Страница 6: ...menu 3 Selecting icons for adjusting 4 Use buttons to scroll through the icons within the main menu and other sub menus the currently selected icon will be highlighted 5 A slider bar is displayed whe...

Страница 7: ...Rev JUL 02 8 Select Auto for autoadjust LCD quality...

Страница 8: ...ality by adjusting the sampling clock of the input RGB Signal 4 Frequency To adjust the frequency of the input signal to optimize the picture quality 5 H Position To adjust the horizontal position of...

Страница 9: ...tion To adjust the vertical position of the OSD frame 3 Half Tone To switch the OSD color from full color to half tone 4 OSD Timeout To modify the duration of the OSD time out 1 Information To display...

Страница 10: ...2 3 Half Tone To switch LCD power ON OFF auto mode Resolution Setting Step 1 Press right click on the desktop Step 3 change the Screen Resolution Step 4 change the Screen refresh rate Step 2 Choose Pr...

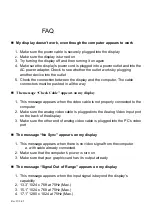
Страница 11: ...n my display 1 This message appears when the video cable is not properly connected to the computer 2 Make sure the analog video cable is plugged into the Analog Video Input port on the back of the dis...

Страница 12: ...nfig 2 Type user sbin m64config prconf to view current resolution 3 Type user sbin m64config res 1024x768x70 now to change to 1024x768 70MHZ 4 the screen will be rubbish 5 Then type pkill Xsun 6 And T...

Страница 13: ...tc Power Input 12V 5A DC adapter External Connection Video Input 15 pin D Sub connector Size 15 Screen Type TFT Display Area 304 1mm H x 228 1mm V Contrast Ratio 300 1 Viewing Angle 130 H x 110 V Typ...

Страница 14: ...Rev JUL 02 KVM Session...

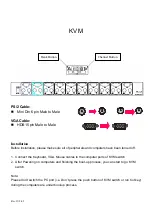
Страница 15: ...rs have been turned off 1 Connect the Keyboard VGA Mouse cables to the computer ports of KVM switch 2 After Powering on computers and finishing the boot up process you can start to go KVM switch Note...

Страница 16: ...5 Pressing to view all port 1 2 3 4 8 7 6 5 LED Indication When you change the channel If the PC is turn off or is disconnected The LED will flash otherwise is will lit Keyboard hot key command Simple...

Страница 17: ...wn Next Bank To Select PC port S L S L Bank No Port No Bank No 1 8 Max Port No 01 16 Max Example we select Bank 3 Channel 14 S L S L 3 14 Example we select Bank 7 Channel 5 S L S L 7 05 Beeper On Off...

Страница 18: ...Rev JUL 02...

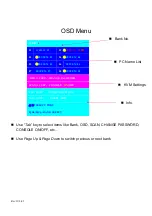
Страница 19: ...own to switch previous or next bank BANK 1 01 SYSTEM 01 02 SYSTEM 02 03 SYSTEM 03 04 SYSTEM 04 05 SYSTEM 05 06 SYSTEM 06 07 SYSTEM 07 08 SYSTEM 08 OSD 1 0 SEC CHANGE PASSWORD SCAN 1 0 SEC CONSOLE ON O...

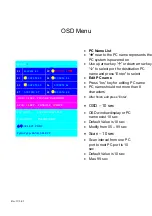
Страница 20: ...ear to the PC name represents the PC system is powered on Use up arrow key or down arrow key to select port for destination PC name and press Enter to select Edit PC name Press Ins key for editing PC...

Страница 21: ...ss Esc key to dear the message right away of OSD menu ENTER PASSWORD ESC QUIT ENTER ENTER NEW PASSWORD ESC QUIT ENTER COMPLETE RETYPE NEW PASSWORD ESC QUIT ENTER COMPLETE NEW PASSWORD COMPLETE ESC QUI...

Страница 22: ...Rev JUL 02...
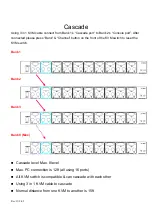
Страница 23: ...e press Bank Channel button on the front of the KVM switch to reset the KVM switch Bank 1 Bank 2 Bank 3 Bank 8 Max Cascade level Max 8 level Max PC connection is 128 all using 16 ports All KVM switch...

Страница 24: ...r pressing the mouse buttons when switching ports z Avoiding switching ports during shutting down the PC process z When you switch one PC port to another PC port the best scan time setting need to be...

Страница 25: ...VGA HDDB 15pin PC selection On Screen Display Manual Hot Key Push Button 7 segment LED One Bank LED Two PC Port LEDs On Screen Display Control Yes Scan Intervals 5 99 Sec Keyboard Emulation PS2 Mouse...

Отзывы: