
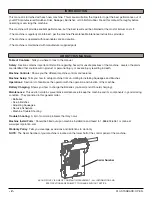


K10-STANDARD-OP-EN
- 5 -
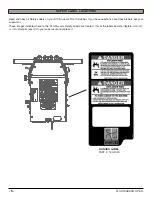
WARNING
The Batteries in this machine produce hazardous
voltage which can cause electrical shock, burns and/
or electrocution. Always disconnect Batteries before
servicing this machine.
WARNING
When climbing or descending ramps, always drive
machine forward. To avoid overturning the machine, Do
not back down ramps. Do not drive across inclines. Do
not turn while ascending or descending ramps. Over-
turning the machine can cause serious injury or death.
WARNING
Do not use water that exceeds 135
°
F / 57
°
C. If wa-
ter is above said temperature, this will void the Tank
Warranty.
WARNING
Do not park this machine on ramps or slopes. Always
park this machine on a level, hard surface. Do not oper-
ate this machine outdoors or on uneven surfaces.
WARNING
The batteries in this machine contain sulfuric acid,
which causes burns to skin. If battery acid contacts
clothing or skin, rinse the effected area with cold water
immediately. If battery acid gets on your face or in your
eyes, flush the area immediately with cold water and
seek medical attention.
WARNING
To avoid electrical shock, do not operate this machine
over electrical floor outlets.
WARNING
Dress safely. Do not wear rings or metal wrist watches
when servicing this machine, as they can cause an
electrical short circuit which can cause serious burns.
WARNING
Do not remove, paint over or destroy warning decals. If
warning decals become damaged, call 1-262-681-3583
for free replacements.
WARNING
Dress safely. Do not wear a neck tie, scarf, or any
loose or dangling clothing while operating this machine.
Loose or dangling clothing or neck-wear can tangle in
rotating parts, causing serious injury or death.
WARNING
Always turn off this machine before leaving it unat-
tended. Do not allow untrained persons to operate this
machine.
WARNING
NO RIDERS. Do not carry passengers on this ma-
chine. Do not use this machine as a stepladder or work
platform.
WARNING
Understand the dynamic braking system before you
operate the machine on ramps. Machine may coast.
WARNING
Before you service a Battery, always wear face protec-
tion, protective gloves and protective clothing. Battery
acid or battery explosion can cause serious injuries.
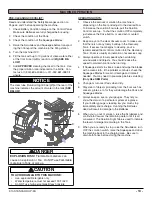
CAUTION
To avoid damage to this machine, use only cleaning
solutions and replacement parts recommended by the
manufacturer.
CAUTION
Do not operate this machine if any parts have been
damaged or removed.
CAUTION
Always use the automatic battery charger provided by
the manufacturer of this machine to charge the batter-
ies of this machine. It is designed to charge the batter-
ies at the appropriate rate. If you must use a different
charger, disconnect the Batteries before charging to
avoid damage to the electronic speed controller.
CAUTION
To avoid damage to the electronic control components
of this machine, Do not store this machine outdoors. Do
not pressure wash this machine.
Содержание KODIAK K10 STANDARD Series
Страница 28: ...BLANK THIS PAGE WAS INTENTIONALLY LEFT BLANK ...


