background image


 USER MANUAL 


11 


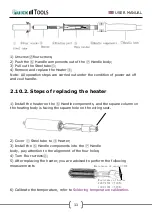
1) Unscrew

four screws; 

2) Push the 

 Handle components out of the 

 Handle body; 

3) Pull out the Steel tube

4) Remove and replace the Heater

Note: All operation steps are carried out under the condition of power cut off 
and cool handle. 


2.10.2. Steps of replacing the heater 


1) Install the heater on the 

 Handle components, and the square column on 

the heating body is facing the square hole on the wiring seat. 


2) Cover 

 Steel tube to 

 Heater; 

3) Install the 

 Handle components into the 

 Handle 

body, pay attention to the alignment of the four holes;  
4) Turn Four screws

5) After replacing the heater, you are advised to perform the following 
measurements 


6) Calibrate the temperature, refer to 

Soldering temperature calibration

.   

 The square is opposi
te the terminal block   


Resistance of sensor<2Ω

Resistance of heater
220V:40Ω(±10%)
110V:10Ω(±10%)

Содержание QU862DW+

Страница 1: ...NUNGSANLEITUNG QU862DW Hei luft L tstation Hot Air Rework Station Br unlich GmbH Am Heideberg 26 D 06886 Lutherstadt Wittenberg Tel 49 0 3491 6181 0 Fax 49 0 3491 6181 18 e mail info quick tools de ww...

Страница 2: ...nbetriebnahme 6 1 7 Einstellungen 7 1 8 Temperatur kalibrieren 8 1 9 Standby 9 1 10 Heizelement wechseln 10 1 1 Fehlermeldungen 9 1 2 Hei luftd sen 9 2 English 1 2 1 Safety Instruction 1 2 2 Character...

Страница 3: ...der zu einer Besch digung beteiligter Objekte f hren Zu Ihrer eigenen Sicherheit sollten Sie diese Hinweise einhalten HINWEIS Beschreibt einen Vorgang der f r die jeweilige Aufgabe wichtig ist WARNUNG...

Страница 4: ...enten Verwenden Sie eine hitzebest ndige Arbeitsunterlage und halten Sie Ihren Arbeitsplatz sauber Lote Flussmittel und erhitzte Materialien k nnen gesundheitssch dliche Eigenschaften besitzen und sol...

Страница 5: ...de zu verhindern Das Ger t ist nur mit der auf dem Ger t angegebenen Nennspannung und Frequenz zu betreiben Verwenden Sie ausschlie lich mitgelieferte Schutzkontakt Anschlussleitungen Vor der Benutzun...

Страница 6: ...elkreis B rstenloser verschlei armer Motor Gro er einstellbarer Luftstrom Bereich Automatische K hl Funktion 1 4 Technischen Daten Anzeige LCD Anschluss Leistung 1000 W Betriebs Spannung 230 V 50 Hz T...

Страница 7: ...mton ist eingeschaltet SOLL Temperatur ist erreicht 1 5 Anzeige und Tasten Luftmenge einstellen Speicherpl tze 1 3 gleichzeitig dr cken de aktiviert den Tasten und Alarmton gleichzeitig ffnet das Kali...

Страница 8: ...t wurde bevor er komplett abschaltet Erneutes entnehmen des Kolbens schaltet aus dem Standby Modus in den Arbeitsmodus der zuletzt eingestellten Parameter Stecken Sie eine Hei luftd se auf den Hei luf...

Страница 9: ...en und am Netzschalter einschalten Wenn im Display C angezeigt wird kann los gelassen werden Nun wird im Display password und SET angezeigt Die 100er Stelle blinkt Mit den Tasten und kann das Passwort...

Страница 10: ...mperatur stabilisiert hat und im Display Real Temp angezeigt wird muss die Temperatur am Luftaustritt gemessen werden Hierzu kann z B das Messger t Quick196 verwendet werden 3 Die Tasten und gleichzei...

Страница 11: ...en des Hei luftkolbens aus der Ablage schaltet die Station wieder in den Arbeitsmodus Legen Sie in Arbeitspausen den Hei luftkolben immer in den Ablagest nder Wenn die Station l ngere Zeit nicht benut...

Страница 12: ...auf Raumtemperatur abk hlen 2 4 Schrauben l sen 3 Griffeinsatz aus dem Griff ziehen 4 Stahlrohr entfernen 5 Heizeinsatz entfernen 6 Neuen Heizeinsatz in den Griffeinsatz stecken 7 Stahlrohr auf den H...

Страница 13: ...en viel Freude und Erfolg beim Einsatz Ihrer QUICK L tstation und sind gern an Ihren Anregungen f r Verbesserungen interessiert Kontaktieren Sie uns auch bei auftretenden Problemen oder Fragen zu Ihre...

Страница 14: ...lich deren zum Zeitpunkt der Erkl rung geltenden nderungen entspricht Folgende harmonisierte Normen wurden angewandt RICHTLINIE DES EUROP ISCHEN PARLAMENTS UND DES RATES zur Harmonisierung der Rechtsv...

Страница 15: ...of burns on the surfaces The device is designed for brazing soft solder at different temperatures A different use is not permitted During operation and immediately after switching off do not touch th...

Страница 16: ...es for a safe working environment Make sure that the device and the shelf are secure Place the tool on the shelf when not in use The use of the device by children from 8 years and persons with disabil...

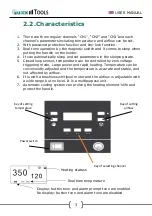
Страница 17: ...putting the handle on the holder 4 It can automatically sleep and set parameters in the sleeping state 5 Closed loop sensor temperature can be controlled by zero voltage triggering mode Large power an...

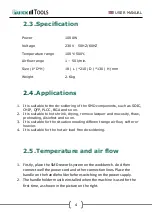
Страница 18: ...and mucosity thaw preheating disinfect and so on 3 It is suitable for the situation needing different range airflow softer or heavier 4 It is suitable for the hot air lead free de soldering 2 5 Temper...

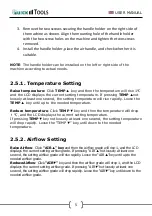
Страница 19: ...y until up to the needed temperature Reduce temperature Click TEMP key and then the temperature will drop C and the LCD displays the current setting temperature If pressing TEMP key not loosely at lea...

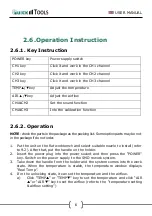
Страница 20: ...ot in the package if do not order 1 Put the unit on the flat workbench and select suitable nozzle to install refer to 9 2 After that put the handle on the holder 2 Insert the power plug into the power...

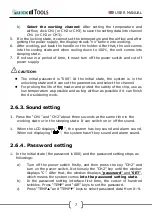
Страница 21: ...he safety of the chip use as low temperature as possible and as big airflow as possible if it can finish the de soldering work 2 6 3 Sound setting 1 Press the CH1 and CH2 about three seconds at the sa...

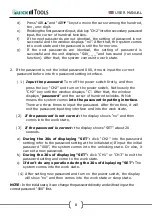
Страница 22: ...ndow displays password and the cursor of hundred twinkles Which means the system comes into the password inputting interface There are three times to input the password After three time it will exit t...

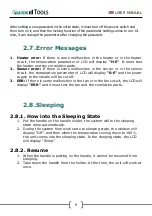
Страница 23: ...meter of LCD will display S E and the power supply to the handle will be cut off 3 ERR If there is some malfunction in the fan or in the fan circuit the LCD will display ERR and it must test the fan a...

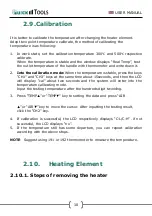
Страница 24: ...nd CH3 keys at the same time about 15seconds and then the LCD will display cal about two seconds and the system will enter into the temperature calibrating mode Input the testing temperature after the...

Страница 25: ...the Handle components and the square column on the heating body is facing the square hole on the wiring seat 2 Cover Steel tube to Heater 3 Install the Handle components into the Handle body pay atten...

Страница 26: ...4 35 EC including the changes which applied at the time of the declaration The following harmonised standards have been applied DIRECTIVE OF THE EUROPEAN PARLIAMENT AND OF THE COUNCIL on the harmonisa...

Страница 27: ...SER MANUAL BEDIENUNGSANLEITUNG Br unlich GmbH Am Heideberg 26 D 06886 Lutherstadt Wittenberg Tel 49 0 3491 6181 0 Fax 49 0 3491 6181 18 e mail info quick tools de www quick tools de Version 27 04 2023...

Отзывы:

Похожие инструкции для QU862DW+