


14
Menu - SETTINGS
w
RECEIVER
†
•
TV OUT
The traditional tv screen is set to 4:3. If you have a
screen supporting 16:9 tv-out, you can select this
mode
‡
where available.
•
MENU LANGUAGE
To select the menu language
•
POWER-OFF TIMER
[
only with QTM100C mode]l
To adjust the switch-off time
.
w
RESTORE
‡
This function enables the user to reset the input data
among these data categories:
•
RECEIVER PARAMETERS
To reset settings, system and installation parameters
•
CHANNELS LIST
To delete all the channels lists
•
SOFTWARE UPDATE
To update the receiver software
WARNING: This process must be carried out by
experts.
[During the updating be sure to select OTA (user
process) if the update program originate from tv
programmes, or to select COM (experts process)]
It’s possible to make a complete data’s restore by selecting
the items all at once.
w
CLOCK
ˆ
The receiver's clock will be automatically updated through
the tv signal. It's possible, if desired, to change the time
zone, set at Greenwich one by default.
Menu - TV LIST
15
v
How to manage the Favourite Tv List
It's possible to create a personal favourite Tv List.
TV LIST, recallable through[LIST], and RADIO LIST,
recallable through [TV/RADIO] include all the tuned
channels, so they are not allowed to be personalized
1. How to create the Favourite Tv List:
• press [MENU]
‚
• select TV LIST and press [OK]
„
to confirm
• select CREATE and press [OK]
„
to confirm
• browse the list in sequential mode by using
[
5
][
6
]
…
buttons, or in groups of six channels all at
once by using [
3
][
4
]
ƒ
buttons and select the
channel
• press [OK]
„
to confirm the selection. A tick signal
ü
will be shown next to the selected channel
‡
• If you want to cancel the selection press [OK]
„
again
and the tick signal
ü
will be deleted
2. How to delete a channel from the
Favourite Tv List:
Follow the same procedure as shown at the point 1 and
replace CREATE with DEL.CHAN.
3. How to sort the Favourite Tv List:
• press [MENU]
‚
• select TV LIST and press [OK]
„
to confirm
• select SORT LIST and press [OK]
„
to confirm
• browse the list in sequential mode by using [
5
][
6
]
…
buttons or in groups of six channels all at once by
using [
3
][
4
]
ƒ
buttons and select the channel you
want to move
• browse the liste in the same way and click on the
position where you want to move the selected channel.
A tick signal
3
will be shown next to the selected
channel
• press [OK]
„
to confirm the new position of
the channel
ˆ
4. How to delete the Favourite Tv List:
Follow the same procedure as shown at the point 1 and
replace CREATE with DEL.LIST
SETTINGS
DIAGNOSTICS
TV LIST
PAY-TV
CLOCK
RECEIVER
RESTORE
“
“
“
“
SETTINGS
[OK] to confirm - [EXIT] to quit
DIAGNOSTICS
TV LIST
PAY-TV
RECEIVER
RESTORE
CLOCK
TV out
4/3 pan & scan
Menu language
ita
†
†
SETTINGS
[OK] to confirm - [EXIT] to quit
DIAGNOSTICS
TV LIST
PAY-TV
RESTORE
CLOCK
RECEIVER
Receiver Data
ON
Channel List
OFF
Software OFF
Download
’
’
‚
†
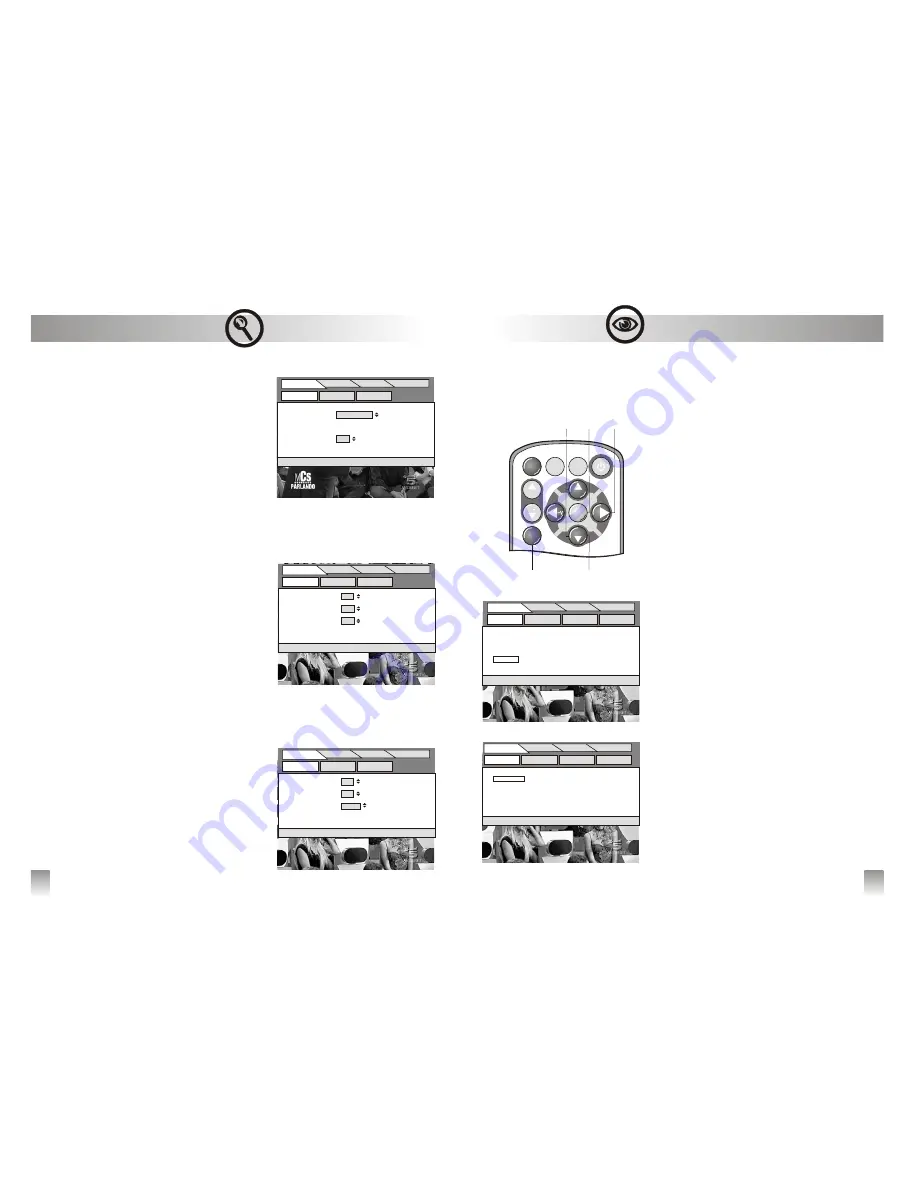
SCAN
A/V
OK
P+
P
V+
CHANNEL
EXIT
info
MENU
ƒ
„
…
LIST
TV LIST
[EXIT to quit and save
SETTINGS
PAY-TV
DIAGNOSTICS
CREATE
SORT LIST
DEL.CHAN
DEL.LIST
’
’
1 Channel TV
2 Channel TV
3 Channel TV
4 Channel TV
5 Channel TV
6 Channel TV
ü
ü
ü
ü
[EXIT] to quit and save
1 Channel TV 01
2 Channel TV 02
3 Channel TV 03
4 Channel TV 04
5 Channel TV 05
6 Channel TV 06
3
3
4
4
TV LIST
SETTINGS
PAY-TV
DIAGNOSTICS
SORT
DEL.CHAN
DEL.LIST
CREATE
“
“
“
“
[OK] to confirm - [EXIT] to quit
Local time 11:23
Greenwich time
09:23
Offset +-01:00
All manuals and user guides at all-guides.com


