background image

Notice

The information in this document is subject to change in order to improve reliability, design,

or function without prior notice and does not represent a commitment on the part of this

company. In no event will we be liable for direct, indirect, special, incidental, or consequen-

tial damages arising out of the use or the possibility of such damages.

All trademarks are the property of their respective owners.

For further information, please visit our web-site: “ www.qdigrp.com” .
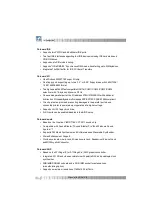
Item Checklist

Completely check your package. If you discover damaged or missing items, contact your

retailer.

ZillioX 6 motherboard

QDI Motherboard Utility CD-ROM

Retention Module

I/O shield (manufacturing option)

1 IDE ribbon cable

1 serial port ribbon cable (25-pin connector)with bracket (manufacturing option)

1 floppy ribbon cable

User’ s manual

Содержание ZillioX 6

Страница 1: ...the use or the possibility of such damages All trademarks are the property of their respective owners For further information please visit our web site www qdigrp com Item Checklist Completely check your package If you discover damaged or missing items contact your retailer ZillioX 6 motherboard QDI Motherboard Utility CD ROM Retention Module I O shield manufacturing option 1 IDE ribbon cable 1 se...

Страница 2: ...disturbance characteristics of information technology equipment þ EN 50081 1 Generic emission standard Part 1 Residential commercial and light industry þ EN 50082 1 Generic immunity standard Part 1 Residential commercial and light industry European Representative QDICOMPUTER UK LTD QDI COMPUTER SCANDINAVIA A S QDI SYSTEMHANDEL GMBH QDICOMPUTER NETHERLANDS B V QDICOMPUTER FRANCE SARL QDICOMPUTER HA...

Страница 3: ...ype of Product AGP Pentium II Motherboard Manufacturer Quantum Designs HK Inc Address 5 F Somerset House TaiKoo Place 979 Kings Road Quarry Bay HONG KONG SupplementaryInformation This device complies with Part 15 of the FCC Rules Operation is subject to the following two conditions 1 this device may not cause harmful interfer ence and 2 this device must accept any interference received including i...

Страница 4: ...B2 8 Parallel Port Connector and Serial Port Connector 9 Line in Jack Microphone in Jack and Speaker out Line out Jack 9 AGP VGA Connector 10 Power Supply Connector Power Switch 10 Hard Disk LED Connector 10 Reset Switch 11 Speaker Connector 11 Power LED Connector 11 Key Lock Connector 11 Green LED Connector 11 Hardware Green Connector 11 Infrared Header 12 Fan Connector 12 Wake Up On LAN 12 Wake ...

Страница 5: ...tion 35 Features 35 System Requirements 35 Installation of ATI Rage IIC Display Drivers for Windows 95 98 NT 36 Configuring Windows 95 Driver 38 Configuring Windows NT 4 0 Driver 40 5 Creative Audio Description 41 Features 41 Creative Software Installation 42 Installation of Windows 95 driver 42 Installing Driver in DOS Windows 3 1X 43 Installation of Windows NT 4 0 Driver 43 Enabling Disabling th...

Страница 6: ...eo you get a state of the art corporate system Key Features Form factor l microATX form factor of 244mm x 210mm l Provides backward compatibility with standard ATX 2 01 chassis for easy integration Microprocessor l Supports all Intel Pentium II processors at 233 266 300 333MHz with 66MHz bus speed and 350 400 450MHz with 100MHz bus speed l Supports Intel CeleronTM processors at 266 300 333MHz with...

Страница 7: ...EPP ECP IEEE 1284 compliant l Circuit protection provided preventing damages to the parallel port when a connected printer is powered up or operates at a higher voltage l Supports LS 120 floppy disk drive l All I O ports can be enabled disabled in the BIOS setup On board audio l Based on the Creative ViBRA 16XV CT2511 sound chip l Compatible with Sound Blaster Sound Blaster Pro and Windows Sound S...

Страница 8: ...ges chassis intrusion and fan speed l Provides management application such as ManageEasy and LDCM LANDesk Client Manager manufacturing option l Supports keyboard password and PS 2 mouse power on function l System status resumes selectable after AC power supply failure BIOS l Licensed advanced AWARD BIOS supports DIP flash ROM with 2MB memory size plug and play ready l Supports IDE CD ROMor SCSI bo...

Страница 9: ...Manual for ZillioX 6 This page is intentionally left blank 4 ...

Страница 10: ...k white line Pin 1 referring to the motherboard silkscreen Jumpers with two pins will be shown graphically as for close and for open Jump ers with three pins will be shown as to represent pin1 pin2 connected and to represent pin2 pin3 connected Clock Multiple Selection JX4 JX3 JX2 JX1 These jumpers set the frequency ratio between the Internal frequency of the CPU and the external frequency namely ...

Страница 11: ...ard audio 6 Carefully set the Clock Multiple by referring to the CPU list CPU Freq SC Ratio JX1 JX2 JX3 JX4 Model MHz MHz Intel Pentium II or CeleronTM Clear CMOS JCC If you want to clear CMOS unplug the AC power supply first close JCC pin1 pin2 once set JCC back to normal status with pin2 pin3 connected then power on the system Enable Disable on board audio JP7 If you want to use the on board aud...

Страница 12: ...2 mouse power on function The motherboard provides advanced keyboard password and PS 2 mouse power on function To use these functions set JP3 with pin1 pin2 closed default Otherwise set JP3 with pin2 pin3 closed for disabling these two functions In order to implement these functions you need to set POWER ON Function as Pass word Mouse Left Mouse Right accordingly in the INTEGRATED PERIPHERALS sect...

Страница 13: ...eyboard password power on function is enabled 3 A PS 2 mouse is required to power up the system rather than a serial port mouse 4 If you set JP3 with pin2 pin3 closed you should set POWER ON Func tion as BUTTON ONLY do not set it as Password Mouse Left Mouse Right or this will prevent you from powering up the system 5 If you encounter the above problems the system can t be powered up or you forgot...

Страница 14: ...Jack and Speaker out Line out Jack The Line in jack can be connected to devices such as a cassette or Minidisc player for playback or recording The Microphone in jack can be connected to a microphone for voice input The Speaker out Line out jack is determined bythe jumpers JP8 JP9 refer to Jumper Settings for details If set as Line out it allows you to bypass the built in amplifier to connect powe...

Страница 15: ...witch just push once the button of the power switch J11 is an optional 6 pin power connector used for the power supply which has an identical connector The pin assignment and the location of the connectors are as shown below Note If you change soft off by PWR BTTN from default Instant off to Delay 4 Secs in BIOS Setup POWER MANAGEMENT SETUP the power button should be pressed for more than 4 second...

Страница 16: ...ector KEY_L The connector can be connected to the keyboard lock switch on the case for locking the keyboard GreenLEDConnector GRNLED The Green LED has four status When no AC power supply is present the LED is off When the system is in power off status the LED is glows dimly When the system is powered up the LED is on When the system enters green mode the LED will flash Hardware Green Connector SLE...

Страница 17: ... once to make sure this function takes effect Infrared Header IRDA This connector supports wireless transmitting and receiving You must set Serial Port 2 Mode to IrDAor ASKIR and configure the settings in the INTEGRATED PERIPHERALS section of the BIOS FanConnector CPUFAN CHSFAN These two fans are controllable They will be automatically turned off after the system enters suspend mode You can also c...

Страница 18: ...to make sure this function takes effect Chassis Security CHSSEC The connector can be connected to the chassis security switch on the case When using QDI s ManageEasy software the system can detect the status of the chassis For detailed information refer to the ManageEasy manual located in the path Doc from the QDI motherboard utility CD CDAudioConnector CDLIN MITSU The CD Audio Connector can be co...

Страница 19: ... set of rules allows optimum configurations Rules for populating a 440ZX memory array l EDO SDRAM DIMMs can not be used on the same system it is advised you use only one kind of DIMM l Processors with 100MHz front side bus should be paired only with 100MHzSDRAM Processors with 66MHz front side bus can be paired with either 66MHz SDRAM EDO or 100MHzSDRAM l No Registered DIMM support l The DRAM Timi...

Страница 20: ...nto your new bootable diskette 3 Download the updated BIOS file from the Website http www qdigrp com Please be sure to download the suitable BIOS file for your motherboard 4 Uncompress the file download copy the BIOS file xx bin onto the bootable diskette and write down the checksum of this BIOS which is included in readme file 5 Reboot the system from the bootable diskette which you have created ...

Страница 21: ...ure your new BIOS is compatible with your MB If not the system will be damaged g Retrieves BIOS file from BIOS ROM Examples A FLASH EXE BIOSfile bin A FLASH EXE BIOSfile bin cdpc n A FLASH EXE BIOSfile bin g Note FLASH utility runs incorrectly at Windows DOS prompt 16 BIOS Description ...

Страница 22: ... to select among the items and press the Enter key to accept or enter the sub menu The ESC key is used to exit the sub menu Figure 1 Main Menu Note The System Monitor SETUP item will not be displayed if there is no hardware monitor chip on the motherboard Load Setup Defaults The Setup Defaults are common and efficient It is recommended that users load the setup defaults first then modify the neede...

Страница 23: ...lated information should be entered regarding the following items Enter the information directly from the keyboard and press Enter CYLS number of cylinders HEAD number of heads PRECOMP write pre compensation LANDZ landing zone SECTOR number of sectors MODE HDD access mode Video Set this field to the type of video display card installed in your system EGA VGA Enhanced Graphics Adapter Video Graphic...

Страница 24: ...p for a disk error but it will stop for all other errors All But Disk Key The system boot will not stop for a keyboard or disk error but it will stop for all other errors Memory This is a Display Only category determined by POST Power On SelfTest of the BIOS Base Memory The POST of the BIOS will determine the amount of base or conventional memory installed in the system Extended Memory The BIOS de...

Страница 25: ...cache L1 L2 Cache Disabled Disables CPU internal Level1 Level2 cache l CPU Enabled Enables CPU L2 Cache ECC Error Checking L2 Cache and Correction function ECC Disabled Disables CPU L2 Cache ECC function l Quick Power Enabled Enables quick POST BIOS will shorten or skip some On Self Test check items during POST to speed up POST after you power on the computer Disabled Normal POST l Boot From LAN E...

Страница 26: ...Sec per second l Typematic 250 1000 Sets the time of the typematic delay Delay Msec l Password Setting System The system will not boot and access to BIOS Setup will be denied if the correct password is not entered when prompted Setup The system will boot up but access to BIOS Setup will be denied if the correct password is not entered when prompted l PCI VGA Palette Enabled Non standard VGA cards ...

Страница 27: ...tically configures DRAM Timing according to the value of DRAM Speed Selection Disabled Manually configure Note It is recommended that the En abled option be chosen by common users l EDO DRAM Speed 50ns This item is of selected EDO DRAM read write Selection 60ns timing You must ensure that your DIMMs are as fast as 50ns otherwise 60ns should be selected l EDO CASx MA 2 One additional wait state is ...

Страница 28: ... 16 bit I O recovery time does not exist l Memory hole at Enabled Memory hole at 15 16M is reserved for expanded 15M 16M ISA card Disabled Does not set this memory hole l Passive Release Enabled Default setting is suggested Disabled l Delayed Transaction Enabled Default setting is suggested Disabled l AGP Aperture Size 4 256 Sets the effective size of the Graphics Aperture MB to be used in the par...

Страница 29: ... defined timer values are used All timers are in their MIN values l PM Control by No System BIOS will ignore APM when Power APM Management is enabled Yes System BIOS will wait for APM s prompt before it enters any PM mode e g Standby or Suspend Note If APM is installed and there is a task running even when the timer is time out the APM will not prompt the BIOS to put the system into any power savi...

Страница 30: ...n and activated the system will be woken up l Standby Mode Disabled 1 The system never enters Standby mode Min 1Hr Defines the continuous idle time before the system enters Standby mode If any items defined in Reload Global Timer Events are On and activated the system will be woken up l Suspend Mode Disabled The system never enters Suspend mode Min 1Hr Defines the continuous idle time before the s...

Страница 31: ...he system to be powered on when a Ring Ring Indicator signal comes up to UART1 or UART2 from external modem or comes up to WOM from an internal modem card Disabled Does not allow Ring Power On l Resume by Enabled RTC alarm can be used to generate a wake event Alarm to power up the system which is in power off status You can set any time or any date to power up the system Disabled RTC has no alarm ...

Страница 32: ...igned to PCI ISA PnP The specified IRQ x will be assigned to ISA or PCI l DMA 0 DMA 7 Legacy ISA The specified DMA x will be assigned to Legacy ISA assigned to PCI ISA PnP The specified DMA x will be assigned to ISA or PCI l PCI Slot 1 2 use Auto 3 4 5 7 9 Assigns an IRQ for PCI slot1 2 manually or IRQ No 10 11 12 14 15 automatically l Used MEM base C800 8 64K Claims a memory space to be occupied ...

Страница 33: ...d if ultra DMA device Primary Secondary is detected Master Slave UDMA Disabled Disables this function l On chip Enabled On chip primary secondary PCI IDE port is enabled Primary Secondary Disabled On chip primary secondary PCI IDE port is PCIIDE disabled l USB Keyboard Enabled USB Keyboard Support is enabled Support Disabled USB Keyboard Support is disabled l Init Display First PCI Slot Initialize...

Страница 34: ...terrupt number 3E8 IRQ4 2E8 IRQ3 Auto Disabled Onboard serial port is disabled l Serial Port 2 Normal Defines Serial Port 2 as standard serial port Mode ASKIR Supports SHARP ASK IR protocol with maximum baud rate up to 57600bps IrDA Supports IrDA version1 0 SIR protocol with maxiumum baud rate up to 115 2Kbps l Onboard Parallel 378 IRQ7 Defines onboard parallel port address and IRQ Port 278 IRQ5 c...

Страница 35: ...r CPUFAN or Current CHSFAN Speed 2010RPM CHSFAN Fan speed value is based on an assumption that tachometer signal is two pulses per revolution In other cases you should regard it relatively l VCCVID CPU Voltage 1 98V Displays current Voltage values including all VTT 1 5 Voltage 1 37V significant voltages of the mainboard 3 3V Voltage 3 32V 3 3V 5V 12V 12V 5V are voltages 5V 4 83V from the ATX power...

Страница 36: ... may also press Esc to abort the selection To disable password just press Enter when you are prompted to enter password A message will confirm the password being disabled Once the password is disabled the system will boot and you can enter CMOS Setup freely PASSWORD DISABLED If you haveselected System in Password Setting of BIOS Features Setup menu you will be prompted for the password every time ...

Страница 37: ...Ses like SCO UNIX must use NORMAL for installation Figure 9 IDE HDD Auto Detection Menu 1 Setup Changes With auto detection BIOS setup will display all possible modes supported by the HDD including NORMAL LBA and LARGE If HDD does not support LBA modes no LBA option will be shown If number of physical cylinder is less than or equal to 1024 LARGE option may not be shown Users can select their appro...

Страница 38: ... LARGE mode Some IDE HDDs contain more than 1024 cylinder without LBA support in some cases users do not want LBA The Award BIOS provides another alternative to support these kinds of HDD BIOS tricks DOS or other OS into recognizing the number of cylinders is less than 1024 by dividing it by 2 At the same time the number of heads is multiplied by 2 A reverse transformation process will be made ins...

Страница 39: ...Manual for ZillioX 6 This page is intentionally left blank 34 ...

Страница 40: ...deo for video conference Integrated 200 MHz internal DAC supports resolutions up to 1600x1200 at 76 Hz true color operation up to 1280x1024 at 85 Hz depend on video memory size VGA Fully compatible DPMS for power management support DDC2B for monitoring plug and play support Drivers for major operation systems and APIs including Windows 95 98 Windows NT 4 0 DirectX 5 0 etc Drivers meet Microsoft ri...

Страница 41: ...he actual installation of the AGP driver 1 Installing Standard VGA Driver It is recommended that you first install Windows 95 98 NT with this motherboard After the installation of Windows 95 98 NT the default standard VGA driver should have been installed If Windows 95 OSR2 has been installed previously on another system when you first start up Windows 95 with this motherboard the Update Device Dr...

Страница 42: ...the CD ROM drive run Auto exe in the CD directory DevDrv VGA Rage2C a dialog box pops up as shown below Select Install Display Driver the ATI Rage IIC driver will be automatically installed When completed a message box pops up prompting you to restart the computer Press OK to restart the computer 37 Chapter 4 ...

Страница 43: ...age2C and install the correspondent language version manu ally You can read the Readme file in this path to receive the name of corresponding installation program Configuring Windows 95 Driver To receive optimum visual display and performance configure your Windows 95 driver once it is installed Click the right mouse button while the mouse is pointing at an empty area of Windows 95 desktop and sel...

Страница 44: ...ange the color depth of the screen use the Color palette selector on the left side of the window If you are unable to choose a resolution supported by your monitor you may need to change your monitor settings by clicking the Advanced Properties button and clicking the Monitor tab Click Change button for Monitor Type Click the Manufacturer and Model that matches your monitor If your monitor brand i...

Страница 45: ...r To configure your Windows NT 4 0 driver once it is installed follow the procedures listed below 1 Right click on the Windows NT desktop and select Properties 2 From the Display Properties dialog box you can change your driver and monitor configurations Click on the Settings tab located at the top of the dialog box adjust the settings using the drop down boxes and slider bars 3 Follow the on scre...

Страница 46: ... Level Audio Stereo Microphone Level Audio Mono and Mono Audio Mono Individual software programmable volume controls Digital Audio Variable sampling rates from 5KHz to 48KHz Full duplex record and playback 8 16 bit stereo mono digital audio playback and recording FIFO s for digital audio playback and recording for optimum Windows operations Mixer 32 level volume control mixer Music Synthesizer and...

Страница 47: ... drive Direct the path to D DevDrv Sound CT2511 Win 95 and run setup exe The Creative software installation will guide you through the setup process Restart the computer when prompted After completing the installation the sound video and game controllers should be listed in Device Manager from System Properties as shown below Creative Audio Description 42 ...

Страница 48: ...ions on the View menu of Windows NT Explorer select the Show All Files option and clear the Hide Extensions For Known File Types check box then click the OK button The file PNPISA INF will be displayed Right click on this file and select Install Restart your computer when prompted 2 Installing Creative Audio Drivers When the system restarts the New Hardware Found message boxes for the various devi...

Страница 49: ... CT3DSE ON to enable the effect or CT3DSE OFF to disable the effect In Windows 95 To enable or disable the effect in Windows 95 1 Click Start button in the task bar 2 Select Settings then Control Panel The Control Panel group box appears 3 Double click the System icon The System Properties dialog box appears 4 Click the Device Manager tab A list of devices found on your system appears 5 Double cli...

Страница 50: ...r quality sound other than what would normally be expected from a PC Installation Instructions in Windows95 Under Windows 95 insert the QDI Motherboard Utility CD into the CD ROM drive Direct the path to D DevDrv Sound CT2511 Wavesynt and run setup exe The Creative software installation will guide you through the setup process Restart Windows when prompted Select the WaveSynth MIDI as your default...

Страница 51: ...Manual for ZillioX 6 This page is intentionally left blank 46 ...

Страница 52: ...ge IIC AGP drivers included in the directory DevDrv VGA Rage2C are for the onboard VGA Run DevDrv VGA Rage2C Auto exe for installation referring to the installation guide in Chapter 4 Note If your onboard AGP is based on ATI Rage Pro direct the path to DevDrv VGA RagePro for installation according to your OS b The sound drivers included in the directory DevDrv Sound CT2511 are for the onboard audi...

Страница 53: ...SH EXE CBLOGO EXE LF EXE Refer to the online help for information on how to use these utilities 6 Documents for QDI Motherboard The files included in the directory Doc are Adobe Acrobat Reader V3 0 ar32e301 exe ManageEasy Manuals QMEV12 PDF Appendix 48 ...

Страница 54: ... Note 1 Please choose four caps which match the motherboard 2 If choosing to use CeleronTM Processor snap on Celeron fittings onto the Plastic Guide 3 Please note the Plastic Guide has one orientation If one way doesn t fit change the direction to the other way Do not forcefully press the Plastic Guide onto the motherboard 2 To Install HSSBASE Heatsink Support Base insert the two plastic pins thro...

Страница 55: ...Manual for ZillioX 6 3 Insert Pentium II or CeleronTM Processor in Slot1 4 Clip Plastic Bar onto the HSSBASE through the fins on the processors heatsink Appendix 50 ...

Страница 56: ...ed as shown below Remark Please skip step2 and step4 for Boxed Pentium II Processor and refer to relevant details concerning this type of processor installation S E C Cartridge Retention Mechanism Heatsink support and ATX Form Factor Headsink Isometric View Not To Scale Appendix 51 ...

Страница 57: ...se cblogo exe included on the QDI Motherboard Utility CD to replace it by any other logo which you prefer Regarding the method of using cblogo exe utility please refer to it s online help If you don t prefer the logo displayed on the screen during boot up set the Show Bootup Logo option as Disabled in the BIOS FEATURESSETUP sectionof theBIOS We reserve the right of modifying the default full logo ...

Страница 58: ...Manual for ZillioX 6 P N 430 01015 901 00 Manual ZillioX 6 Ver 1 0 ...

Страница 59: ...Manual for ZillioX 6 Board Layout of ZillioX 6 V1 0 Board Layout of ZillioX 6 V1 0 ...

Отзывы: