background image

How to Set [Received] Mode printing

This section describes how to use the [Received] type of imprint, to:

• Print the date on incoming mail.

• Print 'Received' on incoming mail.

You must begin with selecting the Type of imprint to gain access

to the corresponding parameters and be able to run mail.

Required settings:
1.

Make sure you are on the home screen of the [Received] type of imprint.

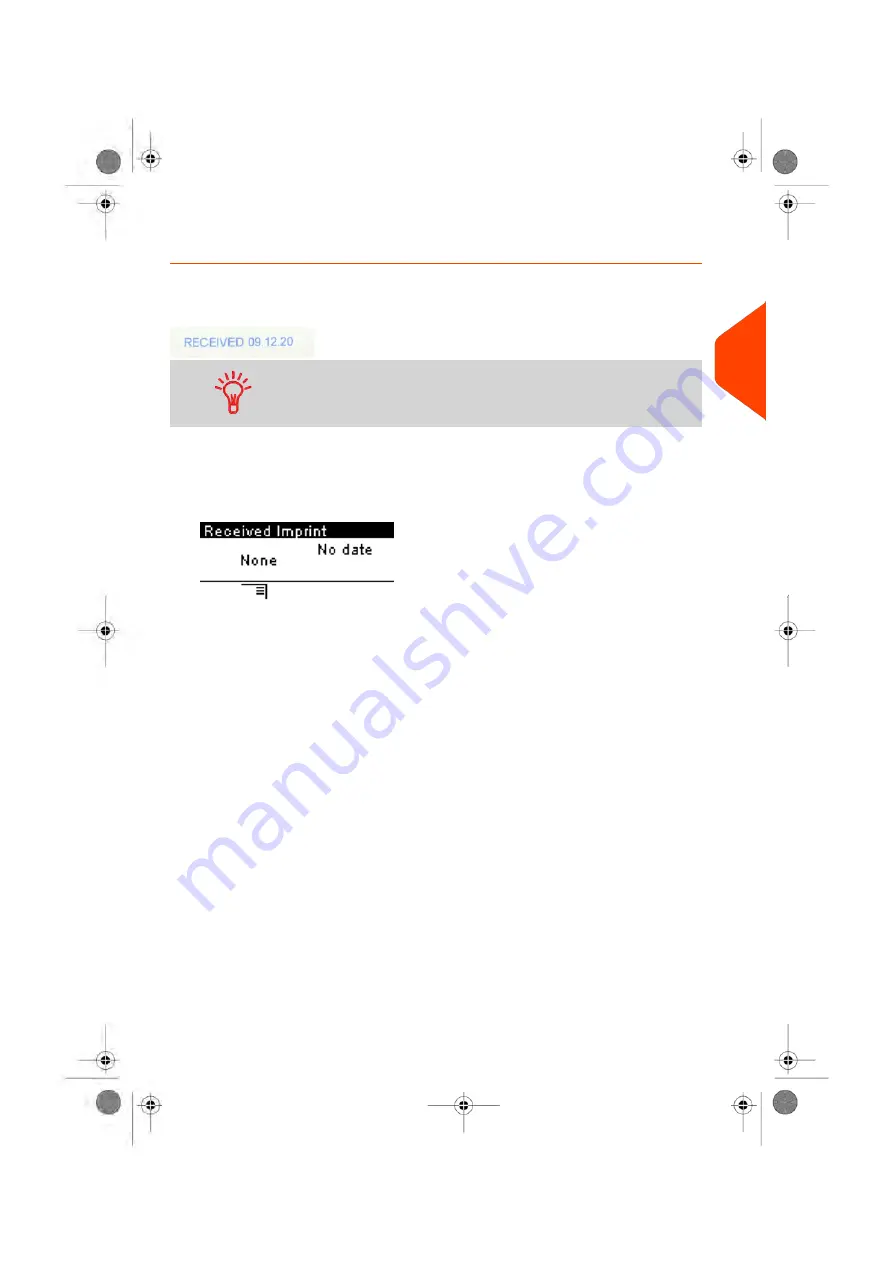
The type of imprint is indicated at the top of the home screen as illustrated.

3

Processing

Mail

45

| Page 45 | Jun-21-2021 09:24 |

Содержание iX-3 Series

Страница 1: ...User Guide iX 3 Franking Machine ...

Страница 2: ...and Starting your Work Session 29 3 2 Choosing Imprint Type 33 3 3 Processing Examples 36 3 4 Printing PPI Mail 50 3 5 Payment Surcharge Entry 54 3 6 Settings 57 Imprints 77 4 4 1 Imprint Configuration 79 4 2 Job Memories 196 Money Operations 93 5 5 1 Managing Credit 95 5 2 Unlocking the PSD Postal Inspection 99 5 3 Setting Warnings 189 5 4 Credit Reports 104 Accounts and Access Control 107 6 6 1 ...

Страница 3: ...tion Tests 179 9 4 System Online Services 181 Configuring your Mailing System 183 10 10 1 Display Settings 185 10 2 System Time outs and Settings 187 10 3 Setting Warnings 189 10 4 Weighing Settings 192 10 5 Job Memories 196 10 6 Connection Settings 201 10 7 Date and Time 205 Options and Updates 209 11 11 1 Overview 211 11 2 Using the Mailbox 212 11 3 Managing Options 214 11 4 Managing ERAs 216 11...

Страница 4: ...shooting 257 13 13 1 Machine Issues 259 13 2 Diagnostics 263 13 3 System Data 277 Specifications 283 14 14 1 Mail Specifications 285 14 2 General Specifications 286 14 3 Operating Conditions 287 14 4 System Specifications 288 Page 3 TOC Jun 21 2021 09 24 ...

Страница 5: ... Page 4 TOC Jun 21 2021 09 24 ...

Страница 6: ...Safety Information 1 1 1 Safety Requirements 3 How to Disconnect your Mailing System 6 1 2 How to Enable an Emergency Stop 7 1 3 Symbols 8 1 4 Glossary 9 1 Page 1 Safety Information Jun 21 2021 09 24 ...

Страница 7: ......

Страница 8: ... of liquid spillage disconnect the power cord from the socket and proceed with cleaning Use an socket located near the system that is easily accessible As the power supply cord is the system disconnecting device do not route the power cord between pieces of furniture or over sharp edges Avoid using sockets controlled by wall switches or shared by other equipment Make sure there is no strain on the...

Страница 9: ...mark that indicates conformity with health safety and environmental protection standards for products sold within the European Economic Area EEA The CE marking is also found on products sold outside the EEA that are manufactured in or designed to be sold in the EEA This is a class A product Operation of this equipment in a residential area is likely to cause interference in which case the user wil...

Страница 10: ...cigars etc on the mailing system When removing jammed material avoid using too much force to prevent personal injury and damaging components When lifting covers wait for all parts to stop moving before placing hands near the feeder path or ink cartridge To prevent overheating do not block the ventilation openings or try to stop the power supply fans Do not remove bolted covers as they enclose pote...

Страница 11: ...sleep on soft off mode button sets the machine to soft off The light located next to the key indicates Green The mailing system is in awake mode and ready for use Amber continuous The mailing system is in sleep mode low power mode Amber blinking The mailing system is in soft off mode very low power mode 2 Be sure that the light located next to the key at the top right corner of the control panel i...

Страница 12: ...How to Enable an Emergency Stop 1 2 If you want to stop the system in the event of an emergency To stop the run process immediately 1 Press 7 Page 7 Jun 21 2021 09 24 1 Safety Information ...

Страница 13: ...uman safety hazard ATTENTION brings to your attention a risk for equipment or mail that could result from an action you may perform NOTE remark that explains different scenarios or situations TIP advice to help save you time when processing your mail 8 Page 8 Jun 21 2021 09 24 1 Safety Information ...

Страница 14: ... ID Kerberos Key Distribution Center KDC Local Area Network link between computers LAN Mail Accounting Software allows you to remotely manage mailing accounts and associated reports MAS Online Services OLS Personal Computer PC Personal Identification Number PIN Pre Paid Imprint PPI Postal Security Device Meter PSD Weighing Platform WP 9 Page 9 Jun 21 2021 09 24 1 Safety Information ...

Страница 15: ......

Страница 16: ...ion 2 1 System Layout 13 2 2 Accessories 15 2 3 Control Panel Features 17 2 4 Connections 21 2 5 Power Management 23 How to Turn the Mailing System to Sleep Soft Off Mode 23 How to Turn the Mailing System to Off Mode 24 11 Page 11 Meet Your Mailing System Jun 21 2021 09 24 ...

Страница 17: ......

Страница 18: ...ight of mail pieces Weighing platform Prints envelopes and controls the Mailing System Base Allows you to remove jammed envelopes Jam release handle Beginning of mail transport path Feed Table 13 Page 13 Jun 21 2021 09 24 2 Meet Your Mailing System ...

Страница 19: ...stage meter Never remove unless Helpdesk asks you to Postal Security Device PSD Lift from the front to open Cover Prints the postal imprint on envelopes Ink Cartridge 14 Page 14 Jun 21 2021 09 24 2 Meet Your Mailing System ...

Страница 20: ...ed in the table below Touchpad use The touchpad on the keyboard or a USB mouse plugged into the system allow you to make the same selections or actions as with your finger using its pointing device They allow you to do the same selections or actions as with your finger on the touch screen All the tactile elements can be activated by the pointer In addition it allows you to Exactly position the cur...

Страница 21: ...printing mailing related reports For more information about compatible printers that can connect to your mailing system please contact technical support Barcode Scanner Optional This scanner is used to identify accounts through barcodes 16 Page 16 Jun 21 2021 09 24 2 Meet Your Mailing System ...

Страница 22: ... to calculate postage amount 4 Weight Displays selected job memory 7 Job Memory Displays account currently selected 8 Account Indicates the printing offset status imprint position shifting for thick envelopes 23 Print Offset Current weighing method 24 Weighing Type Allows your selection of a Slogan Indicates that a Slogan will be printed at the closest place of imprint 25 Slogan 17 Page 17 Jun 21 ...

Страница 23: ...us Long press Increase the backlight when a homepage is displayed 6 Up Arrow Short press Navigate down in lists or menus Long press Decrease the backlight when a homepage is displayed 6 Down Arrow SHORTCUT KEYS 15 Accesses credit management including adding credit 17 Credit Displays the Report list 19 Report Displays the rate selection screen 18 Rate Selection Accesses imprint selection and imprin...

Страница 24: ...et START STOP KEYS Short press Wakes the Mailing System up or turns it to Sleep mode The light indicates the system state green awake amber continuous asleep Long press The system is in Soff off state amber blinking soft off 5 Sleep Wake Soft Off Starts printing process 12 Start Stops printing and all mechanical activity motors in the Mailing System 11 Stop Keypad Use For different contexts the ta...

Страница 25: ...8TUVtuv 8 9WXYZwxyz 9 0 0 Clear function C 20 Page 20 Jun 21 2021 09 24 2 Meet Your Mailing System ...

Страница 26: ... Connectors To connect to LAN LAN Port To connect to memory device or printer Two USB Ports To power supply Power Connector and Switch To weighing platform COM1 21 Page 21 Jun 21 2021 09 24 2 Meet Your Mailing System ...

Страница 27: ...Detail of Connections To connect to the LAN in order to access online services LAN Port 22 Page 22 Jun 21 2021 09 24 2 Meet Your Mailing System ...

Страница 28: ...ow power sleep mode after a period of inactivity A very low power sleep mode called soft off mode is also available This mode should only be used for long periods of non use of the machine In this mode the machine takes longer to wake up and the automatic postal updates cannot take place Spending a large portion of time in low power mode not only saves energy but helps your equipment run cooler an...

Страница 29: ...ing system is in soft off mode very low power mode To avoid weighing errors make sure the weighing device platform is clear when starting the machine When the mailing system is in soft off mode it is able to automatically wake up to perform automatic call if scheduled date and time is reached How to Turn the Mailing System to Off Mode To turn off your system you can use the on off button located o...

Страница 30: ...3 Turn off your mailing system The circle or O indicates the system is off 2 Meet Your Mailing System 25 Page 25 Jun 21 2021 09 24 ...

Страница 31: ......

Страница 32: ...Received Mode printing 45 How to Set Pass Through Mail processing 48 How to Set Postage for Normal Mail 36 How to Process Normal Mail 39 3 4 Printing PPI Mail 50 How to Set Postage for PPI Mail 50 How to Process PPI Mail 51 3 5 Payment Surcharge Entry 54 How to Set Payment Surcharge Entry Mode 54 3 6 Settings 57 How to Move the Imprint Print Offset 82 How to Select a PPI 73 Using Job Memories 199 ...

Страница 33: ...How to Change the Date 79 How to Add or Cancel an ERA on the Imprint 216 How to Add or Cancel a Slogan on the Imprint 226 28 Page 28 Processing MailJun 21 2021 09 24 ...

Страница 34: ...rding to the characteristics and in the order that follows 1 Mail Type See table Type of Process and Type of Imprint on page 33 Outgoing mail with different postage types Normal postage Pre paid mail Payment Surcharge Incoming mail Mail to count 2 Separate envelopes that require sealing from those that do not 3 Accounts to allocate costs to only if you have to select an account at login see Settin...

Страница 35: ...ettings The access to the system may be open You may have to enter a PIN code You may have to select an account Your work session ends when the system returns to a Sleep mode You should not put anything on the weighing platform before starting the mailing system How to Log in and Start a Work Session To log in as a user 30 Page 30 Jun 21 2021 09 24 3 Processing Mail ...

Страница 36: ...r step is required to navigate through the system Login Screen If the login screen is displayed enter your PIN code Account Screen If the account screen is displayed select your account as follows Use up and down arrows and press OK to validate You can also use a barcode scanner optional to select your account The Home Screen Normal page is displayed The work session starts 3 Processing Mail 31 Pa...

Страница 37: ...ll phone Example To have N press twice the key 6 Accounting information To change allocating accounts when a session is already opened see Changing the Current Account on page 57 To choose security level for accounts and access control see Accounts and Access Control on page 107 To turn your system on sleep mode see How to Turn the Mailing System to Sleep Soft off Mode on page 23 32 Page 32 Jun 21...

Страница 38: ...et optional Normal Printing Normal Mail on page 36 Applying postage to outgoing mail Pre paid imprint Slogan optional ERA Slogans optional Print offset optional Weight PPI Printing PPI Mail on page 50 Sending Prepaid mail Date received ON or OFF Slogan Received ON or OFF Slogan optional Print Counter optional Print offset optional Received Printing Incoming Mail with Received Mode on page 45 Print...

Страница 39: ... Each type of imprint is associated to A specific home screen that displays current imprint configuration weight postage etc A specific imprint configuration menu that allows you to set imprint parameters To directly gain access to the configuration menu of the type of imprint press the shortcut key on the control panel Your system has five shortcut keys for direct access to save time You can elim...

Страница 40: ...is displayed 3 Select the type of imprint in the list and press OK The Imprint screen is updated and displays the menu items that allow you to modify the imprint options 4 Press or to return to the home screen 3 Processing Mail 35 Page 35 Jun 21 2021 09 24 ...

Страница 41: ...in with selecting the Type of imprint to gain access to the additional options and be able to run your mail normal is default To set the imprint quickly consider using job memories The memories store imprint characteristics together with rates and if activated charged account See Job Memories on page 196 Required settings 1 Make sure you are on the home screen of the Normal type of imprint The hom...

Страница 42: ...e type of imprint is indicated on line 2 of the screen To change the type of imprint select the Type line press OK and then select Normal in the Type of imprint screen and press OK To select an option in the screen Highlight the option using the arrow keys and 3 Processing Mail 37 Page 37 Jun 21 2021 09 24 ...

Страница 43: ... more details see How to Add or Cancel an ERA on the Imprint on page 216 Check or change the Date Select Date and then select a date option in the Date advance screen Select Today s date for printing today s date For more details see How to Change the Date on page 79 Press or to return to the home screen 4 Select a rate and add services Press to open the Rate selection screen Type a rate number to...

Страница 44: ...ome screen 1 Press System motors start running 2 Insert the envelope into the mail path against the rear guide wall with the side to be printed facing upwards If you want to seal the envelope first engage the flap into the moistener option Do not try to moisten self adhesive envelopes 3 The Mailing System applies postage and the envelope is ejected In mode Standard Weighing 3 Processing Mail 39 Pa...

Страница 45: ...g upwards If you want to seal the envelope first engage the flap into the moistener option Do not try to moisten self adhesive envelopes 4 The Mailing System prints postage and the mail piece is ejected In optional mode Differential Weighing From the Normal home screen 1 Place the stack of mail to process on the Weighing Platform then follow the instructions on the screen or the steps below 2 Remo...

Страница 46: ...istener option Do not try to moisten self adhesive envelopes 4 The Mailing System applies postage and the mail piece is ejected 5 Repeat the previous step for each piece of mail To quit the process at any time press When you remove the last object from the Weighing Platform the Mailing System will ask if you want to print it You can answer Yes or No 3 Processing Mail 41 Page 41 Jun 21 2021 09 24 ...

Страница 47: ...through the machine This mailing system requires double meter tapes Single meter tapes will not work on this mailing system 1 Place your mail piece on the weighing platform and select your rate 2 Press the green Start button 3 Slide your double meter tape though the mailing system 42 Page 42 Jun 21 2021 09 24 3 Processing Mail ...

Страница 48: ...manually You may have to enter the weight manually if a mail piece exceeds the weighing capacity of your Scale To enter the weight manually from the home screen you must first select the postal class 1 Select the postal rate To select a rate see How to Select a Rate on page 151 The home screen with postal rate is displayed 3 Processing Mail 43 Page 43 Jun 21 2021 09 24 ...

Страница 49: ...t that is above the capacity authorised for the WP You can contact Customer Service to extend WP capacity 3 Enter the weight in g and press OK to validate The home screen displays the Manual Weight Entry icon and the weight entered 44 Page 44 Jun 21 2021 09 24 3 Processing Mail ...

Страница 50: ...n incoming mail You must begin with selecting the Type of imprint to gain access to the corresponding parameters and be able to run mail Required settings 1 Make sure you are on the home screen of the Received type of imprint The type of imprint is indicated at the top of the home screen as illustrated 3 Processing Mail 45 Page 45 Jun 21 2021 09 24 ...

Страница 51: ...vate or deactivate printing the date Activate or deactivate printing Received Add slogan to print using slogan element Activate or deactivate Counter Select the option to change and press OK The screen indicates the current status of the options Press or to return to the home screen To select an option on the screen Highlight the option using the arrow keys and Then always press to validate your s...

Страница 52: ...envelope into the mail path against the rear guide wall with the side to be printed facing upwards The Mailing System applies the imprint and the mail piece is ejected 3 Processing Mail 47 Page 47 Jun 21 2021 09 24 ...

Страница 53: ...ustrated 2 Check or change the type of imprint if you are not in Pass through mode Press to access the imprint screen To change the type of imprint select the Type line press OK and then select Pass Through in the Type of imprint screen and press OK To select an option in the screen Highlight the option using the arrow keys and Then press to validate your selection 3 Press or to return to the home...

Страница 54: ...2 Insert the envelope into the mail path against the rear guide wall 3 The Mailing System does not apply postage and the envelope is ejected 3 Processing Mail 49 Page 49 Jun 21 2021 09 24 ...

Страница 55: ...ee section How to Change the Current Type of Imprint on page 34 The type of imprint is indicated at the top of the home screen 2 Check or change the type of imprint if you are not in PPI mode Press to access the Imprint screen 3 Select a PPI to use See How to Select a PPI on page 73 50 Page 50 Jun 21 2021 09 24 3 Processing Mail ...

Страница 56: ...atform Press The system motors start running 3 Insert the envelope into the mail path against the rear guide wall with the side to be printed facing upwards If you want to seal the envelope first engage the flap into the moistener option Do not try to moisten self adhesive envelopes 4 The Mailing System prints postage and the mail piece is ejected In Manual weight entry type From the PPI home scre...

Страница 57: ...postage and the envelope is ejected In Differential weighing type From the PPI home screen to print postage on mail pieces 1 Place the stack of mail you want to process on the weighing platform and then follow the instructions on the screen or the steps below 2 Remove the first mail piece from the top of the stack The Mailing System displays weight and postage on the home screen and starts motors ...

Страница 58: ...he moistener option Do not try to moisten self adhesive envelopes 4 The Mailing System applies postage and the mail piece is ejected 5 Repeat the previous step of each piece of mail To quit the process at any time press When you remove the last object from the WP the Mailing System asks if you want to print it You can answer Yes or No 3 Processing Mail 53 Page 53 Jun 21 2021 09 24 ...

Страница 59: ... only be used to reimburse Royal Mail for underpriced mail and surcharges Required settings 1 Make sure you are on the home screen of the Payment Surcharge Entry type of imprint The home screen indicates the date and amount as illustrated below 54 Page 54 Jun 21 2021 09 24 3 Processing Mail ...

Страница 60: ...How to Change the Current Type of Imprint on page 34 3 Select Amount and enter the desired amount Press OK to validate Press or to return to the home screen 4 Payment Surcharge Entry type of imprint also allows you to correct the Date if necessary Select Date and then select a date option in the Date Advance Screen Press OK to validate On the Payment Surcharge Entry home screen 1 Press System moto...

Страница 61: ... piece into the mail path against the rear guide wall side to be printed facing upwards The Mailing System applies the imprint and the mail piece is sent to the catch tray 56 Page 56 Jun 21 2021 09 24 3 Processing Mail ...

Страница 62: ...nt as follows How to Change Account You can change the account to charge to any account created In this example we will change from Marketing account 00001 to Sales account 00002 To change accounts 1 As a user Press and select the path Change Account The list of accounts that are available is displayed 57 Page 57 Jun 21 2021 09 24 3 Processing Mail ...

Страница 63: ...p and configured by a Quadient service technician The barcode sheet of accounts that you create should be Free 3 of 9 A barcode scanner can be used for One Click entry of accounts into your Mailing System You can change the account to charge to any account created In this example we will change from Marketing account 00001 to Sales account 00002 To change accounts with a barcode scanner 58 Page 58...

Страница 64: ...rccode scanner to the mailing system via a USB port The list of accounts barcodes that are available is typically placed near the mailing system 2 Select the account you want to use and scan 3 Processing Mail 59 Page 59 Jun 21 2021 09 24 ...

Страница 65: ...services from the rate selection screen the system Home Screen will display an asterisk M1 There is a Rate Code for all possible rate combinations available in the mailing system This includes rates that may not be displayed on the Rate Selection screen Press the numeric key 8 and select Rate Code to enter a Rate Code To select a rate 1 Press The Rate Selection screen is displayed 60 Page 60 Jun 2...

Страница 66: ... the screen is zero as long as the weight is not known zero How to Select a Rate Code To choose a rate quickly you may type the rate code directly from the home screen using the keypad There is a Rate Code for all possible rate combinations available in the mailing system This includes rates that may not be displayed on the Rate Selection screen To use Rate Codes 1 Press The Rate Selection screen ...

Страница 67: ...hained to another rate When the printing with the rate chaining is done the Machine shall return to the selected rate The following example explains the rate chaining functionality 1 From the home screen a rate has been selected Put one item with weight exceeds a threshold lead to rate chaining 2 The Machine displays the rate chaining on the homepage process as normal 62 Page 62 Jun 21 2021 09 24 ...

Страница 68: ...is manually placed on the Weighing Platform and then put into the mail path Standard Weighing is the default weighing method when the mailing system is first turned on From Differential Weighing press to return to Standard Weighing Home screen To use Standard Weighing 1 From the Standard Weighing Home Screen place an item on the scale If the weight exceeds a threshold the rate will be chained to a...

Страница 69: ...s are stacked together on the Weighing Platform Remove the pieces one by one and put them into the mail path The Mailing System calculates the postage and prints the mail piece automatically You can leave all the mail pieces in a tray on the Weighing Platform the Mailing System will ask you to confirm printing for the last item removed from the tray The mails pieces will be processed at the displa...

Страница 70: ...ing system to be imprinted with the indicia How to Enter the Weight Manually Manual Weight Entry Manual Weighing allows you to enter the weight manually You may have to enter the weight manually if a mail piece exceeds the weighing capacity of your Scale To enter the weight manually from the home screen you must first select the postal class 3 Processing Mail 65 Page 65 Jun 21 2021 09 24 ...

Страница 71: ...51 The home screen with postal rate is displayed 2 Press The Manual Weight Entry screen is displayed You have to enter a weight that is above the capacity authorised for the WP You can contact Customer Service to extend WP capacity 66 Page 66 Jun 21 2021 09 24 3 Processing Mail ...

Страница 72: ...n modify the elements printed on mail pieces as follows Change printed date Adding a pre loaded Slogan to the left of the imprint Adding a pre recorded ERA to the left of the imprint Moving the imprint away from the right edge of the envelope See also How to Change the Current Type of Imprint on page 34 Type of Process and Type of Imprint on page 33 3 Processing Mail 67 Page 67 Jun 21 2021 09 24 ...

Страница 73: ...ted for the next days mail pickup The Date setting allows you to Change the date printed on the mail pieces for future sending you are processing the mail on Friday but not delivering the mail to the post office till Monday To change the date that will be printed 1 Press The Imprint screen is displayed 2 Select Date and press OK The Date screen is displayed 68 Page 68 Jun 21 2021 09 24 3 Processin...

Страница 74: ...can be advanced up to 7 days from today s date Use the scroll button to select a different date 4 Press OK to apply changes and return to the configuration menu Adding ERA and or Slogan to the Imprint You can add an ERA and or a slogan to the imprint as illustrated below See also Managing ERAs on page 216 Managing Slogans on page 226 3 Processing Mail 69 Page 69 Jun 21 2021 09 24 ...

Страница 75: ...s OK The ERA list screen is displayed 3 Select the desired ERA in the list or None for printing no ERA The icon indicates the current selection 4 Press OK to validate your selection The Imprint screen is displayed with updated parameters home screen See also Managing ERAs on page 216 70 Page 70 Jun 21 2021 09 24 3 Processing Mail ...

Страница 76: ...gan list screen is displayed 3 Select the slogan in the list or select None for printing no slogan The icon indicates the current selection 4 Press OK to validate your selection The Imprint screen is displayed with updated parameters home screen See also Managing Slogans on page 226 3 Processing Mail 71 Page 71 Jun 21 2021 09 24 ...

Страница 77: ...ded edges 1 Imprint printing offset To add an offset to the imprint position 1 From the home screen Press and select the path Advanced settings Settings Base Settings Print offset The Print offset mode screen is displayed 2 Select the offset and press OK to validate No Offset Offset 1 Offset 2 72 Page 72 Jun 21 2021 09 24 3 Processing Mail ...

Страница 78: ...int you would like to use In account activated configurations Job Memories allow you assign postage costs to pre selected accounts If your mail requires different settings then the job memories are the solution all your settings are stored in a single memory Just press the job memory key instead of multiple keystrokes to select all the required elements A list of job memories can be viewed under t...

Страница 79: ...y associated with the desired Job Memory Long press on numeric keypad to select corresponding memory For example to use the memory 4 long press The job memory zone of the home screen displays the current job memory name 74 Page 74 Jun 21 2021 09 24 3 Processing Mail ...

Страница 80: ...able is equipped with a moistener you can close the envelopes by sliding the flap under the moistener brush while feeding them into the base mail path Do not attempt to seal self adhesive envelopes Use standard flap envelopes 3 Processing Mail 75 Page 75 Jun 21 2021 09 24 ...

Страница 81: ......

Страница 82: ...A on the Imprint 216 How to Add or Cancel a Slogan on the Imprint 226 How to Move the Imprint Print Offset 82 4 2 Job Memories 196 How to Save a Job Memory 196 How to Edit a Job Memory 198 Using Job Memories 199 How to Remove a Slogan from a Job Memory 231 77 Page 77 Imprints Jun 21 2021 09 24 ...

Страница 83: ......

Страница 84: ...f mailing is printed for the next days mail pickup The Date setting allows you to Change the date printed on the mail pieces for future sending you are processing the mail on Friday but not delivering the mail to the post office till Monday To change the date that will be printed 1 Press The Imprint screen is displayed 2 Select Date and press OK The Date screen is displayed 79 Page 79 Jun 21 2021 ...

Страница 85: ...indicates the current selection The date can be advanced up to 7 days from today s date Use the scroll button to select a different date 4 Press OK to apply changes and return to the configuration menu How to Add or Cancel an ERA on the Imprint To add an ERA to the imprint or to cancel the ERA 1 Press 80 Page 80 Jun 21 2021 09 24 4 Imprints ...

Страница 86: ...ERA The icon indicates the current selection 4 Press OK to validate your selection The Imprint screen is displayed with updated parameters home screen See also Managing ERAs on page 216 How to Add or Cancel a Slogan on the Imprint To add a slogan to the imprint or cancel the slogan 1 Press 4 Imprints 81 Page 81 Jun 21 2021 09 24 ...

Страница 87: ...idate your selection The Imprint screen is displayed with updated parameters home screen See also Managing Slogans on page 226 How to Move the Imprint Print Offset You can move the imprint away from the edge of the envelope when printing on thick envelopes with rounded edges 1 Imprint printing offset To add an offset to the imprint position 82 Page 82 Jun 21 2021 09 24 4 Imprints ...

Страница 88: ... and select the path Advanced settings Settings Base Settings Print offset The Print offset mode screen is displayed 2 Select the offset and press OK to validate No Offset Offset 1 Offset 2 4 Imprints 83 Page 83 Jun 21 2021 09 24 ...

Страница 89: ...rate and ERA and or slogan and department to charge then the job memories are the solution all your settings are stored in a single memory Highly recommended for repetitive tasks Normal Job Memory ERA Slogan Weight option Rate Account Number if any Job Memory are limited to a total of nine Once created a Job Memory cannot be deleted only edited To edit or change a Job Memory you make the changes t...

Страница 90: ...press The job memories list is displayed 2 Select any line with value None Press Save If Accounting is enabled the message confirmation to save account info is displayed 3 Enter a name for the job memory then press Save 4 The home screen displays the type job memory you re just created 4 Imprints 85 Page 85 Jun 21 2021 09 24 ...

Страница 91: ... a total of nine Once created a Job Memory cannot be deleted To edit or change a Job Memory you make the changes to an existing Job Memory and save the changes under a different name Prepare the job that you want to save as job memory Rate Slogan ERA Please refer to the following sections to prepare your job How to Select a Rate on page 151 How to Add or Cancel a Slogan on the Imprint on page 226 ...

Страница 92: ...d configurations Job Memories allow you assign postage costs to pre selected accounts If your mail requires different settings then the job memories are the solution all your settings are stored in a single memory Just press the job memory key instead of multiple keystrokes to select all the required elements A list of job memories can be viewed under the Report menu by selecting Job Memory List I...

Страница 93: ...c key associated with the desired Job Memory Long press on numeric keypad to select corresponding memory For example to use the memory 4 long press The job memory zone of the home screen displays the current job memory name 88 Page 88 Jun 21 2021 09 24 4 Imprints ...

Страница 94: ...a name and a number The Home screen displays the name of the current Job Memory In this example we will remove the GOOD NEWS slogan from Job Memory M1 1 From the home screen press the Imprint button Imprint button 2 Select Slogan and press OK OK mem button 3 Select None and press OK 4 Imprints 89 Page 89 Jun 21 2021 09 24 ...

Страница 95: ...saved To save your change press and hold the OK Mem button until the Save your memory screen appears 6 Select the memory number for the memory your saving in this example we re saving M1 2nd Inl Lett Press Save 7 Select whether you wish to save the account information linked to your job memory 90 Page 90 Jun 21 2021 09 24 4 Imprints ...

Страница 96: ...8 Press Save once more to save the job memory 9 The S no longer appears indicating the slogan has been removed 4 Imprints 91 Page 91 Jun 21 2021 09 24 ...

Страница 97: ......

Страница 98: ...ging Credit 95 How to Check the PSD Meter Credit 95 How to Add Credit to the PSD Meter 97 5 2 Unlocking the PSD Postal Inspection 99 How to Unlock the PSD 99 5 3 Setting Warnings 189 How to Set the High Value Warning Amount 189 How to Set the Low Credit Threshold 190 5 4 Credit Reports 104 93 Page 93 Money Operations Jun 21 2021 09 24 ...

Страница 99: ......

Страница 100: ...your Mailing System is connected to a network see Connections on page 21 and that the connection is properly configured see Connection Settings on page 201 Checking Credit You can check the total postage used and the remaining credit in the PSD at any time To check that enough credit is available to complete your current task Use the following steps to display your available postage credit How to ...

Страница 101: ...1 Press The Credit Menu is displayed 2 Select the path Credit information The screen displays your postage credit as shown below 96 Page 96 Jun 21 2021 09 24 5 Money Operations ...

Страница 102: ...me by complete the steps listed below The Mailing System then connects to the Postal Services and validates the operation How to Add Credit to the PSD Meter To add credit to the PSD 1 Press The Credit Menu is displayed 5 Money Operations 97 Page 97 Jun 21 2021 09 24 ...

Страница 103: ...o the Postal Server If the crediting process is successful the system displays a successful message If crediting fails the system displays a failure message and the amount that you may actually add depending on your postal account balance In the case of a communication error the amount previously entered cannot be changed Check connection settings see Connection Settings on page 201 5 You can open...

Страница 104: ...2 Select My Credit 3 Select Postal Inspection or Audit 4 Press the OK button to confirm 5 The mailing system will contact the server to perform the inspection The mailing machine will indicate when the call is complete 6 Press the Home button to return to the home screen How to Unlock the PSD To unlock the PSD and manually connect to the Postal Server 1 Press 99 Page 99 Jun 21 2021 09 24 5 Money O...

Страница 105: ...irm audit transaction request is displayed 4 Press OK to validate If the audit is successful the system displays a successful message If the audit fails the system displays a failure message explaining the cause of the error Try to correct the cause and retry 100 Page 100 Jun 21 2021 09 24 5 Money Operations ...

Страница 106: ...ing prevents the user from accidentally printing high postage amounts Example 4 80 instead of 0 48 To set a high value warning amount 1 From the home screen Press and select the path Advanced settings Settings Base Settings High Value 2 Enter the high value warning amount or press C and enter 0 to disable the warning function 3 Press OK to validate 101 Page 101 Jun 21 2021 09 24 5 Money Operations...

Страница 107: ... in the PSD Meter are getting low More credit should be loaded The Low Credit Value Warning can be set to value in pounds To set a low credit threshold 1 Press 2 Select Credit settings 3 Enter the Supervisor PIN code and press OK 4 Select Low credit threshold 102 Page 102 Jun 21 2021 09 24 5 Money Operations ...

Страница 108: ...5 Enter the low credit warning amount or press C If you enter 0 a message is displayed Zero amount not allowed 6 Press OK to validate 5 Money Operations 103 Page 103 Jun 21 2021 09 24 ...

Страница 109: ...refill operations performed on the machine in a selected period Die Number on printed report only Download date time Default period previous 6 months Crediting amount New descending Output Screen USB printer USB memory key Content 104 Page 104 Jun 21 2021 09 24 5 Money Operations ...

Страница 110: ...on credit usage since the installation of the system The content is limited to the history available in the PSD Die Number Current Date and Time on printed report only Output On label Screen USB printer Content 5 Money Operations 105 Page 105 Jun 21 2021 09 24 ...

Страница 111: ......

Страница 112: ...Code Mode 120 How to Display and Change the Account Mode 127 6 4 Creating Accounts 124 How to Create an Account 128 6 5 Managing Accounts 127 How to Display and Change the Account Mode 127 How to Create an Account 128 How to View Edit Account Information 129 How to Activate Deactivate an Account 131 How to Delete an Account 133 6 6 Import Export Accounts 135 How to Export an Account List 135 How t...

Страница 113: ......

Страница 114: ...Code Postage usage is tracked by account User must select an account when processing mail A PIN number is required to access functions and process mail No Account Postage usage is not tracked by account User does not select an account when processing mail No PIN number is required to access functions and process mail No Account With Access Control Postage usage is not tracked by account User does ...

Страница 115: ...unt with Access Control Account with PIN Code users enter a PIN code and select an account to process mail How to Display and Change to Account with PIN Code Mode Account With PIN Code Postage usage is tracked by account User must select an account when processing mail A PIN number is required to access functions and process mail To use this mode the system must have at least one account created I...

Страница 116: ...Select Account Mode Selection The Account Mode Selection screen is displayed with the current Account Mode shown 3 Select Account with PIN Code 4 Press OK to confirm 5 If required enter the PIN code and press OK The Mailing System then confirms that the Account Mode has been changed 6 Accounts and Access Control 111 Page 111 Jun 21 2021 09 24 ...

Страница 117: ...ss mail In this mode there is a shared System PIN Code To display and change the Account mode to No Account with Access Control 1 From the home screen Press and select the path Account Management The Login screen is displayed Enter the Supervisor PIN code and press OK 2 Select Account Mode Selection The Account Mode Selection screen is displayed with the current Account Mode shown 112 Page 112 Jun...

Страница 118: ... with Access Control 4 Press OK to confirm 5 If required enter the PIN code and press OK The Mailing System then confirms that the Account Mode has been changed 6 Accounts and Access Control 113 Page 113 Jun 21 2021 09 24 ...

Страница 119: ...Access Control mode This provides a single PIN code for all authorised users 1 From the home screen Press and select the path Account Management The Login screen is displayed Enter the Supervisor PIN code and press OK 2 Select Change PIN code The Change machine PIN code screen is displayed 114 Page 114 Jun 21 2021 09 24 6 Accounts and Access Control ...

Страница 120: ...3 Enter the new PIN code and press OK 6 Accounts and Access Control 115 Page 115 Jun 21 2021 09 24 ...

Страница 121: ...o mail You can then issue reports on each account for information about reports see Reports on page 157 If the Accounts Function is activated users of the Mailing System must select an account when starting their work session Afterwards users can change accounts to allocate postal expenditures as needed How to Display and Change to No Account Mode No Account Postage usage is not tracked by account...

Страница 122: ... OK 2 Select Account Mode Selection The Account Mode Selection screen is displayed with the current Account Mode shown 3 Select No Account 4 Press OK to confirm 5 If required enter the PIN code and press OK The Mailing System then confirms that the Account Mode has been changed 6 Accounts and Access Control 117 Page 117 Jun 21 2021 09 24 ...

Страница 123: ...ss mail In this mode there is a shared System PIN Code To display and change the Account mode to No Account with Access Control 1 From the home screen Press and select the path Account Management The Login screen is displayed Enter the Supervisor PIN code and press OK 2 Select Account Mode Selection The Account Mode Selection screen is displayed with the current Account Mode shown 118 Page 118 Jun...

Страница 124: ... change accounts at any time during mail processing If only one account is available the Mailing System automatically selects it at start up Implementing the Account Mode 1 Follow the steps outlined in How to Display and Change the Account Mode on page 127 and select the Account Mode 2 Create accounts as indicated in How to Create an Account on page 128 When you activate the Account Mode the syste...

Страница 125: ...PIN Code Postage usage is tracked by account User must select an account when processing mail A PIN number is required to access functions and process mail To use this mode the system must have at least one account created If only one account is available the Mailing System automatically selects it at start up To display and change the Account mode to Account with PIN Code 120 Page 120 Jun 21 2021...

Страница 126: ...Select Account Mode Selection The Account Mode Selection screen is displayed with the current Account Mode shown 3 Select Account with PIN Code 4 Press OK to confirm 5 If required enter the PIN code and press OK The Mailing System then confirms that the Account Mode has been changed 6 Accounts and Access Control 121 Page 121 Jun 21 2021 09 24 ...

Страница 127: ... the Supervisor PIN code and press OK 2 Select Account Mode Selection The Account Mode Selection screen is displayed with the current Account Mode shown 3 Select the desired Account mode 4 Press OK to confirm 5 If required enter the PIN code and press OK The Mailing System then confirms that the Account Mode has been changed 122 Page 122 Jun 21 2021 09 24 6 Accounts and Access Control ...

Страница 128: ...an authorised technician Implementing Remote account management To implement the Remote account Management Feature 1 Connect the PC to the Mailing System and start the Account Management Application on the PC see the diagram in Connectors on page 21 and the PC application user guide 2 On the Mailing System activate the mode Remote Account Management see How to Display and Change the Account Mode o...

Страница 129: ... Description Format Account Item Number of the account Two accounts cannot have the same number An account number cannot be modified after the account is created However the account can be deleted 30 Alphanumeric Characters Number Name of the account Two accounts cannot have the same name 32 Alphanumeric Characters Name Only active accounts are visible to users Active Inactive Status 124 Page 124 ...

Страница 130: ...nt screen select Manage Account The Manage Account screen is displayed 2 Select Account List 3 Select Add Account 4 Enter Number of account and press OK 5 Enter Name of account and press OK 6 Choose the Status for the account and press OK 7 If you are in Account with pin code mode set a PIN Code for the account 6 Accounts and Access Control 125 Page 125 Jun 21 2021 09 24 ...

Страница 131: ...8 Press OK to validate The Account creation summary screen displayed 9 Press OK to confirm the creation of the account 126 Page 126 Jun 21 2021 09 24 6 Accounts and Access Control ...

Страница 132: ...layed Enter the Supervisor PIN code and press OK 2 Select Account Mode Selection The Account Mode Selection screen is displayed with the current Account Mode shown 3 Select the desired Account mode 4 Press OK to confirm 5 If required enter the PIN code and press OK The Mailing System then confirms that the Account Mode has been changed 127 Page 127 Jun 21 2021 09 24 6 Accounts and Access Control ...

Страница 133: ...nt screen select Manage Account The Manage Account screen is displayed 2 Select Account List 3 Select Add Account 4 Enter Number of account and press OK 5 Enter Name of account and press OK 6 Choose the Status for the account and press OK 7 If you are in Account with pin code mode set a PIN Code for the account 128 Page 128 Jun 21 2021 09 24 6 Accounts and Access Control ...

Страница 134: ... of the account How to View Edit Account Information To view or edit an account 1 From the home screen Press and select the path Account Management The Login screen is displayed Enter the Supervisor PIN code and press OK 2 Select Manage Account 6 Accounts and Access Control 129 Page 129 Jun 21 2021 09 24 ...

Страница 135: ...odify The Edit Modify screen appears 6 Change account name using the keypad use key C to clear characters Press OK to display the next parameter 7 Change Status parameter if necessary and press OK 8 If you are in Account with PIN code mode change PIN Code for account if necessary 130 Page 130 Jun 21 2021 09 24 6 Accounts and Access Control ...

Страница 136: ...s you to create accounts in advance and prevent them being used before your account structure is complete To activate or deactivate an account 1 From the home screen Press and select the path Account Management The Login screen is displayed Enter the Supervisor PIN code and press OK 2 Select Manage Account 6 Accounts and Access Control 131 Page 131 Jun 21 2021 09 24 ...

Страница 137: ...d press OK 5 Select Edit Modify The Edit Modify screen appears 6 Change Status parameter if necessary and press OK 7 Accept the changes by pressing OK on the Account modification summary If an account is deactivated it is no longer visible to the operator 132 Page 132 Jun 21 2021 09 24 6 Accounts and Access Control ...

Страница 138: ...count Management The Login screen is displayed Enter the Supervisor PIN code and press OK 2 Select Manage Account 3 Then select Account list The Account list screen is displayed 4 Select the account or type the account number and press OK 6 Accounts and Access Control 133 Page 133 Jun 21 2021 09 24 ...

Страница 139: ...n of account deletion is displayed 6 Press OK to delete the account An account number cannot be modified If you want to modify the account number first delete the account and then create a new account with a new account number 134 Page 134 Jun 21 2021 09 24 6 Accounts and Access Control ...

Страница 140: ...y it to create new accounts To export an account list on a USB memory key 1 From the home screen Press and select the path Account Management The Login screen is displayed Enter the Supervisor PIN code and press OK 2 Select Manage Account 3 Then select Export Account List 135 Page 135 Jun 21 2021 09 24 6 Accounts and Access Control ...

Страница 141: ... a message will inform you that you when you may remove the USB memory key Account summary The number of accounts you can create is set to 30 by default and can be increased to 100 if required To upgrade your system please contact your Customer Service Account names must be unique within the system 136 Page 136 Jun 21 2021 09 24 6 Accounts and Access Control ...

Страница 142: ...Number Name of the account Two accounts cannot have the same name 32 Alphanumeric Characters Name Only active accounts are visible to users Active Inactive Status How to Import Accounts The CSV file should have the following characteristics Format is ACS_yyyymmdd_hhmmss CSV example ACS_20091007_035711 CSV Name semi colon Field delimiter New line Record delimiter 6 Accounts and Access Control 137 P...

Страница 143: ... System by re importing the file You can only import CSV files located in the root directory of the USB memory key To add accounts to your Mailing System export the current account list and modify it before re importing it into the Mailing System To import accounts from a CSV file 1 From the home screen Press and select the path Account Management The Login screen is displayed Enter the Supervisor...

Страница 144: ...r left and press OK 5 Select the CSV file to import and press OK 6 Follow the instructions displayed on the screen At the end of the process a message will inform you when you may remove the USB memory key 6 Accounts and Access Control 139 Page 139 Jun 21 2021 09 24 ...

Страница 145: ...Account with pin code Report output is printer or USB memory key To generate the Account Report 1 Make sure the current account mode is Account or Account with PIN code 2 Press Menu and select Account management The Login screen is displayed Enter the Supervisor PIN code and press OK 3 Select Manage Account and press OK 140 Page 140 Jun 21 2021 09 24 6 Accounts and Access Control ...

Страница 146: ...r deleted with a postage value The current account mode has to be Account or Account with pin code Die Number on printed report only You have to specify the Begin date and an the End date of the report Use the selection of month and year Default period is previous 12 months ending current month If some items were printed using a mode without accounts default account these items appear in the repor...

Страница 147: ...e has to be Account or Account with pin code You have to select an account in the list of accounts then the Begin date and the End date of the report You have to specify the Begin date and an the End date of the report Use the selection of month and year Default period is previous 12 months ending current month Die Number on printed report only 142 Page 142 Jun 21 2021 09 24 6 Accounts and Access ...

Страница 148: ...Output Screen Content 6 Accounts and Access Control 143 Page 143 Jun 21 2021 09 24 ...

Страница 149: ...his example we will change from Marketing account 00001 to Sales account 00002 To change accounts 1 As a user Press and select the path Change Account The list of accounts that are available is displayed 2 Select the account you want to use and press OK 144 Page 144 Jun 21 2021 09 24 6 Accounts and Access Control ...

Страница 150: ...ervice technician The barcode sheet of accounts that you create should be Free 3 of 9 A barcode scanner can be used for One Click entry of accounts into your Mailing System You can change the account to charge to any account created In this example we will change from Marketing account 00001 to Sales account 00002 To change accounts with a barcode scanner 6 Accounts and Access Control 145 Page 145...

Страница 151: ...scanner to the mailing system via a USB port The list of accounts barcodes that are available is typically placed near the mailing system 2 Select the account you want to use and scan 146 Page 146 Jun 21 2021 09 24 6 Accounts and Access Control ...

Страница 152: ...3 The current account number is displayed 6 Accounts and Access Control 147 Page 147 Jun 21 2021 09 24 ...

Страница 153: ......

Страница 154: ...Selecting a Rate 151 How to Select a Rate 151 How to Select a Rate Code 152 7 2 Managing Postal Rates 236 Rate Table List 236 Download New Rates 237 How to Use Rate Chaining 156 149 Page 149 Rates Jun 21 2021 09 24 ...

Страница 155: ......

Страница 156: ... There is a Rate Code for all possible rate combinations available in the mailing system This includes rates that may not be displayed on the Rate Selection screen Press the numeric key 8 and select Rate Code to enter a Rate Code To select a rate 1 Press The Rate Selection screen is displayed 2 On that screen you can Type a rate number to select a rate or display rate options Pressing the numeric ...

Страница 157: ... Code To choose a rate quickly you may type the rate code directly from the home screen using the keypad There is a Rate Code for all possible rate combinations available in the mailing system This includes rates that may not be displayed on the Rate Selection screen To use Rate Codes 1 Press The Rate Selection screen is displayed 2 Select Adv Rate and press OK 3 Select Rate Code 152 Page 152 Jun ...

Страница 158: ...4 Enter the desired Rate Code and press OK 7 Rates 153 Page 153 Jun 21 2021 09 24 ...

Страница 159: ...stem to the Online Services server as a user Rate Table List The Rate Table List display all available rate tables that are currently installed in your Mailing System and indicates with a check mark the active rate table Rate tables will automatically become active on their effective date For each rate table rate details part number expiration date rate option can be displayed To view the current ...

Страница 160: ...ate file is in use Download New Rates To download new rates 1 Press The Rate Selection screen is displayed Press 8 to select the Adv Rate 2 Select Update rate table and press OK The Mailing System connects to the Online Services server and downloads available rates 7 Rates 155 Page 155 Jun 21 2021 09 24 ...

Страница 161: ...ontact Customer Service How to Use Rate Chaining The rate table can implement the rate chaining function For a selected rate if the weight exceeds a threshold the rate shall be chained to another rate When the printing with the rate chaining is done the Machine shall return to the selected rate The following example explains the rate chaining functionality 1 From the home screen a rate has been se...

Страница 162: ...lains how you can access and print reports for your Mailing System 8 1 Generating a Report 159 How to Generate a Report 159 8 2 Available Reports 160 How to Generate the Account Report 160 157 Page 157 Reports Jun 21 2021 09 24 ...

Страница 163: ......

Страница 164: ...e report type and press OK 3 Depending on the report type the system may ask for preferences such as Period of time targeted begin date end date Desired account etc Select or type the required parameters and press OK The Output selection screen is displayed Use the C key to clear displayed parameter data from right to left and then enter the new parameter data you want 4 Select an available output...

Страница 165: ...Account or Account with pin code Report output is printer or USB memory key To generate the Account Report 1 Make sure the current account mode is Account or Account with PIN code 2 Press Menu and select Account management The Login screen is displayed Enter the Supervisor PIN code and press OK 3 Select Manage Account and press OK 160 Page 160 Jun 21 2021 09 24 8 Reports ...

Страница 166: ...dit History Report This report displays the last postage refill operations performed on the machine in a selected period Die Number on printed report only Download date time Default period previous 6 months Crediting amount New descending 8 Reports 161 Page 161 Jun 21 2021 09 24 ...

Страница 167: ...Report This report displays for each day of the selected period usage data such as total items and total postage value Die Number on printed report only Day number Number of items purchased Total postage value for this day 162 Page 162 Jun 21 2021 09 24 8 Reports ...

Страница 168: ...ort displays the information on credit usage since the installation of the system The content is limited to the history available in the PSD Die Number Current Date and Time on printed report only Output On label Screen USB printer Content 8 Reports 163 Page 163 Jun 21 2021 09 24 ...

Страница 169: ...Job Memory List report This report displays the job memory list Output The Job Memory List report outputs are Screen Label USB Printer Content 164 Page 164 Jun 21 2021 09 24 8 Reports ...

Страница 170: ...en USB printer Content IP Configuration Report The IP Configuration Report displays IP address information To generate this report the mailing system must be connected to the network with a LAN The report prints to a label Output The IP Configuration Report outputs is Label 8 Reports 165 Page 165 Jun 21 2021 09 24 ...

Страница 171: ...Content Machine Configuration Report This report displays all machine settings 166 Page 166 Jun 21 2021 09 24 8 Reports ...

Страница 172: ...Output USB printer if installed USB memory key Content 8 Reports 167 Page 167 Jun 21 2021 09 24 ...

Страница 173: ...al postage used You have to specify the Begin date and an the End date of the report Use the selection of month and year Default period is previous 12 months ending current month Die Number on printed report only Output Screen USB printer USB memory key Content 168 Page 168 Jun 21 2021 09 24 8 Reports ...

Страница 174: ...count mode has to be Account or Account with pin code Die Number on printed report only You have to specify the Begin date and an the End date of the report Use the selection of month and year Default period is previous 12 months ending current month If some items were printed using a mode without accounts default account these items appear in the report under the name Others and No account Output...

Страница 175: ...eriod You can select any account from the list The current account mode has to be Account or Account with pin code You have to select an account in the list of accounts then the Begin date and the End date of the report You have to specify the Begin date and an the End date of the report Use the selection of month and year Default period is previous 12 months ending current month Die Number on pri...

Страница 176: ...Output Screen Content 8 Reports 171 Page 171 Jun 21 2021 09 24 ...

Страница 177: ......

Страница 178: ...mail follow up online 9 1 Online Services Overview 175 9 2 OLS Call Types 176 How to Call Online Services Manually 176 How to Upload Report Data to the Online Services Server 177 Synchronise Call 178 9 3 OLS Connection Tests 179 Ping Server Diagnostic Test 271 Test Server Diagnostic Test 274 9 4 System Online Services 181 173 Page 173 Online Services Jun 21 2021 09 24 ...

Страница 179: ......

Страница 180: ... your mailing machine ink supply and e mails an alert notification when it is time to re order Remote diagnostics and technical support experienced technical professionals analise your mailing machine s error logs diagnose your mailing machine before an on site service visit and your system software can be updated remotely reducing service delays Slogan ERA download order a new slogan ERA and get ...

Страница 181: ...atically connects when it s time to re order ink supplies It is strongly recommended that you leave the Mailing System turned on in sleep mode and connected to a network during the night to allow the connection to the Online Server to occur automatically How to Call Online Services Manually Manual calls allow you to connect to the Online Server in order to retrieve new information messages or to e...

Страница 182: ...r messages see Using the Mailbox on page 212 How to Upload Report Data to the Online Services Server An Upload Statistics call sends report data to the Online Services Server To upload report data 1 From the home screen Press and select the path Advanced Settings Online Services Upload statistics 2 Machine uploads data to the Online Services Server 9 Online Services 177 Page 177 Jun 21 2021 09 24 ...

Страница 183: ...tomatic call schedule of the machine and the features options To trigger a Synchronise call 1 From the home screen Press and select the path Advanced Settings Online services Machine synchronisation The Mailing System connects to the server and updates 2 Call is complete 178 Page 178 Jun 21 2021 09 24 9 Online Services ...

Страница 184: ...ic display test 1 From the home screen Press and select the path Advanced Settings Maintenance Process Diagnostics 2 Select Communication from the list displayed on the screen 3 Select Ping Server from the list displayed on the screen 4 After a successful connection the display shows Press OK 179 Page 179 Jun 21 2021 09 24 9 Online Services ...

Страница 185: ...om the home screen Press and select the path Advanced Settings Maintenance Process Diagnostics 2 Select Communication from the list displayed on the screen 3 Select Test Server from the list displayed on the screen 4 After a successful connection the display shows Press OK 180 Page 180 Jun 21 2021 09 24 9 Online Services ...

Страница 186: ...ection ensures that the latest postal rates are installed on your Mailing System When the Postal Service announce changes in their rate and fee schedule the Online Services server downloads the new rates into your Mailing System Your Mailing System automatically switches to the approved rates on the effective date of rate change For more information please contact Customer Service Account level It...

Страница 187: ......

Страница 188: ...edit Threshold 190 10 4 Weighing Settings 192 How to Zero the Weighing Platform 192 How to activate de activate Shipping application mode 194 How to set the Shipping Application connection 195 10 5 Job Memories 196 How to Save a Job Memory 196 How to Edit a Job Memory 198 Using Job Memories 199 10 6 Connection Settings 201 How to Set the Postal Online Services Connection 201 How to Set LAN Paramet...

Страница 189: ......

Страница 190: ...splay contrast 1 From the home screen Long press or to increase or decrease the contrast The screen updates immediately How to Change the Display Language To change the current display language 1 From the home screen Press and select the path Advanced Settings Settings Base Settings Language 185 Page 185 Jun 21 2021 09 24 10 Configuring your Mailing System ...

Страница 191: ...2 Select the language you want to use 3 Press OK to validate 186 Page 186 Jun 21 2021 09 24 10 Configuring your Mailing System ...

Страница 192: ...es to Sleep mode see Power Management on page 23 To change the Sleep timeout 1 From the home screen Press and select the path Advanced Settings Settings Timeout Setting Sleep Timeout The Sleep Timeout screen is displayed 2 Enter the value of the Sleep timeout Use the key C to clear the old setting and then enter a new value 3 Press OK to validate 187 Page 187 Jun 21 2021 09 24 10 Configuring your ...

Страница 193: ...hange the Soft Off Timeout 1 From the home screen Press and select the path Advanced Settings Settings Timeout Setting Soft Off Timeout The Soft Off Timeout screen is displayed 2 Enter the new value of the Soft off time out Use the C key to clear old settings then enter a new value 3 Press OK to validate 188 Page 188 Jun 21 2021 09 24 10 Configuring your Mailing System ...

Страница 194: ...vents the user from accidentally printing high postage amounts Example 4 80 instead of 0 48 To set a high value warning amount 1 From the home screen Press and select the path Advanced settings Settings Base Settings High Value 2 Enter the high value warning amount or press C and enter 0 to disable the warning function 3 Press OK to validate 189 Page 189 Jun 21 2021 09 24 10 Configuring your Maili...

Страница 195: ...PSD Meter are getting low More credit should be loaded The Low Credit Value Warning can be set to value in pounds To set a low credit threshold 1 Press 2 Select Credit settings 3 Enter the Supervisor PIN code and press OK 4 Select Low credit threshold 190 Page 190 Jun 21 2021 09 24 10 Configuring your Mailing System ...

Страница 196: ...5 Enter the low credit warning amount or press C If you enter 0 a message is displayed Zero amount not allowed 6 Press OK to validate 10 Configuring your Mailing System 191 Page 191 Jun 21 2021 09 24 ...

Страница 197: ... Platform The mailing system should display 0 00 weight when there is nothing on the weighing platform scale If the display does not show zero weight then the weighing platform scale should be zeroed To zero the Weighing Platform as a user 1 From the home screen Long press From the Home screen you must press and hold the button for approximately two seconds 2 The display prompts 192 Page 192 Jun 2...

Страница 198: ...e mail piece weights that have to be corrected according to the geographical location of the mailing system as weights can change with the altitude and latitude The correcting Geodesic Code GEO Code is done automatically with Online Services 10 Configuring your Mailing System 193 Page 193 Jun 21 2021 09 24 ...

Страница 199: ...e can be activated de activated How to activate de activate Shipping application mode To activate de activate Shipping application mode 1 From the home screen Press and select the path Advanced Settings Settings Base Settings Shipping application mode The Shipping application mode screen is displayed 2 Select Activated to start active Shipping application mode or Deactivated to deactivate this mod...

Страница 200: ... screen Press and select the path Advanced Settings Maintenance Network advanced settings Shipping application The Shipping application advanced setting screen is displayed 2 Enter PC IP address 3 Enter PC Port number 4 Press OK to validate 10 Configuring your Mailing System 195 Page 195 Jun 21 2021 09 24 ...

Страница 201: ...and or slogan and department to charge then the job memories are the solution all your settings are stored in a single memory Highly recommended for repetitive tasks Normal Job Memory ERA Slogan Weight option Rate Account Number if any Job Memory are limited to a total of nine Once created a Job Memory cannot be deleted only edited To edit or change a Job Memory you make the changes to an existing...

Страница 202: ... memories list is displayed 2 Select any line with value None Press Save If Accounting is enabled the message confirmation to save account info is displayed 3 Enter a name for the job memory then press Save 4 The home screen displays the type job memory you re just created 10 Configuring your Mailing System 197 Page 197 Jun 21 2021 09 24 ...

Страница 203: ...ine Once created a Job Memory cannot be deleted To edit or change a Job Memory you make the changes to an existing Job Memory and save the changes under a different name Prepare the job that you want to save as job memory Rate Slogan ERA Please refer to the following sections to prepare your job How to Select a Rate on page 151 How to Add or Cancel a Slogan on the Imprint on page 226 How to Add or...

Страница 204: ...ons Job Memories allow you assign postage costs to pre selected accounts If your mail requires different settings then the job memories are the solution all your settings are stored in a single memory Just press the job memory key instead of multiple keystrokes to select all the required elements A list of job memories can be viewed under the Report menu by selecting Job Memory List It will displa...

Страница 205: ...ted with the desired Job Memory Long press on numeric keypad to select corresponding memory For example to use the memory 4 long press The job memory zone of the home screen displays the current job memory name 200 Page 200 Jun 21 2021 09 24 10 Configuring your Mailing System ...

Страница 206: ...y connected to the LAN at power up To set the postal Online Services connection 1 From the home screen Press and select the path Advanced Settings Settings Communication settings Type of connection The Postal access screen is displayed If you did not have the LAN plugged into the system you will get a warning message Please follow the message check your communication cable or device and press OK 2...

Страница 207: ...nly be performed if the machine was actually connected to the LAN at power up To set the parameters of the LAN 1 From the home screen Press and select the path Advanced Settings Settings Communication settings LAN settings The DHCP configuration is displayed 2 Select Auto to automatically configure the LAN recommended 202 Page 202 Jun 21 2021 09 24 10 Configuring your Mailing System ...

Страница 208: ...3 Press OK to validate The screen Host name setting is displayed It is un editable 10 Configuring your Mailing System 203 Page 203 Jun 21 2021 09 24 ...

Страница 209: ...fault Value chosen by supervisor Proxy Port 8080 by default Value chosen by supervisor Proxy Domain Name Empty by default Value chosen by supervisor Proxy Username Empty by default Value chosen by supervisor Proxy Password Empty by default Value chosen by supervisor Press OK The Proxy Kerberos settings screen will display Kerberos realm Empty by default Value chosen by supervisor KDC server name E...

Страница 210: ...ngs Date Management Adjust Date Time If you are processing postage at the time when the system clock adjusts for daylight savings time the Mailing System will wait until you are finished before displaying the new time 2 To resynchronise the time with server press OK 3 Press OK to connect Postal Server 205 Page 205 Jun 21 2021 09 24 10 Configuring your Mailing System ...

Страница 211: ...lock the PSD on page 99 How to Check Adjust the Machine Time and Date on page 206 How to Set the Automatic Date Advance Time The Automatic Date Advance function automatically changes the date printed on mail pieces at a preset time to the next working day date Example You can set the system to change dates at 17 00 hours and set Saturdays and Sundays to be non working days From Friday 17 00 hours ...

Страница 212: ...date advance screen is displayed 2 Select Set Hours enter the Automatic Date Advance time 00 00 hours is not allowed and press OK 3 Select Set working days following by the day number on the keypad to select deselect each day and then press OK 4 Press to exit 10 Configuring your Mailing System 207 Page 207 Jun 21 2021 09 24 ...

Страница 213: ......

Страница 214: ...Imprint 216 How to Display the List of ERAs 217 How to Modify an ERA 218 How to Delete an ERA 220 How to Download New ERAs 221 11 5 Managing Prepaid Imprints PPI s 223 How to Display the List of PPI s 223 How to Delete a PPI 224 How to Download New PPI s 225 11 6 Managing Slogans 226 How to Add or Cancel a Slogan on the Imprint 226 How to Display the List of Slogans 227 How to Modify a Slogan 228 ...

Страница 215: ......

Страница 216: ...rential Weighing or increasing the maximum number of accounts Update postal Rates and Prepaid Postal Imprints PPI s Downloading custom Slogans or ERAs To update your Mailing System s operating system see Online Services on page 173 211 Page 211 Jun 21 2021 09 24 11 Options and Updates ...

Страница 217: ...list screen indicates unread messages and allows you to delete read messages How to Read Messages The mailbox allows you to receive messages from the mailing system or from customer service via the server 1 From the home screen Press and select the path Mailbox The Mailbox screen is displayed 2 Select the message to read and press OK 3 Select Open to read the message 212 Page 212 Jun 21 2021 09 24...

Страница 218: ...ling system or from customer service via the server 1 From the home screen Press and select the path Mailbox The Mailbox screen is displayed 2 Select the message to be deleted and press OK 3 Select Delete to erase the message 11 Options and Updates 213 Page 213 Jun 21 2021 09 24 ...

Страница 219: ...for each option For more information about the options you can add to your Mailing System please contact customer service To display the option list 1 From the home screen Press and select the path Advanced Settings Online Services Option list The Options list screen is displayed 2 To display the details of an option select the option and press OK 214 Page 214 Jun 21 2021 09 24 11 Options and Upda...

Страница 220: ... Services server To activate an option that is ready for downloading on the Online Services server 1 Check that your Mailing System is connected to a network see Connections on page 21 and that the connection is properly configured see Connection Settings on page 201 2 Select Update It will trigger a call to the Online Services server 3 After the call you can display installed options See How to D...

Страница 221: ...Slogan on page 226 To add load ERAs contact your Customer Service The available ERAs are automatically downloaded into your mailing system by connecting to the Online Services server See How to Load New Options on page 215 How to Add or Cancel an ERA on the Imprint To add an ERA to the imprint or to cancel the ERA 1 Press 216 Page 216 Jun 21 2021 09 24 11 Options and Updates ...

Страница 222: ... Press OK to validate your selection The Imprint screen is displayed with updated parameters home screen See also Managing ERAs on page 216 How to Display the List of ERAs The list of ERAs includes the ERAs that are installed in the Mailing System and indicates with a check mark the active ERA To display the list of ERAs 11 Options and Updates 217 Page 217 Jun 21 2021 09 24 ...

Страница 223: ...1 From the home screen Press 2 Select ERA Slogans The list of ERAs is displayed How to Modify an ERA To modify an ERA 1 From the home screen Press 218 Page 218 Jun 21 2021 09 24 11 Options and Updates ...

Страница 224: ...s is displayed 3 Select the ERA and press OK The Slogan Management screen is displayed 4 Select Edit 5 Change the ERA name using the keypad and press OK The system updates the ERA list 11 Options and Updates 219 Page 219 Jun 21 2021 09 24 ...

Страница 225: ...How to Delete an ERA To delete an ERA 1 From the home screen Press 2 Select ERA Slogans The list of ERAs is displayed 220 Page 220 Jun 21 2021 09 24 11 Options and Updates ...

Страница 226: ... is displayed 4 Select Delete The system asks for a confirmation 5 Press OK to confirm deletion The system updates the ERA list How to Download New ERAs To download new ERAs 1 From the home screen Press 11 Options and Updates 221 Page 221 Jun 21 2021 09 24 ...

Страница 227: ...logans The list of ERAs is displayed 3 Select Download new and press OK The Mailing System connects to the Online Services server and downloads available slogans 222 Page 222 Jun 21 2021 09 24 11 Options and Updates ...

Страница 228: ...ete PPI s How to Display the List of PPI s The list of PPI s includes the PPI s that are installed in the Mailing System and indicates with a check mark the active PPI To display the list of PPI s 1 From the PPI home screen Press 2 Select PPI The list of PPI s is displayed 223 Page 223 Jun 21 2021 09 24 11 Options and Updates ...

Страница 229: ...ect PPI The list of PPI s is displayed 3 Select the PPI and press OK The PPI Management screen is displayed 4 Select Delete The system asks for a confirmation 5 Press OK to confirm deletion The system updates the PPI list 224 Page 224 Jun 21 2021 09 24 11 Options and Updates ...

Страница 230: ... 1 From the PPI home screen Press 2 Select PPI The list of PPI s is displayed 3 Select Add new and press OK The Mailing System connects to the Online Services server and downloads available PPI s 11 Options and Updates 225 Page 225 Jun 21 2021 09 24 ...

Страница 231: ... slogans from the list Download new slogans The available slogans are automatically downloaded into your Mailing System by connecting the Mailing System to the Online Services server See How to Load New Options on page 215 How to Add or Cancel a Slogan on the Imprint To add a slogan to the imprint or cancel the slogan 1 Press 226 Page 226 Jun 21 2021 09 24 11 Options and Updates ...

Страница 232: ...alidate your selection The Imprint screen is displayed with updated parameters home screen See also Managing Slogans on page 226 How to Display the List of Slogans The list of slogans includes the slogans that are installed in the Mailing System and indicates with a check mark the active slogan To display the list of slogans 11 Options and Updates 227 Page 227 Jun 21 2021 09 24 ...

Страница 233: ...1 From the home screen Press 2 Select Slogan The list of slogans is displayed How to Modify a Slogan To modify a slogan 1 From the home screen Press 228 Page 228 Jun 21 2021 09 24 11 Options and Updates ...

Страница 234: ...isplayed 3 Select the slogan and press OK The Slogan Management screen is displayed 4 Select Edit 5 Change the slogan name using the keypad and press OK The system updates the slogan list 11 Options and Updates 229 Page 229 Jun 21 2021 09 24 ...

Страница 235: ...How to Delete a Slogan To delete a slogan 1 From the home screen Press 2 Select Slogan The list of slogans is displayed 230 Page 230 Jun 21 2021 09 24 11 Options and Updates ...

Страница 236: ...on 5 Press OK to confirm deletion The system updates the slogan list How to Remove a Slogan from a Job Memory Job Memories are presets for your imprint types Each Job Memory is identified by a name and a number The Home screen displays the name of the current Job Memory 11 Options and Updates 231 Page 231 Jun 21 2021 09 24 ...

Страница 237: ...ve the GOOD NEWS slogan from Job Memory M1 1 From the home screen press the Imprint button Imprint button 2 Select Slogan and press OK OK mem button 3 Select None and press OK 232 Page 232 Jun 21 2021 09 24 11 Options and Updates ...

Страница 238: ...o save your change press and hold the OK Mem button until the Save your memory screen appears 6 Select the memory number for the memory your saving in this example we re saving M1 2nd Inl Lett Press Save 7 Select whether you wish to save the account information linked to your job memory 11 Options and Updates 233 Page 233 Jun 21 2021 09 24 ...

Страница 239: ... to save the job memory 9 The S no longer appears indicating the slogan has been removed How to Download New Slogans To download new slogans 1 From the home screen Press 234 Page 234 Jun 21 2021 09 24 11 Options and Updates ...

Страница 240: ...an The list of slogans is displayed 3 Select Download new and press OK The Mailing System connects to the Online Services server and downloads available slogans 11 Options and Updates 235 Page 235 Jun 21 2021 09 24 ...

Страница 241: ... the Online Services server as a user Rate Table List The Rate Table List display all available rate tables that are currently installed in your Mailing System and indicates with a check mark the active rate table Rate tables will automatically become active on their effective date For each rate table rate details part number expiration date rate option can be displayed To view the current rate fi...

Страница 242: ... is in use Download New Rates To download new rates 1 Press The Rate Selection screen is displayed Press 8 to select the Adv Rate 2 Select Update rate table and press OK The Mailing System connects to the Online Services server and downloads available rates 11 Options and Updates 237 Page 237 Jun 21 2021 09 24 ...

Страница 243: ......

Страница 244: ...the Cartridge Automatically 260 How to Clean the Cartridge Manually 245 How to Align the Cartridge 247 12 2 Moistener 249 Cleaning the Brushes and Sponge Moistener 260 How to Fill the Moistener 252 12 3 Service Processes 253 How to Run the Registration Update 253 How to Save Customer Data 255 239 Page 239 Maintenance Jun 21 2021 09 24 ...

Страница 245: ......

Страница 246: ...rforms cleaning automatically or on your request You can also clean the cartridge manually if the automatic cleaning is not sufficient The ink cartridge also has to be aligned If you observe poor print quality streaked too light blurred etc see Cleaning Cartridge on page 260 How to Change the Ink Cartridge If after cleaning you still observe poor print quality streaked too light blurred etc or the...

Страница 247: ...replacement position Keep fingers away from the ink cartridge while it is moving to the replacement position 2 Press down on the back of the ink cartridge to disengage it 3 Lift out the old ink cartridge 242 Page 242 Jun 21 2021 09 24 12 Maintenance ...

Страница 248: ... on the new ink cartridge The caps are removed 5 Remove the protective strips from the new ink cartridge 6 Insert the new ink cartridge and then push it forward until you hear the click 12 Maintenance 243 Page 243 Jun 21 2021 09 24 ...

Страница 249: ...Level and Cartridge Data Ink Cartridge Data includes information such as consumption and date installed To display the ink cartridge data 1 From the home screen Press and select the path Cartridge Ink information The Ink information screen is displayed 244 Page 244 Jun 21 2021 09 24 12 Maintenance ...

Страница 250: ...tridge To clean the cartridge automatically 1 From the home screen Press and select the path Cartridge Cleaning Process The cleaning starts automatically How to Clean the Cartridge Manually Each ink cartridge contains two cartridges If after cleaning the cartridge you still observe poor print quality streaked too light blurred etc or the system indicates the ink cartridge is out of ink it is time ...

Страница 251: ...e replacement position Keep fingers away from the ink cartridge while it is moving to the replacement position 2 Press down on the back of the ink cartridge to disengage it 3 Lift out the ink cartridge 246 Page 246 Jun 21 2021 09 24 12 Maintenance ...

Страница 252: ...e the base cover How to Align the Cartridge After installing a new ink cartridge you should verify that the ink cartridge is aligned To align the cartridge 1 From the home screen Press and select the path Cartridge Ink cartridge alignment 12 Maintenance 247 Page 247 Jun 21 2021 09 24 ...

Страница 253: ...rtical line 4 Press OK to validate 5 Repeat the previous step until lines F are aligned 6 Press to exit Ink Management Service The Ink Management service sends an electronic message to the Online Services server when the mailing machine s ink supply is running low An e mail message then informs you of that condition so that the ink cartridge can be replaced in time For more information please cont...

Страница 254: ... flap separation blade to open the envelope flap slightly Sealing Moistener Maintenance Keep fresh water in the water reservoir Clean the Brush Assembly weekly with fresh water Rinse out the sponge with fresh water weekly Replace the brush assembly when the moistener is not moistening properly Replace the sponge when it begins to break down and not soak up water properly Hand Feed Table Moistener ...

Страница 255: ...ing the Brushes and Sponge Moistener To avoid sealing issues Keep fresh water in the water reservoir Clean the Brush Assembly weekly with fresh water Rinse out the sponge with fresh water weekly Replace the brush assembly when the moistener is not moistening properly Replace the sponge when it begins to break down and not soak up water properly To clean the brushes and sponge of the feed table moi...

Страница 256: ...le 2 Raise the brush 3 Lift the metal sponge retainer to remove the sponge 4 Clean the sponge and the brush 5 Reinstall the sponge and retainer 6 Put the brush back 7 Put the moistener back into place 12 Maintenance 251 Page 251 Jun 21 2021 09 24 ...

Страница 257: ...e Moistener To add water to the moistener 1 Remove the moistener from the table 2 Fill the moistener with water up to the limit marks 3 Put the moistener back into place 252 Page 252 Jun 21 2021 09 24 12 Maintenance ...

Страница 258: ...anged your address Contact your Customer Service to change your information then you will be instructed to perform the update registration procedure To run the registration update 1 From the home screen Press and select the path Advanced Settings Maintenance Process Diagnostics Processes Update Registration 2 Press OK to begin the procedure 253 Page 253 Jun 21 2021 09 24 12 Maintenance ...

Страница 259: ...ress OK A message for entering the geodesic code Please refer to User Guide for allowed values 5 Press OK 6 Enter the Geocode 7 Press OK The update registration procedure is finished 8 Press Finish to return to menu 9 Press the Sleep Wake Soft Off button to exit 254 Page 254 Jun 21 2021 09 24 12 Maintenance ...

Страница 260: ...request from by Customer Service To run the registration update 1 From the home screen Press and select the path Advanced Settings Maintenance Process Diagnostics Processes Save Customer Data 2 Press OK to begin the procedure 3 Press OK when the process is complete The message Backup Customer Data Server call suceessful is displayed 12 Maintenance 255 Page 255 Jun 21 2021 09 24 ...

Страница 261: ......

Страница 262: ...nsor Diagnostic Test 264 Display Diagnostic Test 265 IP Config Diagnostic Test 266 IP Configuration Checker Diagnostic Test 267 Keypad Diagnostic Test 270 Ping Server Diagnostic Test 271 Ping Tool Diagnostic Test 272 Serial Connectors Diagnostic Test 273 Test Server Diagnostic Test 274 USB Ports Diagnostic Test 275 13 3 System Data 277 How to Display Software Data 277 How to Display Hardware Data ...

Страница 263: ......

Страница 264: ...mmed in the Base 1 Pull the release handle located underneath the base to lower the transport belts and wheels Hold the handle The release handle lowers the rollers to enable the user to clear any jams 2 Using your other hand remove the jammed envelopes 3 Release the jam release handle to put the transport belt and wheels back in position 259 Page 259 Jun 21 2021 09 24 13 Troubleshooting ...

Страница 265: ...t blurred etc or the system indicates the ink cartridge is out of ink It is time to replace the ink cartridge To clean the cartridge automatically 1 From the home screen Press and select the path Cartridge Cleaning Process The cleaning starts automatically Cleaning the Brushes and Sponge Moistener To avoid sealing issues 260 Page 260 Jun 21 2021 09 24 13 Troubleshooting ...

Страница 266: ...perly Replace the sponge when it begins to break down and not soak up water properly To clean the brushes and sponge of the feed table moistener 1 Remove the moistener assembly from the table 2 Raise the brush 3 Lift the metal sponge retainer to remove the sponge 4 Clean the sponge and the brush 5 Reinstall the sponge and retainer 6 Put the brush back 13 Troubleshooting 261 Page 261 Jun 21 2021 09...

Страница 267: ... not correct 1 Press OK to clear the error message 2 Press the Rate key and select a rate class that can accommodate the weight of the package Example select Priority if the rate you had been using was First Class 3 Press lightly on the Weigh Platform to establish the weight and postage with the new rate You have placed a package on the platform that is too heavy for the rate selected 1 Remove the...

Страница 268: ...ostic display test 1 From the home screen Press and select the path Advanced Settings Maintenance Process Diagnostics 2 Select Base from the list displayed on the screen 3 Select Base Status from the list displayed on the screen 4 The display shows Press OK 263 Page 263 Jun 21 2021 09 24 13 Troubleshooting ...

Страница 269: ...access to a Base Sensor diagnostic test 1 From the home screen Press and select the path Advanced Settings Maintenance Process Diagnostics 2 Select Base from the list displayed on the screen 3 Select Base Sensors from the list displayed on the screen 4 The display shows 264 Page 264 Jun 21 2021 09 24 13 Troubleshooting ...

Страница 270: ...ss to a diagnostic display test 1 From the home screen Press and select the path Advanced Settings Maintenance Process Diagnostics 2 Select Base from the list displayed on the screen 3 Select Display from the list displayed on the screen 4 The display shows 13 Troubleshooting 265 Page 265 Jun 21 2021 09 24 ...

Страница 271: ... a diagnostic display test 1 From the home screen Press and select the path Advanced Settings Maintenance Process Diagnostics 2 Select Communication from the list displayed on the screen 3 Select IP Configuration from the list displayed on the screen 266 Page 266 Jun 21 2021 09 24 13 Troubleshooting ...

Страница 272: ...4 The Display shows IP Configuration Checker Diagnostic Test Checks LAN connection To gain access to a diagnostic display test 13 Troubleshooting 267 Page 267 Jun 21 2021 09 24 ...

Страница 273: ...the path Advanced Settings Maintenance Process Diagnostics 2 Select Communication from the list displayed on the screen 3 Select IP Configuration Checker from the list displayed on the screen 268 Page 268 Jun 21 2021 09 24 13 Troubleshooting ...

Страница 274: ...4 Enter the IP Address 13 Troubleshooting 269 Page 269 Jun 21 2021 09 24 ...

Страница 275: ...tic Keypad test 1 From the home screen Press and select the path Advanced Settings Maintenance Process Diagnostics 2 Select Base from the list displayed on the screen 3 Select Keypad from the list displayed on the screen 4 The display shows 270 Page 270 Jun 21 2021 09 24 13 Troubleshooting ...

Страница 276: ...st 1 From the home screen Press and select the path Advanced Settings Maintenance Process Diagnostics 2 Select Communication from the list displayed on the screen 3 Select Ping Server from the list displayed on the screen 4 After a successful connection the display shows Press OK 13 Troubleshooting 271 Page 271 Jun 21 2021 09 24 ...

Страница 277: ... 1 From the home screen Press and select the path Advanced Settings Maintenance Process Diagnostics 2 Select Communication from the list displayed on the screen 3 Select Ping Tool from the list displayed on the screen 4 Enter the IP Address 272 Page 272 Jun 21 2021 09 24 13 Troubleshooting ...

Страница 278: ...est 1 From the home screen Press and select the path Advanced Settings Maintenance Process Diagnostics 2 Select Base from the list displayed on the screen 3 Select Serial Connectors from the list displayed on the screen 4 The display shows Press OK 13 Troubleshooting 273 Page 273 Jun 21 2021 09 24 ...

Страница 279: ...om the home screen Press and select the path Advanced Settings Maintenance Process Diagnostics 2 Select Communication from the list displayed on the screen 3 Select Test Server from the list displayed on the screen 4 After a successful connection the display shows Press OK 274 Page 274 Jun 21 2021 09 24 13 Troubleshooting ...

Страница 280: ...a diagnostic USB Ports test 1 From the home screen Press and select the path Advanced Settings Maintenance Process Diagnostics 2 Select Base from the list displayed on the screen 3 Select USB Ports from the list displayed on the screen 13 Troubleshooting 275 Page 275 Jun 21 2021 09 24 ...

Страница 281: ...4 The display shows Plug in the two USB keys then ppress OK 5 The display shows test successful upon completion 276 Page 276 Jun 21 2021 09 24 13 Troubleshooting ...

Страница 282: ...mation PSD Loader OS PACK XNDF DATA DELTA language variant To display Software Data 1 From the home screen Press and select the path Advanced Settings Maintenance System Info Software information 2 The system software data appears on the screen 277 Page 277 Jun 21 2021 09 24 13 Troubleshooting ...

Страница 283: ...om the home screen Press and select the path Advanced Settings Maintenance System Info Hardware Information 2 The system hardware data appears on the screen How to Display the Machine Counters The display will show the data of the machine counters To display the data of the machine counters 278 Page 278 Jun 21 2021 09 24 13 Troubleshooting ...

Страница 284: ...nd select the path Advanced Settings Maintenance System Info Counters 2 The system displays the data of the machine counters How to Display the Event Lists To display the event lists 13 Troubleshooting 279 Page 279 Jun 21 2021 09 24 ...

Страница 285: ... Services The Login screen is displayed Enter the Technician PIN code and press OK 2 Select Software information 3 Select the Base events list or the PSD events list or Server connection history 4 Press OK to validate 280 Page 280 Jun 21 2021 09 24 13 Troubleshooting ...

Страница 286: ...d list in a table with for each error The Code of the event The Date where appends the event The Cycles count when the event occurred 6 Note the Code and refer to your customer service 13 Troubleshooting 281 Page 281 Jun 21 2021 09 24 ...

Страница 287: ......

Страница 288: ...ions contains the main specifications of your Mailing System 14 1 Mail Specifications 285 14 2 General Specifications 286 14 3 Operating Conditions 287 14 4 System Specifications 288 283 Page 283 Specifications Jun 21 2021 09 24 ...

Страница 289: ......

Страница 290: ...he envelope flap sizes as illustrated below note the illustration is not to scale Envelopes Minimum Weight 3 g Maximum Weight 750 g Minimum Envelope Thickness 0 2 mm Maximum Envelope Thickness 10 mm 1 envelope at a time no sealing 285 Page 285 Jun 21 2021 09 24 14 Specifications ...

Страница 291: ... with moistener 188 mm x 218 mm x 99 mm Feed Table 152 mm x 278 mm x 118 mm Weight Base 10 6 kg Feed table 0 4 kg Power Frequency 50 Hz Max current rating full configuration 0 2 A Power supply 230 V 10 2 poles with EARTHED circuit up to standards NFC15 100 286 Page 286 Jun 21 2021 09 24 14 Specifications ...

Страница 292: ...erated in the following conditions Ambient temperature 10 C 40 C Temperature range 80 max without condensation Relative humidity Weighing accuracy To obtain the best weighing results use a solid and steady table Away from any doors Away from any fan 287 Page 287 Jun 21 2021 09 24 14 Specifications ...

Страница 293: ...ccounts you can create is set to 30 by default and can be raised optionally to 100 Weighing accuracy To obtain the best weighing results use a solid and steady table Away from any doors Away from any fan 288 Page 288 Jun 21 2021 09 24 14 Specifications ...

Страница 294: ... 79 104 105 141 142 154 156 161 163 168 169 170 181 206 236 Date Advance 206 Daylight Savings Time 206 Diagnostics 175 Differential Weighing 18 39 63 64 211 E Energy Star 3 23 ERA 9 17 33 67 84 86 196 198 216 217 F Feed Table 13 75 249 286 Feeder 5 G Generate 140 159 160 165 I Imprint 9 14 17 18 33 34 36 67 72 82 Ink 5 175 176 181 248 Ink Cartridge 14 181 241 244 245 247 248 260 J Jam Release Hand...

Страница 295: ...ffset 17 33 PSD 9 95 99 206 277 R Rate Selection 18 60 151 rate tables 154 236 Rate Updates 175 Received 33 45 reports 116 176 264 Re zero 262 S Scale 43 65 262 285 session 29 30 Sleep 18 32 176 187 Slogan 17 33 67 84 86 89 175 196 198 216 227 231 Sponge 249 250 260 Standard 39 63 75 249 T Task 29 Text 137 265 Thickness 285 Time 8 23 34 187 206 Type of Imprint 29 33 34 36 45 48 67 W Weighing platf...

Страница 296: ...A0139548 B 22 06 2021 ...

Отзывы: