


4
magicolor
6100 Print System
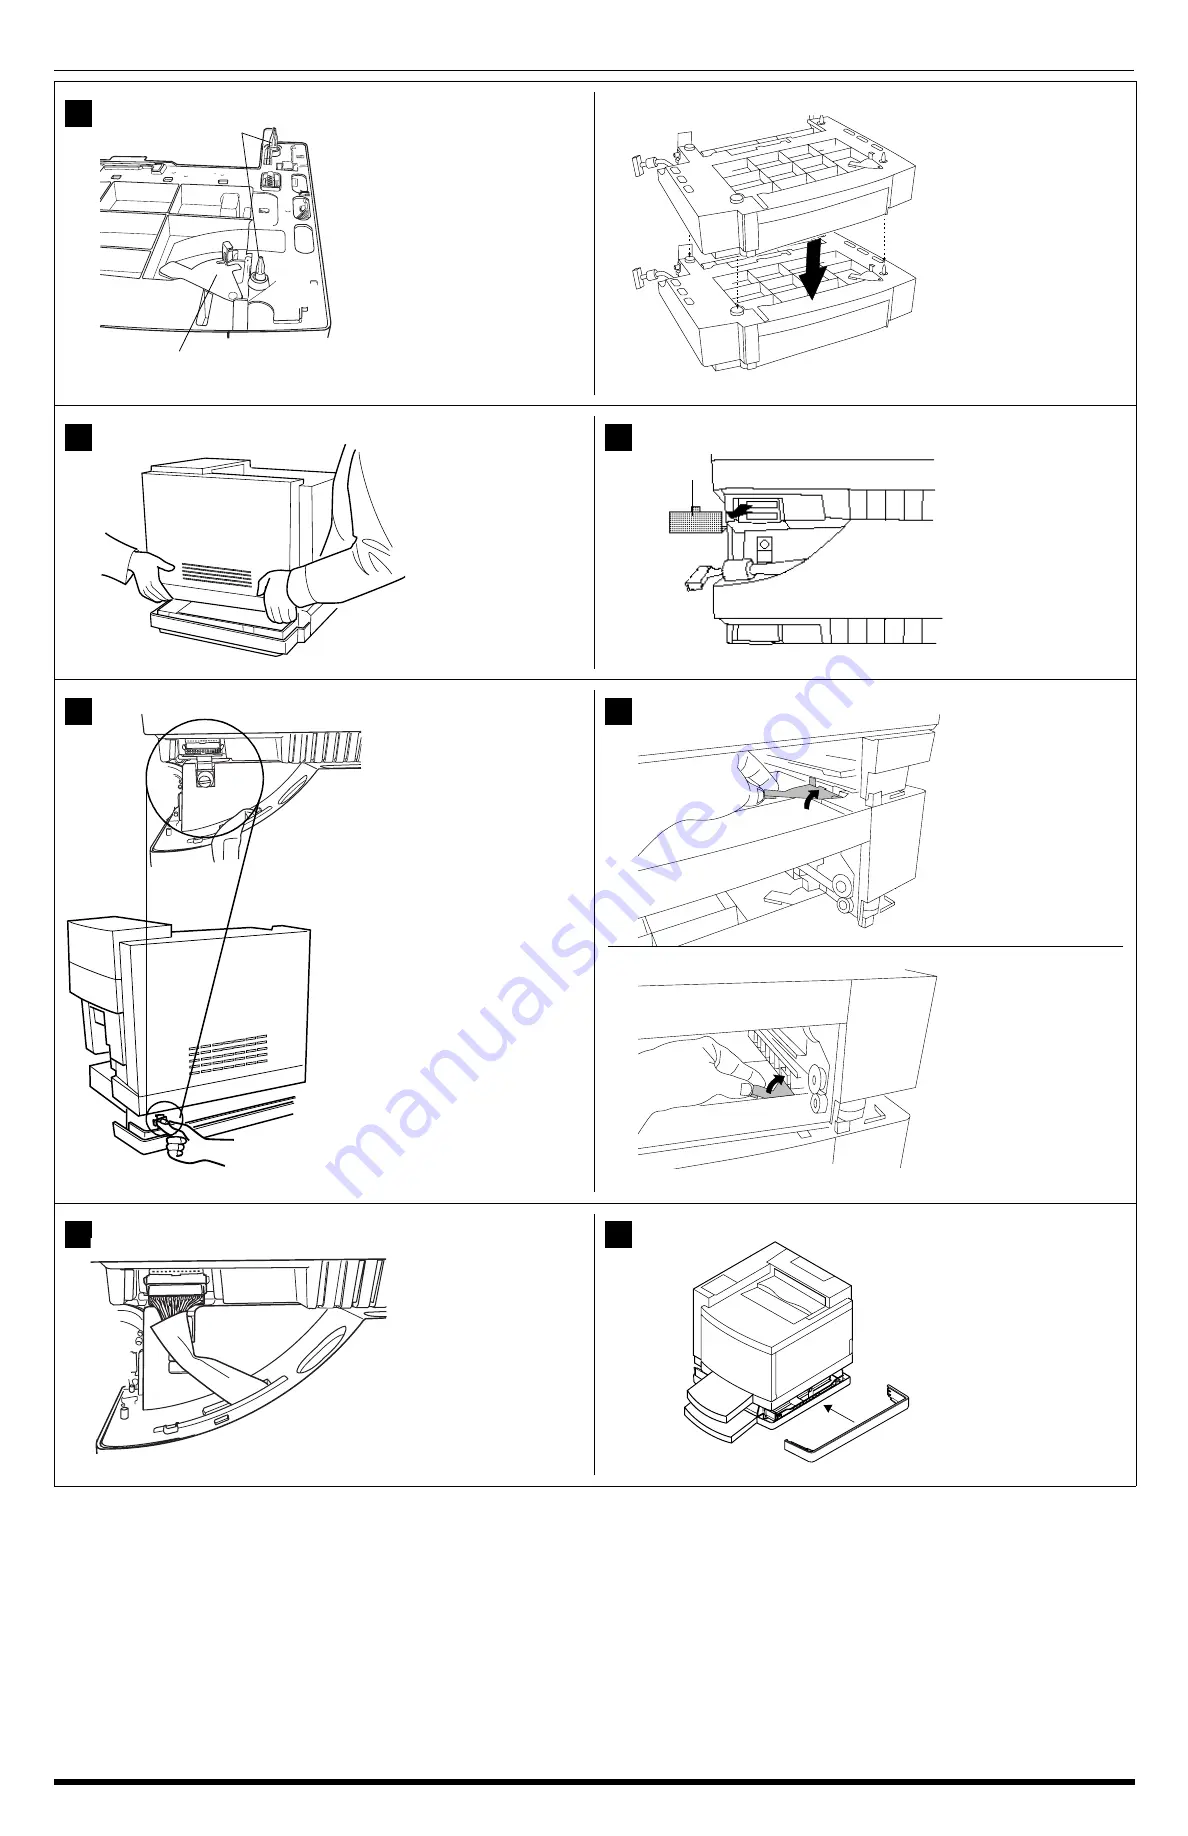
Locate the front and rear
positions of the positioning
pins on the LFU, and make
sure the metal coupler is in
the open position.
For dual LFU installations:
After verifying that both
metal couplers are in
the open position, align
the positioning pins and
set one LFU on top of
the other.
Set the printer on top of the
input feeder.
Be sure to align the printer
and LFU as precisely as
possible. Make sure the
printer is not tilted on top of
the LFU.
Remove the printer’s
connector access cover
from the bottom left side of
the printer by sliding the
cover down and then out.
The connector access
cover is replaced by the left
side cover of the LFU.
Install the metal bracket
underneath the side of the
printer just below the
connector.
Holding the bracket at a
slight angle, slide it up
into the hole underneath
the printer before setting
it to vertical.
Make sure that the hole in
the metal bracket is lined
up with the corresponding
hole on the input feeder.
Tighten the thumbscrew to
attach the bracket to the
lower input feeder.
For dual LFU installations:
After completing the above
steps, repeat the bracket
installation between the
lower and upper LFU.
Remove the cassette from
the printer.
You should be able to see
the metal coupler at the
front upper-right corner of
the printer’s cassette slot.
Push the handle of the
metal coupler around so
the hook is attached to the
slot on the printer.
For dual LFU installations:
In addition to the above
instructions, close the
metal coupler inside of the
top-most LFU’s cassette
slot to secure the two LFU’s
together.
Connect the LFU cable to
the white printer connector.
For dual LFU installations:
Complete the above
instructions and connect
the lower LFU cable to the
upper LFU connector.
Install the right side
cover(s).
3
!
)("""
4
5
*%
6
098mati.eps
7
8
9


