78
DRAINAGE OPTION
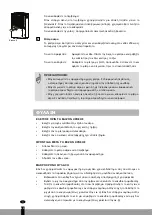
OPTION 1 EMPTYING MANUALLY
Notes:
• Do not remove the bucket when unit is in operation or has just stopped.
Otherwise it may cause some water to drip on the floor.
• Do not use the hose if using water bucket to collect water. When the hose is connected,
water will be drained out through it instead of into the bucket.
1
Hold the handles on both sides of the water bucket and pull it out following the
arrow direction. (Attention: Pull out the bucket carefully in case the water may spill
out from the bucket and onto the floor.)
2
Empty the bucket by grasping the handle on the top of bucket with one hand and
grasping the bottom of bucket with the other hand.
3
Replace bucket in the dehumidifier according to the arrow direction.
OPTION 2 GRAVITY DRAIN HOSE
1
Hose is not provided, so user shall prepare it in advance.
[Size: The hose should have an inner diameter of 14mm]
2
Remove bucket from the unit as instructed.
Open the drainage cover and then install the drainage joint on the drainage outlet
tightly along the arrow direction.
G
NOTE!
The drainage joint is with sealing gasket. Before installing the drainage joint,
reinstall the gasket on the drainage joint if it dropped. Otherwise, there will be
water leakage phenomenon.
3
Insert the drainage pipe into the drainage point.
Picture 3
Picture 4
Picture 5
4
78
Picture 6
Содержание D 416
Страница 35: ...35 5...
Страница 53: ...53 3...
Страница 54: ...1 2 PVG Holding B V 54...
Страница 55: ...A B C 4 E F G H A 2 3 4 5 6 7 8 55...
Страница 56: ...56 220 240 V 50 Hz...
Страница 57: ...57 CE...
Страница 58: ...58 8...
Страница 61: ...61 0 5 24 5 MODE 6 CONTINUOUS 7 FILTER Clean Filter 250 1 3 10 2 5 3 4 Full 5 250 250 2...
Страница 62: ...62 G 1 1 2 3 2 1 14 mm 2 G 3 4 5...
Страница 63: ...63 3 4 G G G 1 6 7 8...
Страница 64: ...64 2 250 G 9...
Страница 65: ...32 C 5 C 5 15 C 65...
Страница 66: ...66 CO 5 C 1 F1...
Страница 67: ...67 2 F2 3 L1 4 F0 5 H3...
Страница 103: ...103...
Страница 137: ...137 1...

