QHY600
4
02
Important hint of using the camera
How to reboot the camera
QHY600 is designed as using the +12V to reboot the camera, Not using the disconnect/reconnect USB
method. So if you want to reboot the camera, just shut down the +12V and then power on it. This feature
is very useful for the remotely obs. You can use a remotely controllable powersupply to reboot the camera.
No
need
to
consider
how
to
do
USB
reconnecting
in
remotely
conditions.
So please note that when you wanting to reboot the camera, just show down/power on the +12V, Not
disconnect/reconnect the USB.
What is the readout mode of QHY600?
The readout mode is the different CMOS drive timing and settings. Different read mode will have different
performance like the different fullwell, different readout noise and different of other noise behaviour. Since
different readmode has its advantages and disadvantages, so we allow user to set different readout mode.
Currently
both
the
ASCOM
driver,
SharpCAP
support
these
options. QHY600 has three readout mode currently.
Image Area Layout
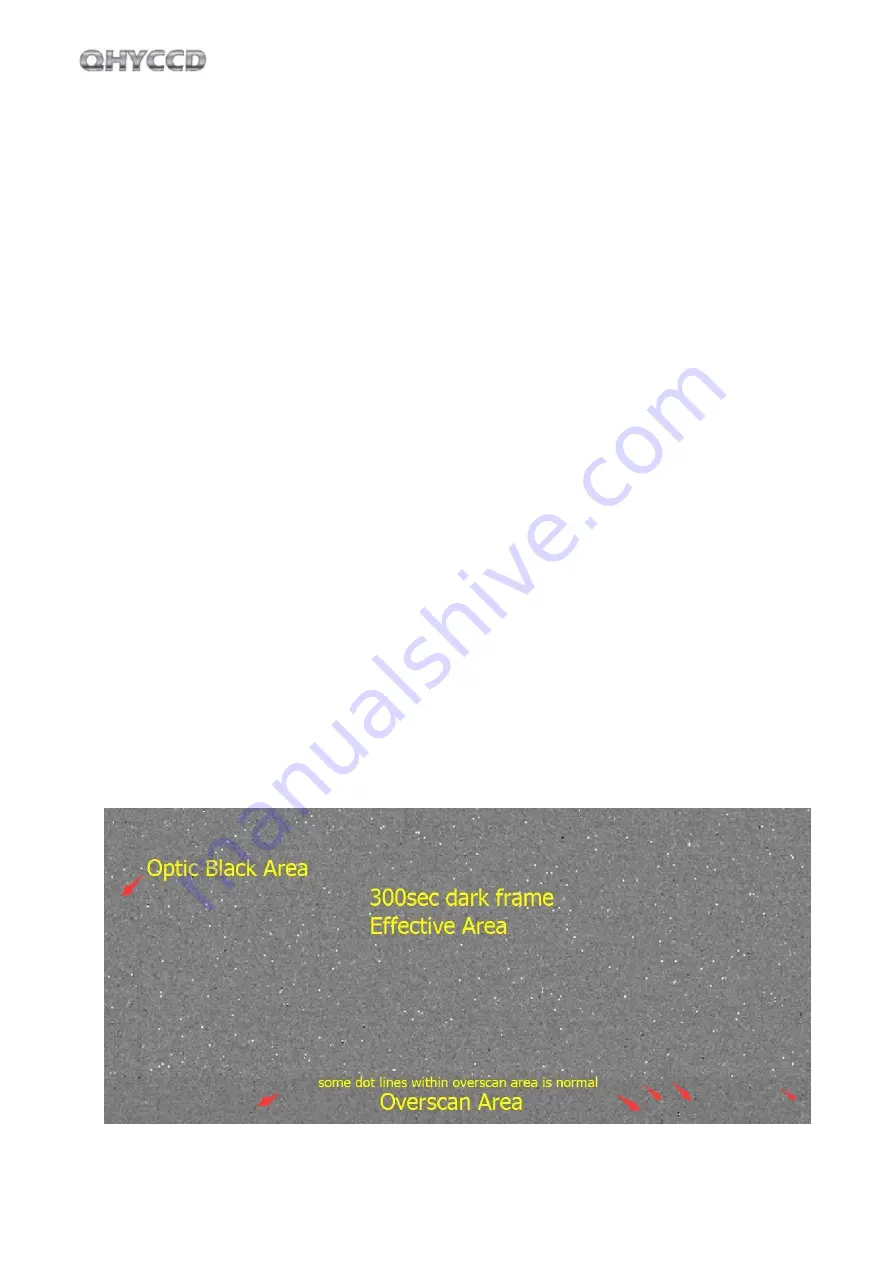
QHY600 can output the whole image with the optic black area and overscan area. The total image size
includes the Optic black area is 9600*6422. The optic black area is on the left of the image and
the overscan area is on bottom of the image.
The different of optic black area and overscan area is that the optic black area includes the dark current
during long exposure while the overscan area does not includes the dark current during exposure time.
Both optic black area and overscan area cannot response to the light. Therefore, it is regards as the "Non-
Effective" area In the Bottom of the overscan area. You may find some "vertical dot lines" in single frame
and after stacking it will become some vertical lines, one explain of the reason of this is the "FPN calibraiton
results” represented in the overcan area. In the effective image area, you will not find this.
The following picture is the left bottom corner of a 300sec dark image. You can find this area.
Содержание QHY600
Страница 1: ...QHY600 COLDMOS Astronomy Camera User Manual ...
Страница 11: ...QHY600 11 After connecting the software follow the steps to set the cooling temperature ...
Страница 12: ...QHY600 12 ...
Страница 14: ...QHY600 14 ...
Страница 17: ...QHY600 17 4 Set the exposure time to capture the image ...
Страница 20: ...QHY600 20 After Adjust the USB_Traffic to avoid the periodic horizontal noise ...
Страница 23: ...QHY600 23 QHY600U3 Amateur Photographic Version ...
Страница 24: ...QHY600 24 ...
Страница 25: ...QHY600 25 ...


