FX-710 OPERATING INSTRUCTIONS
Bluetooth Function
• Pair phone to the FX-710 Bluetooth: Enable phone’s Bluetooth
function and locate the Bluetooth name "CAR KIT”. Some
mobile phones may need to enter the password (the password
is" 0000 "or" 1234 "). When you hear a prompt tone or the BT
icon no longer flashes, it indicates that the BT connection
between the host and the mobile phone has been successful.
• Making phone calls: After the BT connection is complete, press
the "MODE" key to switch to the "BT" state. At this time, you
can hold down the (insert icon) key on the panel to resend the
last phone number, or make a call through the mobile phone.
Función Bluetooth
• Empareje el teléfono con el Bluetooth FX-710: Habilite la función
Bluetooth del teléfono y localice el nombre de Bluetooth "CAR
KIT". Es posible que algunos teléfonos móviles deban ingresar la
contraseña (la contraseña es "0000" o "1234"). Cuando escuche
un el tono de aviso o el icono BT ya no parpadea, indica que la
conexión BT entre el host y el teléfono móvil se ha realizado
correctamente.
• Realización de llamadas telefónicas: después de completar la
conexión BT, presione la tecla "MODE" para cambiar al estado
"BT". En este momento, puede mantener presionada la tecla (icono
de inserción) en el panel para volver a enviar el último número de
teléfono o realizar una llamada a través del teléfono móvil.
Fonction Bluetooth
• Associez le téléphone au FX-710 Bluetooth : activez la fonction
Bluetooth du téléphone et localisez le nom Bluetooth « CAR KIT
». Certains téléphones mobiles peuvent avoir besoin d'entrer le
mot de passe (le mot de passe est « 0000 » ou « 1234 »).
Lorsque vous entendez un la tonalité d'invite ou l'icône BT ne
clignote plus, cela indique que la connexion BT entre l'hôte et le
téléphone mobile a réussi.
• Passer des appels téléphoniques : Une fois la connexion BT
établie, appuyez sur la touche "MODE" pour passer à l'état
"BT". À ce stade, vous pouvez maintenir enfoncée la touche
(insérer l'icône) sur le panneau pour renvoyer le dernier numéro
de téléphone ou passer un appel via le téléphone mobile.
Precautions
• When the fuse needs to be replaced, you must use a fuse with
the same size and amp rating.
• All conductors must be correctly connected based on the wiring
diagram to ensure normal operation.
Precauciones
• Cuando sea necesario reemplazar el fusible, debe usar un
fusible del mismo tamaño y amperaje.
• Todos los conductores deben estar correctamente conectados
según el diagrama de cableado para garantizar un
funcionamiento normal.
Précautions
• Lorsque le fusible doit être remplacé, vous devez utiliser un
fusible de même calibre et de même ampérage.
• Tous les conducteurs doivent être correctement connectés selon
le schéma de câblage pour assurer un fonctionnement normal.
Installation
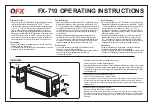
• Install the support and bend the clamp of the support.
• Connect the power wire and loudspeaker wire.
• Insert the aerial plug and push the host into the support to tighten the fixing nut of the stator.
• To disassemble, insert two pieces of the disassembly key into the gap on the left and right
sides and pull it out gently to disengage it from the bracket. Then remove the output cable
and antenna cable.
• Instale el soporte y doble la abrazadera del soporte.
• Conecte el cable de alimentación y el cable del altavoz.
• Introducir el enchufe de antena y empujar el host en el soporte para apretar la tuerca de fijación del estator.
• Para desmontar, inserte dos piezas de la llave de desmontaje en el espacio de los lados izquierdo y
derecho y tire de ella con cuidado para desengancharla del soporte. Luego retire el cable de salida y el
cable de antena.
• Installez le support et pliez la pince du support.
• Connectez le fil d'alimentation et le fil du haut-parleur.
• Insérez la prise d'antenne et poussez l'hôte dans le support pour serrer l'écrou de fixation du stator.
• Pour démonter, insérez deux morceaux de la clé de démontage dans l'espace sur les côtés gauche et
droit et tirez-la doucement pour la dégager du support. Retirez ensuite le câble de sortie et le câble
d'antenne.
Holder
Holder
Screw
Содержание FX-710
Страница 1: ...TM INSTRUCTION MANUAL FX 710...
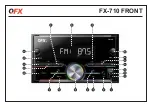
Страница 2: ...FX 710 FRONT 6 7 3 22 14 10 21 13 12 15 16 9 5 2 8 20 19 1 18 11 17 4...
Страница 11: ......


