15
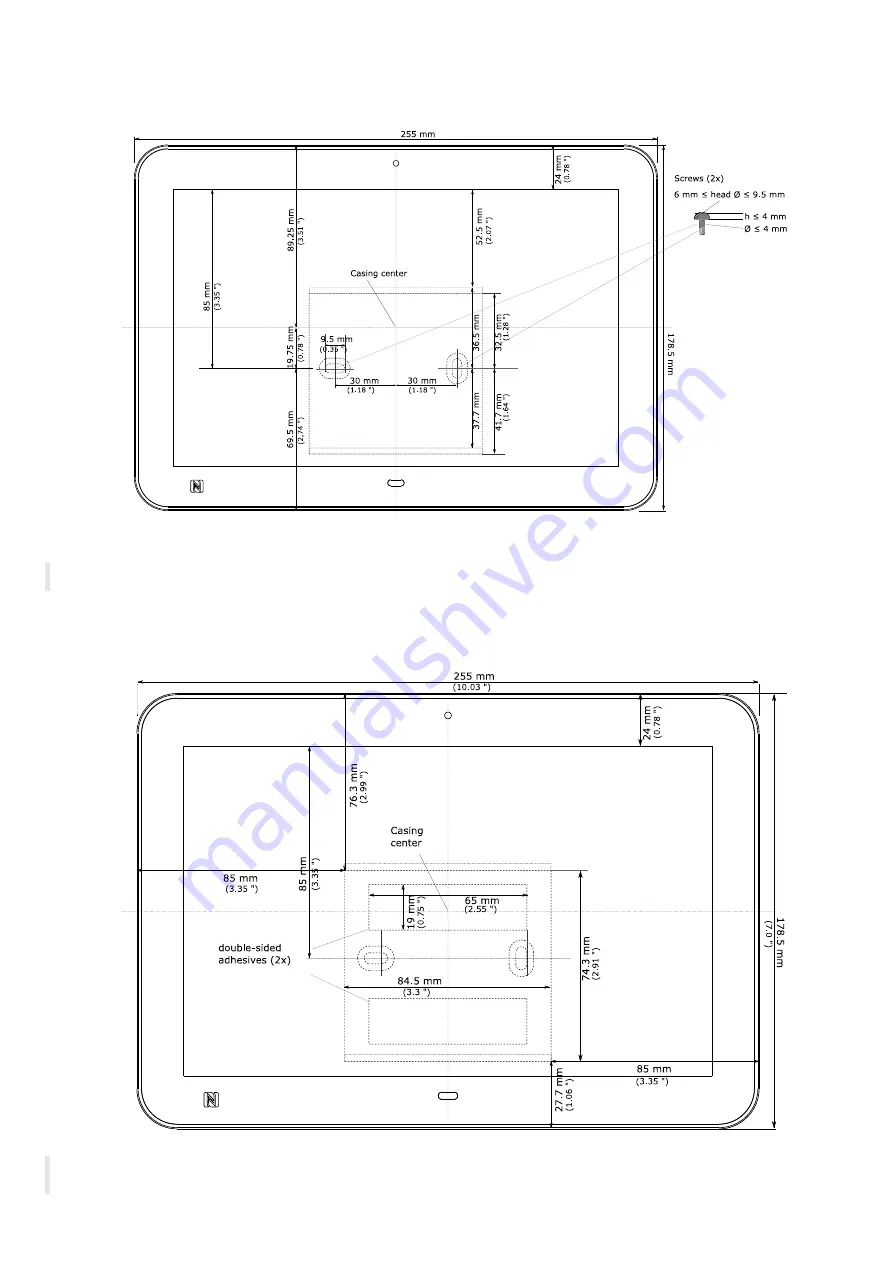
1.3.3 Drilling pattern
In case you want to hang the TAB10s device on the wall, you can do it using the provided mounting bracket.
Follow the drilling pattern to install it.
This mounting bracket can be fixed using screws (recommended for walls with pierceable material).
☛
The screws and dowels required to fix the mounting bracket on the wall are not provided with the product. They can depend on the wall
material.
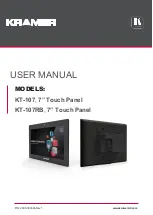
Adhesive pattern
If it is not possible to fix the device with screws, for example when needing to be fixed on a glass wall, you can use the provided adhesive tapes.
⚠
Clean carefully the surface before sticking the adhesive tapes.
⚠
Press firmly the mounting bracket against the glass wall before hanging and locking the TAB10s device on it.
Содержание TAB10s
Страница 1: ...User manual TAB10s 9 10 13 002A TAB10s 8 30...
Страница 5: ...5 Part I Description and installation...
Страница 10: ...10 1 3 1 Device dimensions...
Страница 13: ...13...
Страница 25: ...25 Part II System con guration...
Страница 41: ...41 This message is then displayed until the device is rebooting automatically once...
Страница 49: ...49 Part III Applicative user interface...
Страница 51: ...51 Part IV Administration console user interface...
Страница 87: ...87 Part V Technical information...
Страница 91: ...91 5 3 Antenna return loss This is the return loss diagram for the WIFI Bluetooth antenna...
Страница 93: ...93 Part VI Contacts...
Страница 95: ...95 Part VII Appendix...


