


60
61
3.3 LIVE VIEWING AND RECORDING
SWITCHING VIDEO OUTPUT
As described in
Section 2.4 Video Display
, the DVR is normally configured to output
video signal to a 19” or larger monitor through the VGA port on the back. However, if you
have attached a television to the Video Out port instead, then you will need to press and hold
the
ESCAPE
,
EXIT
or
STOP
button (depending on model) on the front of the DVR for 10
seconds or until you hear a beep to indicate that the video mode has been changed. On the
QT474, the video mode can be changed by pushing and holding the
VGA/TV
button.
LIVE VIEWING
The normal mode of the DVR is to display the live feed from the cameras. Configuring which
channels will be displayed, naming the cameras and other display settings will be covered in
SECTION 4.2
.
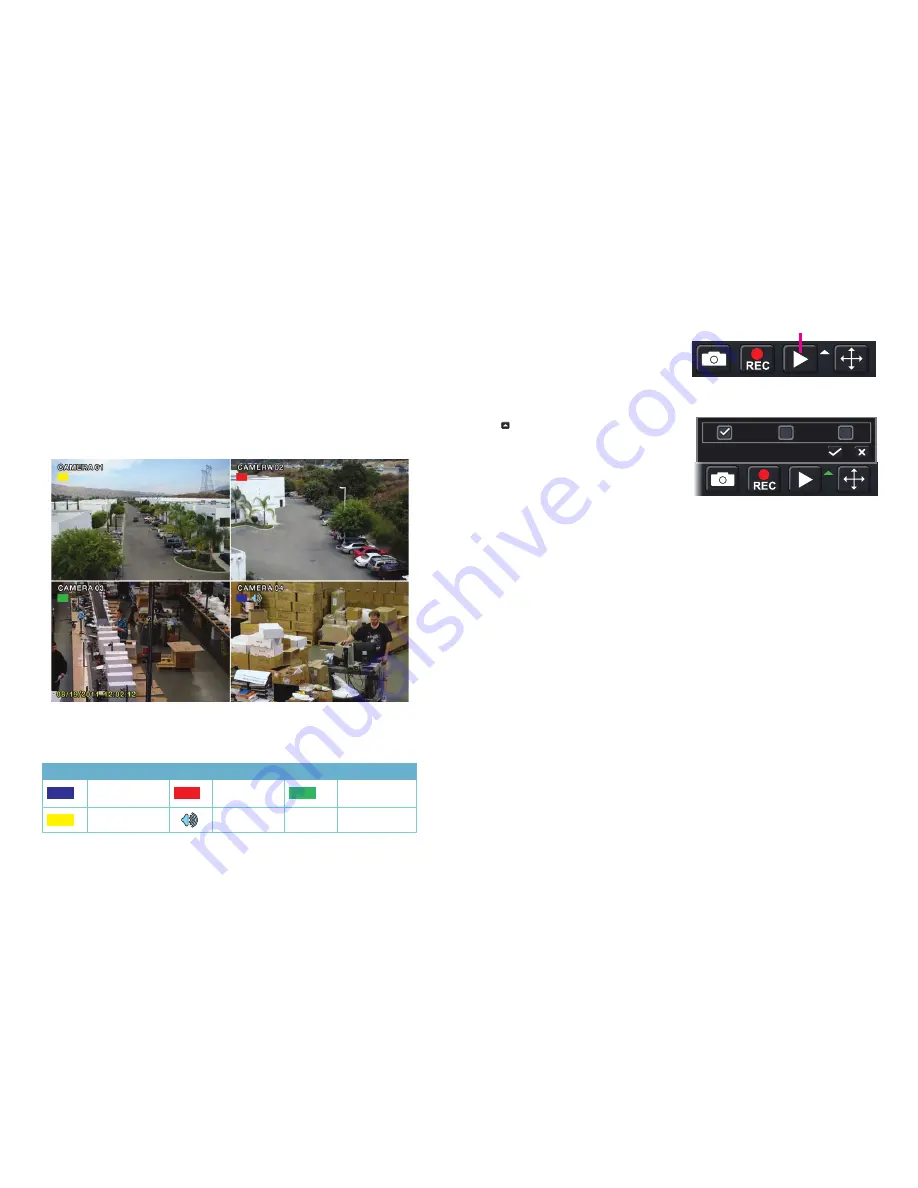
PICTURE 3-8
Symbol
Meaning
Symbol Meaning
Symbol
Meaning
Scheduled
Recording
Alarm
Recording
Manual
Recording
Motion Detection
Audio Enabled
In addition to the camera images, the DVR will display symbols regarding the status of each
camera
RECORDING
Your DVR is configured to record whenever motion is detected. It is also set to record at the
best setting possible. These settings work for most users, but each user’s situation will be
different and directions for adjusting these settings can be found in
Section 4.3 Record
Configuration
.
PICTURE 3-9
PICTURE 3-10
3.4 QUICK PLAYBACK
Pushing the playback button on the DVR or remote will enable you to play back what has
been recently recorded by launching Quick Playback.
Clicking on the
Playback
button within the
Control Bar
will begin the Quick Playback
process as well.
The time period for the Quick Playback can
be set by clicking the upward-pointing arrow
icon next to the
Playback
button. You can
chose to go back 2-, 5- or 10 minutes. This
setting will apply whether you’ve selected
playback on the remote, the front of the DVR
or by clicking on the
Playback
button.
[Minutes]
2
5
10
Playback Button
Only channels with recorded video will display their feeds and those without will be dark.
As shown on the next page, a toolbar will appear below the display showing the playback
controls. If you are using the mouse, clicking on the various controls will affect the video
playback in a similar manner to using the front panel buttons or remote control.
There may be additional video recorded before your starting point and you can go back to
the beginning of the recording within this playback. You will, however, need to use the search
feature described in
Section 4.8
to locate video event recordings from other days, or earlier
times.


