


20
21
Language
This DVR supports English, Spanish, Portuguese and French languages.
1.
From the Main Menu, select SYSTEM to open the SYSTEM SETUP menu
2.
Select LANGUAGE to open the SYSTEM LANGUAGE menu (
IMAGE 30
)
3.
Click the arrow next to the SYSTEM LANGUAGE drop down menu to select the
preferred language
4.
Select APPLY to save settings (the selected language will go into effect after the
system is restarted)
5.
Select EXIT to return to the SYSTEM SETUP menu
Info
The INFO panel allows the user to view the system’s device type, software version and MAC
address, as shown in
IMAGE 31
.
IMAGE 30
IMAGE 31
System Maintenance
The SYSTEM MAINTENANCE menu provides access to reset the DVR to factory default
settings, update the system software (firmware), and set the system’s auto-maintenance
feature.
1.
From the Main Menu, select SYSTEM to open the SYSTEM SETUP menu
2.
Select MAINTAIN to open the SYSTEM MAINTAIN menu (
IMAGE 32
)
3.
To configure the DVR to automatically check for updates when the system is restarted,
click the arrow next to the SYSTEM MAINTAIN drop down menu, select ON
4.
To manually check for system updates, select SYSTEM UPDATE
5.
Select DEFAULT to reset all values to the original factory installed settings
6.
Select APPLY to save settings
7.
Select EXIT to return to the SYSTEM SETUP menu
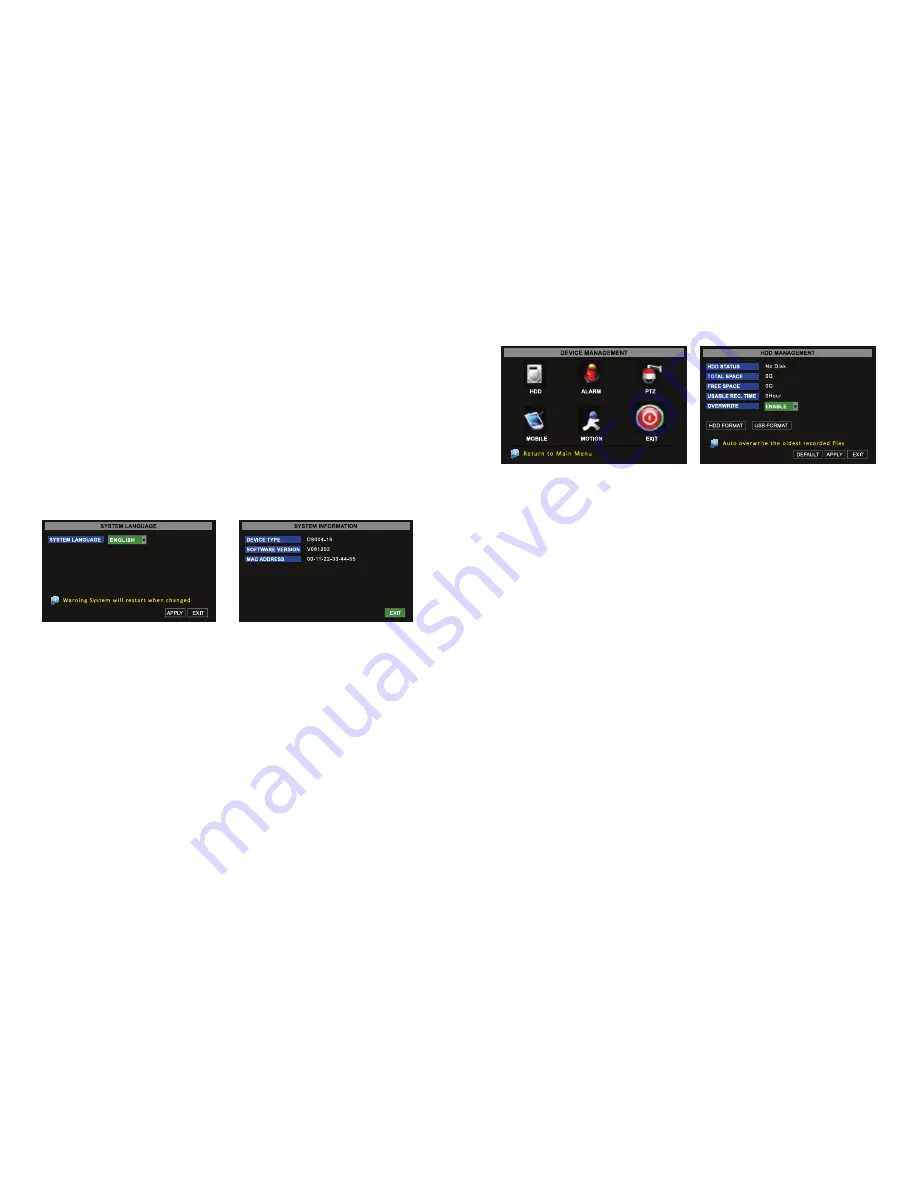
DEVICE MANAGEMENT
The DEVICE MANAGEMENT menu, as shown in
IMAGE 33
, allows access to configure
the Hard Disk Drive, External Alarm, PTZ Cameras, Mobile Phone Monitoring, and Motion
Detection.
IMAGE 33
IMAGE 34
HDD Management
If a new hard drive is installed into this DVR, access the HDD Management menu after a new
HDD is installed.
HDD Status:
If the new hard drive needs to be formatted, the system will automatically detect
and the alert will appear nest to HDD STATUS.
No Disk:
The HDD STATUS will show NO DISK (as shown in
IMAGE 34
) if the hard drive is not
detected, indicating that it is not installed properly.
Not Format:
If the HDD STATUS shows NOT FORMAT, the HDD disc needs to be formatted.
If the HDD STATUS shows NOT FORMAT, follow the instructions in the HDD FORMAT
paragraph in this section.
Normal:
If the HDD STATUS shows NORMAL, the HDD disc does not need to be formatted.
Total Space
indicates the total space size of the hard drive.
Free Space
indicates the amount of unused space available on the hard drive.
Usable Rec Time
indicates the amount of recording time remaining on the system based on
the current recording and resolution settings.
Overwrite
allows the system to either automatically overwrite the oldest recorded files once
the hard drive is full or to turn off the automatic overwrite feature to prevent recordings from
accidentally being erased.
WARNING!


