14
15
EXAMPLE 1: SETTING A CRUISE
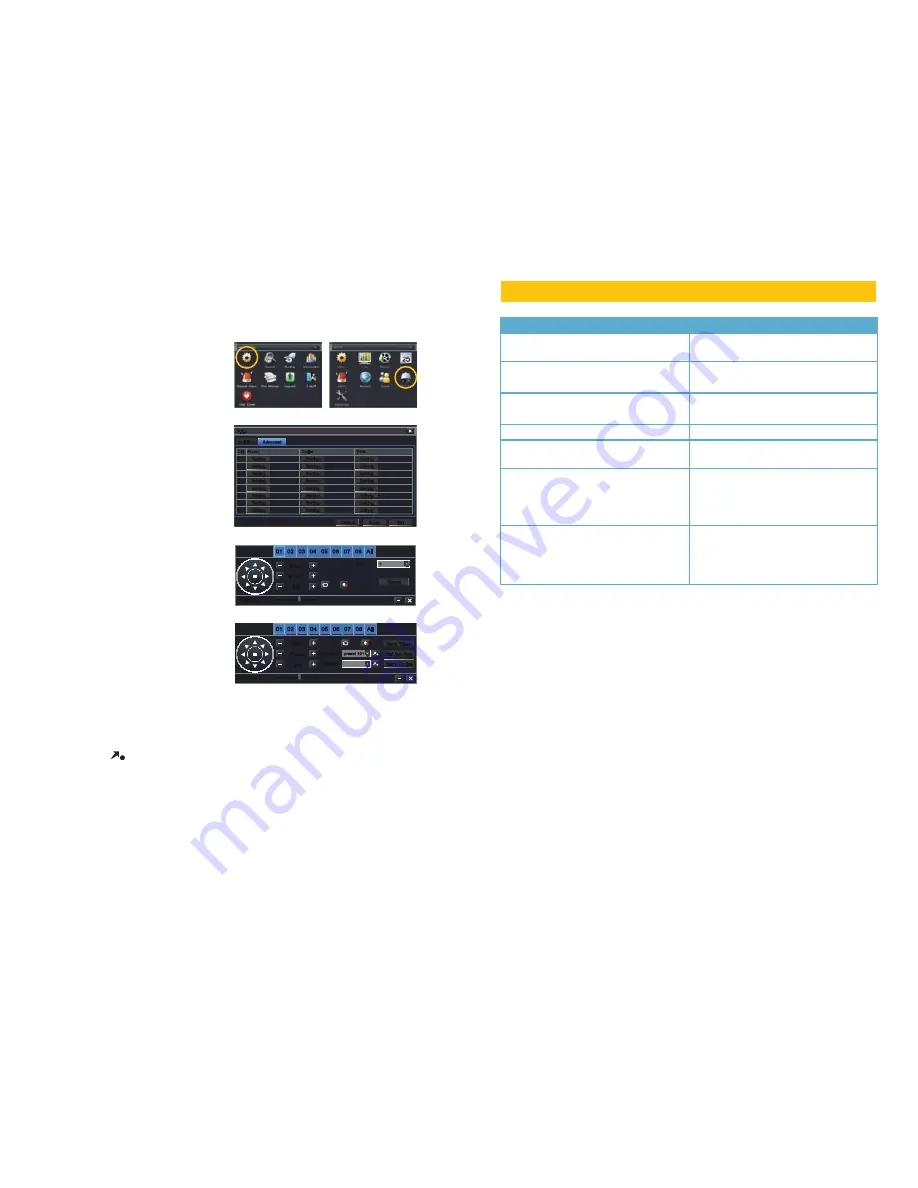
This example is based on using a QT-Series DVR without an attached PTZ keyboard. Your
DVR’s specific commands may differ slightly. Please consult your system’s manual.
STEP 1.
In your DVR’s
PTZ settings
window, select the
Advanced
tab and
then
Preset 1
.
STEP 2.
Rotate the camera to the desired
position using the arrow controls.
STEP 3.
Click
Save
STEP 4.
Select
Preset 2
.
STEP 5.
Rotate camera to desired
second location.
STEP 6.
Click
Save
You may repeat Steps 4-6 for additional
positions if desired.
STEP 7.
Return to the PTZ window and
click on the
Cruise
button for your
channel.
STEP 8.
Click
Add
.
STEP 9.
Double-click on the new cruise
setting to begin loading your presets.
STEP 10.
Click on the
+
button to open
the Preset pop-up window and select
your starting preset point, speed and
stop time.
Speed
: 1-8 with 8 being the fastest
Time
: This is the time the camera will
stay pointed at this location.
Serial Port
Serial Port
Advanced
Advanced
P.T.Z
P.T.Z
Default
Default
Setting
Setting
Setting
Setting
Setting
Setting
Setting
Setting
Setting
Setting
Setting
Setting
Setting
Setting
Setting
Setting
Setting
Setting
Setting
Setting
Setting
Setting
Setting
Setting
Setting
Setting
Setting
Setting
Setting
Setting
Setting
Setting
Setting
Setting
Setting
Setting
Setting
Setting
Setting
Setting
Setting
Setting
Setting
Setting
Setting
Setting
Setting
Setting
Apply
Apply
Exit
Exit
CH Preset
Cruise
Track
1
2
3
4
5
6
7
8
CH Preset
Cruise
Track
1
2
3
4
5
6
7
8
Save
Save
Zoom
Focus
Iris
Zoom
Focus
Iris
Speed: 5
Speed: 5
No.
No.
1
1
02
02
01
01
03
03
04
04
05
05
06
06
07
07
08
08
All
All
Start Track
Start Track
Start Auto Scan
Start Auto Scan
Start Cruise
Start Cruise
Preset
Cruise
Preset
Cruise
Speed: 5
Speed: 5
preset 101
preset 101
02
02
01
01
03
03
04
04
05
05
06
06
07
07
08
08
All
All
Zoom
Focus
Iris
Zoom
Focus
Iris
STEP 11.
Repeat for each preset - up to a maximum of 16 per cruise.
STEP 12.
Click
OK
save your settings and close the windows until you reach the
PTZ
Settings
window. Click
Apply
to save all of the settings.
STEP 13.
Open the PTZ controls from the Control Bar, select your cruise in the pull-down
and click
to begin.
EXAMPLE 2: SETTING A TRACK
An alternate method is to utilize the Track settings - also found in the
Advanced
tab. Click
the
Track
button for the right channel, use the directional controls to point the camera at your
desired starting point and then click
Start Record
. The DVR will then record your movements,
including delays at selected spots. Click
Stop Record
to end. Clicking on
Start Track
in the
PTZ control window will start the camera on its track.
TROUBLESHOOTING
Problem
Solution
No picture or unstable image
Check both the power and video
connections to the camera.
The on-screen image is blurry.
1. Check for fingerprints or dirt on the lens.
2. Check menu settings.
The on-screen image is dim.
1. Check for fingerprints or dirt on the lens.
2. Check monitor settings
The on-screen image is dark.
1. Adjust the monitor contrast settings.
The screen flickers.
Camera may be facing sun, television or
computer monitor.
The IR LEDs will not light up
1. Check the power connection to the
camera.
2. Power supply may need to be located
closer to camera.
The camera is not working properly, is hot,
smells or is producing smoke.
DISCONNECT CAMERA FROM POWER
SUPPLY IMMEDIATELY!
1. Check that correct power supply is in use.
2. Send camera out for repair.


