11.
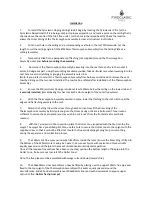
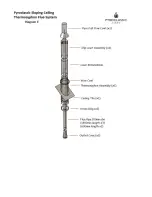
Push fit the Full Flow Pyroclassic Cowl Assembly into the upper end of top flue section sufficiently
for a secure fit. (It is a tight interference fit and may require encouragement with a block of wood and
hammer.).
12.
Slide slip liner upwards until it contacts the Free Flow Cowl skirt.
Now
fix the slip liner to the
200x600mm Liner with four rivets spaced equally around circumference.
Note: The free flow cowl is to sit with the skirt contacting the slip liner perimeter preventing cooling air flow
when flue is cold. When the flue heats up it will expand upwards opening an air gap between the slip liner
and cowl skirt allowing cooling air to flow maintaining the flue at correct temperature.
13.
With the Pyroclassic Sloping Ceiling Flue installed and aligned, attach the stay bars from the slip
liner to the roof spaced at 90 deg apart or as practicable.
(Tip: when attaching bars, fix at liner then ‘twist’ the bar so that the leg aligns flat with desired attach point
on roof. Bend the legs slightly for best fit).
14.
Finally, to ensure a weather tight system, apply a thin coat of clear silicon sealant to the seam line of
outer liners that protrude above the roofline.
---------------------------------------------------------------------------------------------------------------------
NOTE
:
no alterations are needed to the supplied Full Flow Pyro Cowl; this cowl is complete and has been
used for over 25 years.
The Sloping Ceiling Kit will have been supplied with a Ceiling Tile. This is
pre-cut and ordered
to suit the
ceiling angle
required and installed directly onto the
ceiling to tidy up around the Thermosyphon Assembly .
If the flue pipe is within 3 meters of the ridge then the flue pipe must protrude at least 600mm
above the ridge of the roof. If the distance from the ridge is more than 3 metres horizontally, the
flue pipe must protrude at least 1000mm above roof penetration. The flue pipe must be more than
3 metres from any nearby structure (refer to Diagram C.)
Use the checklist in the Installation Instructions to make sure all stages are complete.
Leave all Installation and Operating Instructions with the owner.
CLEANING OF FLUE PIPES BEFORE LIGHTING THE FIRE:
It is very important that the Stainless Steel flue pipes are wiped clean. Use a soft cloth and methylated
spirits to remove finger marks and any oil residue that may be on the Flue Pipe, otherwise these will be
baked on once the flue has been heated.


