background image

6

Product Components

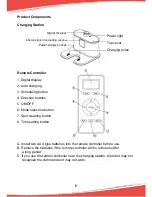
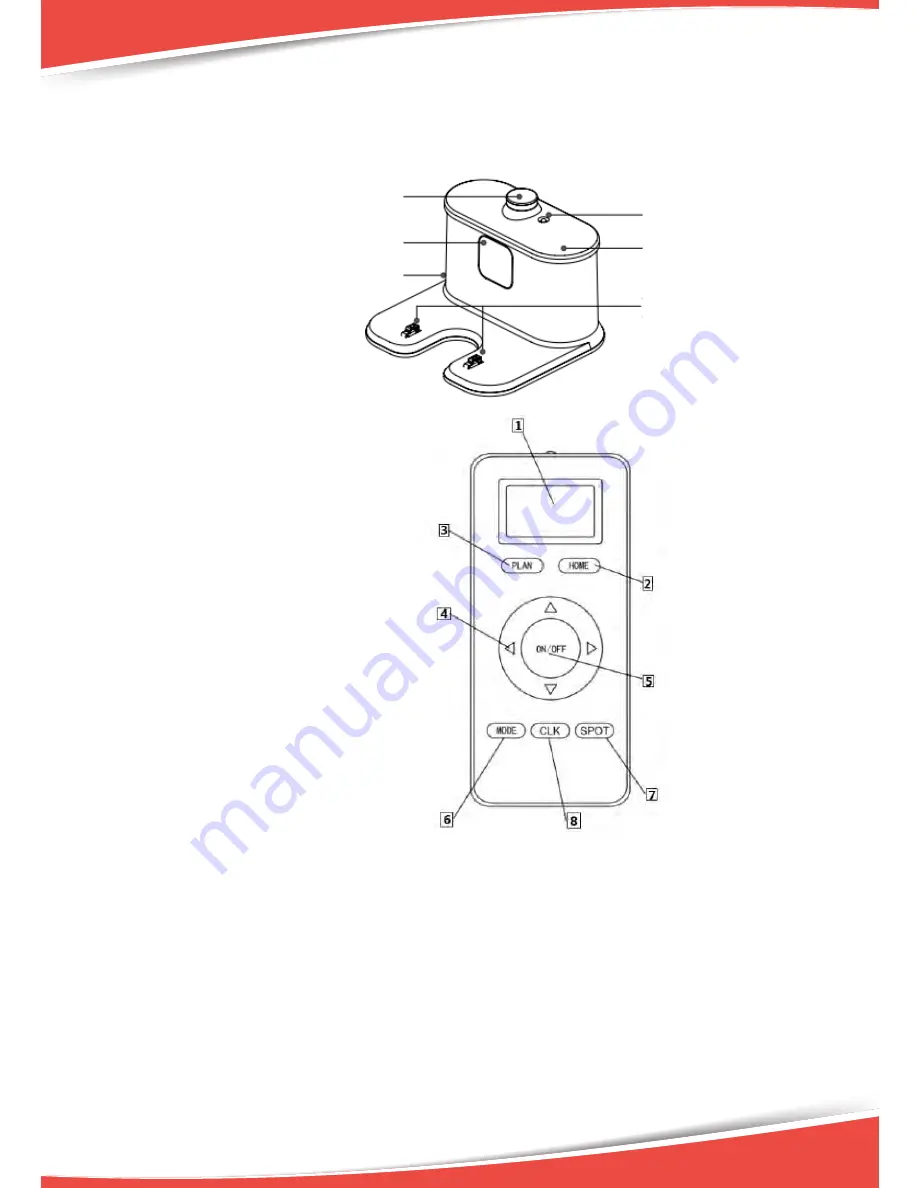
Charging Station

Remote Controller

1. Digital display
2. Auto charging
3. Scheduling button
4. Direction buttons
5. ON/OFF
6. Mode selection button
7. Spot cleaning button
8. Time setting button

A. Install two AAA type batteries into the remote controller before use.

B. Remove the batteries if the remote controller will be left unused for

     a long period.

C. If you use the remote controller near the charging station, the robot may not    

     recognize the command and may not work.


Signal recei

v

er


Infrared signal trans

m

itting 

w

indo

w


Po

w

er supply soc

k

et


Power light

Top cover

Charging poles

Содержание PUCRC95

Страница 1: ...Robot Vacuum Cleaner User Manual ...

Страница 2: ...CONTENTS FAQs Product Setup Video Contact Us www PureCleanHome com 1 2 4 4 5 6 7 8 8 9 10 11 13 13 13 14 14 15 15 16 17 PRODUCT SPECIFICATION ...

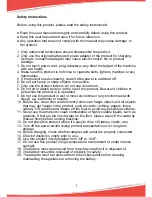
Страница 3: ... not use this product in wet or moist environment any environment with liquid e g bathroom or laundry 10 Before use clean floor environment remove all fragile object and all objects that may get caught in the product such as cords clothing papers loose cables Lift curtains and drapes off the floor to avoid any possible accidents 11 Never use the product to clean combustible or highly volatile liqu...

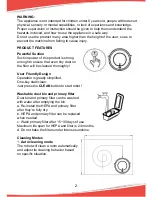
Страница 4: ...enough to ensure that even tiny dust on the floor will be cleaned thoroughly User Friendly Design Operation is greatly simplified One key start clean Just press the CLEAN button to start robot Washable dust bin and primary filter Dust bin and primary filter can be washed with water after emptying the bin a Re install the HEPA and primary filter after they re fully dry b HEPA and primary filter can...

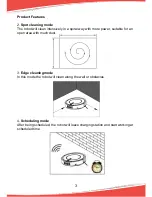
Страница 5: ...ly in a spiral way with more power suitable for an open area with much dust 3 Edge cleaning mode In this mode the robot will clean along the wall or obstacles 4 Scheduling mode After being scheduled the robot will leave charging station and start working at scheduled time ...

Страница 6: ...ccessories No Descrip on Quan ty 1 Main Body 1 2 Charging Sta on 1 3 Power Adapter 1 4 Remote Controller ba ery not included 1 5 Mopping Cloth 1 and Mopping Plate 1 1 1 6 HEPA Filter 1 7 Cleaning Brush 1 8 Side Brushes 2 2 9 User Manual 1 ...

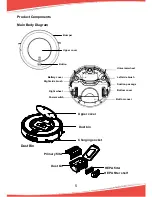
Страница 7: ...over Dust bin Charging socket Primary filter Dust bin HEPA filter shelf HEPA filter Dust Bin Bottom cover Bumper Upper cover Button Bottom cover Suction passage Left side brush Universal wheel Battery cover Right side brush Right wheel Power switch ...

Страница 8: ...tting button A Install two AAA type batteries into the remote controller before use B Remove the batteries if the remote controller will be left unused for a long period C If you use the remote controller near the charging station the robot may not recognize the command and may not work Signal receiver Infrared signal transmitting window Power supply socket Power light Top cover Charging poles ...

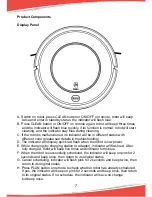
Страница 9: ...ting D The indicator will display quick red flash when the robot is low power E While charging by charging station or adapter indicator will flash red After fully charged robot will beep five times and indicator turns blue F When the robot is successfully scheduled the indicator will keep on pink for 2 seconds and beep once then return to its original status G Cancel scheduling indicator will flas...

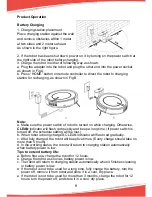
Страница 10: ...sh red quickly and beep a long time If power switch is turned off the schedule setting will be lost b When robot is being charged CLEAN indicator will flash red gradually c After fully charged the robot will beep five times Every charge should take no more than 5 hours d In the working status the robot will return to charging station automatically when battery power is low Tips to extend battery l...

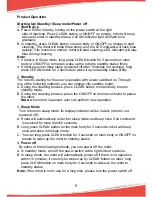
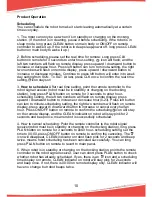
Страница 11: ...ou can change into standby mode A During the cleaning process press CLEAN button on main body to enter standby mode B During the cleaning process press the ON OFF on remote controller to pause the robot Note when robot is paused user can perform new operation 3 Sleep Mode Turn robot into sleep mode its display indicator will be in dark robot is not powered off A Robot will automatically enter into...

Страница 12: ...ng setting the left two numbers will flash on remote display press upward downward button to increase or decrease hour 0 23 Press left button can turn to minute scheduling setting the right two numbers will flash on remote display press upward downward button to increase or cancel every half an hour Press ON OFF button on remote to confirm the scheduling icon will stay on the remote display and th...

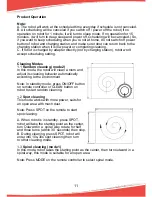
Страница 13: ...m cleaning mode 2 In this mode the robot will clean a room and adjust its cleaning behavior automatically according to the environment Note In standby mode press ON OFF button on remote controller or CLEAN button on robot to start random cleaning 1 2 Spot cleaning This mode works with more power suits for an open area with much dust Note Press SPOT on the remote to start spot cleaning A When robot...

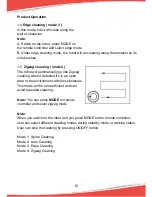
Страница 14: ...lly go into Zigzag cleaning when it detected it s in an open area or the environment with less obstacles This mode will be more efficient and can avoid repeated cleaning Note You can press MODE on remote controller and select zigzag mode Note When you switch on the robot and you press MODE on the remote controller user can select different cleaning modes during standby mode or working status User ...

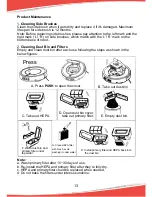
Страница 15: ...n after each use following the steps as shown in the below figures Note a Wash primary filter after 15 30 days of use b Re install the HEPA and primary filter after they re fully dry c HEPA and primary filter could be replaced when needed d Do not bake the filters under intense sunshine Press A Press PUSH to open the cover B Take out dust bin C Take out HEPA D Open dust bin cover take out primary ...

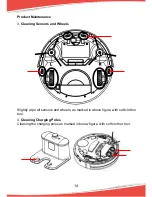
Страница 16: ...e 3 Cleaning Sensors and Wheels Slightly wipe all sensors and wheels as marked in above figure with soft cloth or tool 4 Cleaning Charging Poles Cleaning the charging poles as marked in below figure with soft cloth or tool ...

Страница 17: ...ol Note Pay attention and avoid wetting the sensors 6 Mopping Cloth Usage A Stick mopping cloth on mop plate fix them at the bottom of the robot as shown in right figure B When the mopping cloth is dirty please wash and clean it You can change a new one if needed Note Do not clean the appliance under water ...

Страница 18: ...e Bumper sensor fault Check the sensor to see if it is covered by any object During charging LED indicator flashes red quickly and robot beeps Power switch of robot might not turned on Switch on the robot LED indicator flashes red quickly Ba ery low power Fully charge the ba ery Blue LED flashes once Red LED flashes once Side brush get stuck Put robot on flat surface and clean side brush Troubleshootin...

Страница 19: ...ww PureCleanHome com www pyleusa com contactus Classifica on Item Detail Electrical Specifica ons Ba ery Voltage DC 14 4V Ba ery Specifica ons Ni MH 1500mAh Consump on Power 15W Func onal Specifica ons Dust Bin Capacity 0 3L Charging Type Auto Charging Manual Charging Cleaning Mode One Key Clean Mode Selec on by Remote Controller Cleaning Time 80 minutes Bu on Type of Main Body Press Bu on Button Type...

Страница 20: ...www pyleusa com contactus ...

Отзывы: