background image

Nixie Tube Clock ‘Quattro' 


ISSUE 3 (01 November 2018)


www.pvelectronics.co.uk


- 8 -


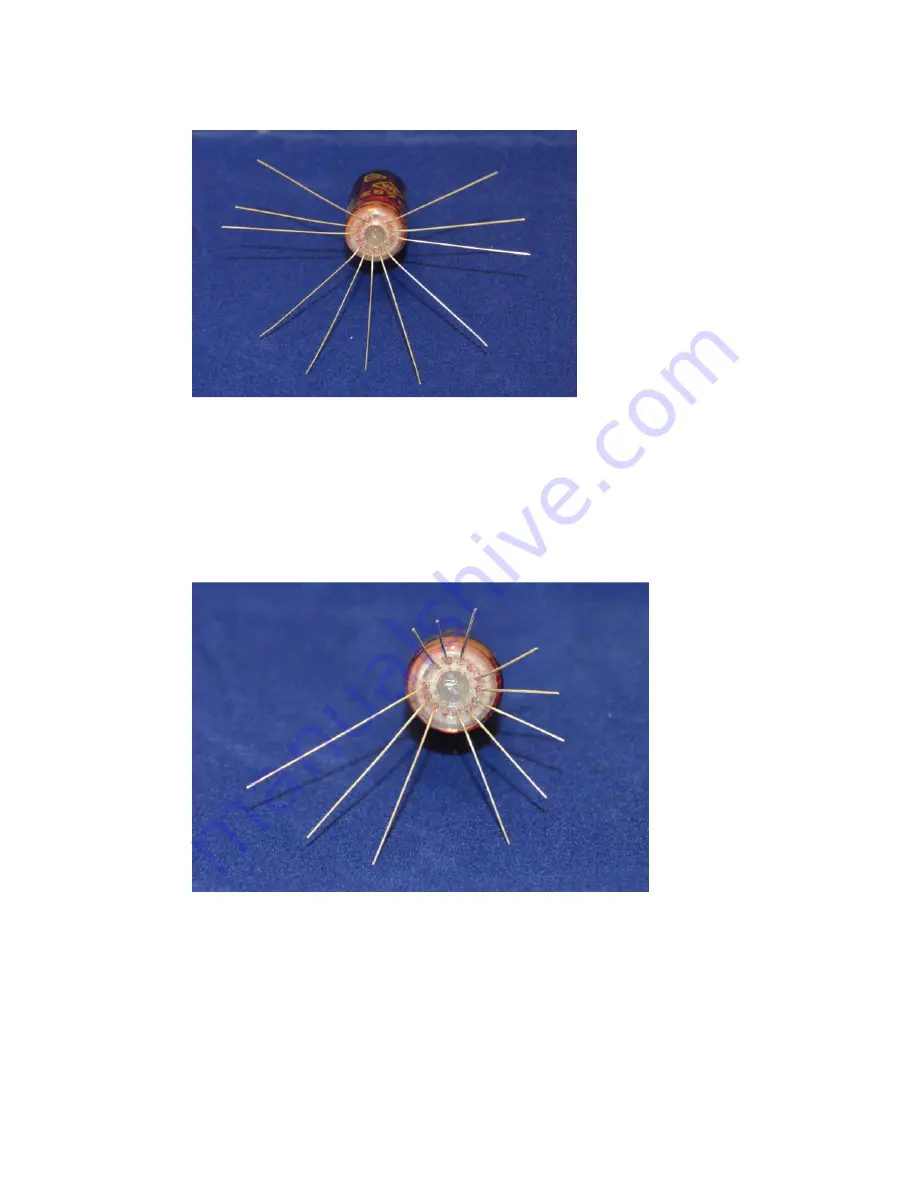
To facilitate easy insertion of the flying leads into the PCB holes, it 
helps enormously to trim the remaining flying leads with a pair of 
scissors as shown below. Start at one of the leads at the back of 
the tube. 
Then, working around the tube, cut each sucessive lead approx 
2mm shorter than the previous one. This will allow you to feed 
each lead in in turn.  


Now you can insert and solder in the tube.  Its best to have the 
tube approx 5mm from the PCB, so you are not soldering too close 
to the glass-to-metal seal. 


Содержание Quattro

Страница 1: ...Nixie Tube Clock Quattro ISSUE 3 01 November 2018 www pvelectronics co uk 1 Assembly Instructions And User Guide Nixie Clock Type Quattro ...

Страница 2: ...lock Quattro ISSUE 3 01 November 2018 www pvelectronics co uk 2 REVISION HISTORY Issue Number Date Reason for Issue 3 01 Nov 2018 New diode for D2 new ZD1 2 8 Sept 2012 Errors corrected 1 27 July 2012 New document ...

Страница 3: ...e setting using two buttons Programmable leading zero blanking Five programmable neon colon settings Flashing AM PM indication illuminated AM PM indication both flashing both on both off Seconds can be reset to zero to precisely the set time Programmable night mode blanked or dimmed display to save tubes or prevent sleep disturbance Separate modes for colon neons during night mode Standard or scro...

Страница 4: ... generated by this circuit can give a potentially LETHAL ELECTRIC SHOCK DISCLAIMER This product is supplied as a kit of parts intended only for suitably qualified electronic engineers who are suitably qualified and experienced in electronics assembly and are familiar with safe procedures for working with high voltages The supplier his agents or associates accept no liability for any damage injury ...

Страница 5: ...470uF 16 25V Electrolytic C5 15pF Ceramic C6 33pF Ceramic C7 100nF Ceramic C8 0 1F C9 100nF Transistors Q1 IRFD220 MOSFET Q2 Q3 MPSA42 Q4 Q5 MPSA92 Q6 Q7 MPSA42 Diodes D1 D3 1N5819 D2 1N4001 D4 UF4004 D5 D8 3mm Blue LED Integrated Circuits IC1 78L05 5V voltage regulator IC2 PIC16F1827 8 bit microcontroller IC3 HV5812 Miscellaneous L1 100uH inductor PM 4mm wire ended neon lamp SET ADJ Miniature pus...

Страница 6: ...tic 1 470uF 16 25V Electrolytic 1 0 1F 1 Transistors IRFD220 MOSFET 1 MPSA42 4 MPSA92 2 Diodes 1N5819 2 1N4001 1 UF4004 fast recovery diode 1 3mm Blue LED 4 Integrated Circuits 78L05 5V voltage regulator 1 PIC16F1827 8 bit microcontroller 1 HV5812 1 Miscellaneous 100uH inductor 1 4mm wire ended neon lamp 1 Miniature push button 2 18 way narrow IC Socket for IC2 1 PLCC28 IC Socket for IC3 1 2 1mm P...

Страница 7: ...oltage Components C3 C4 R1 R4 D4 L1 ZD1 Q1 IC2 IC2 socket The two joined pins on Q1 face the inductor Test HV Point for 168 172V If you do not get the correct voltage do not continue Stop and check your work and email for support if necessary 1 2 All remaining components except Tubes and LEDs 1 3 Z570M Z573M ZM1080 ZM1082 GN9A Nixie Tubes It is necessary to clip off two of the Z570M and equivalent...

Страница 8: ...g leads with a pair of scissors as shown below Start at one of the leads at the back of the tube Then working around the tube cut each sucessive lead approx 2mm shorter than the previous one This will allow you to feed each lead in in turn Now you can insert and solder in the tube Its best to have the tube approx 5mm from the PCB so you are not soldering too close to the glass to metal seal ...

Страница 9: ...Nixie Tube Clock Quattro ISSUE 3 01 November 2018 www pvelectronics co uk 9 1 4 D5 D8 Note these LEDs are polarised the longer lead goes in the hole marked ...

Страница 10: ...n this format 01 XX XX is the software verson eg 12 means version 1 2 In configuration mode the hours digits diplay the current parameter being adjusted and the minutes digits display the current value stored against the parameter For each parameter and referring to the table below scroll through the range of possible values by pressing the ADJ button When the desired value has been reached move o...

Страница 11: ...s Mode2 0 Slots disabled 1 Slots every minute 2 Slots every 10 minutes default 3 Slots every hour 4 Slots at midnight 13 Display Mode 0 Standard change of digits 1 Cross fading digits with scrollback effect default 14 Seconds display each minute 0 Off 1 On default 3 15 Night Mode Override Period 0 50 default 0 gives 15 seconds override 4 15 Restore default settings 0 Keep user settings 1 Restore o...

Страница 12: ... the ADJ button to set the minutes Briefly Press SET again and the hours will be highlighted Press the ADJ button to set the hours Finally briefly Press SET again to revert to normal clock operation Auto Date Display Setting parameter 14 to 1 will enable auto display of date between 55 and 59 seconds past each minute Night Blanking Override During programmed night blanking the blanking may be over...

Страница 13: ...Nixie Tube Clock Quattro ISSUE 3 01 November 2018 www pvelectronics co uk 13 3 CIRCUIT DIAGRAM ...

Страница 14: ...Nixie Tube Clock Quattro ISSUE 3 01 November 2018 www pvelectronics co uk 14 ...

Отзывы: