background image

 P16MI358 - A03-04/15  |  7

INSTaLLaTION aND MaINTENaNCE Of YOUR TOWEL RaIL

EN

2. OPERaTINg INSTRUCTIONS Of YOUR TOWEL RaILS

To make the most of your towel rail and for greater comfort,  we would ask you to take the following 
recommendations into account:

2.1 Positioning

•  The diagrams below show the appliance’s correct positioning.

   The appliance must be installed on a vertical wall and the power cable must be located at the bottom.

·  Figures 1 and 2 below show the correct positioning of the radiator,
·  The radiator should be mounted on a vertical wall with the connection cord at the bottom of the radiator,
·  The lower part of the radiator must be within a minimum distance of 150mm from the ground,
·  The radiator must not be installed within 50mm of a wall or underneath a power outlet,
·  Improper installation of a shelf above the radiator must be carried out over 150mm of it,
·  It  is  recommended  to  perform  the  installation,  if  possible,  close  to  locations  with  high  heat  losses  
  (windows etc) and using screw fasteners appropriate to the nature of the wall,
·  Drill and plug the 4 fixing holes in a suitable location,
·  Secure the radiator to the wall using the screws supplied,
·  Make the electrical connection.

2.2 Brackets 

•    For correct heater installation, when the appliance is located close to a wall, it is essential to leave a  
  minimum distance of 250 mm to access the installation.
•   Use  bracket  screws  suited  to  your  type  of  wall,  secure  the  heater  on  the  wall  using  the  screws  
  provided with the towel rails.
•   The towel rail must be installed on a vertical wall using the wall mounts supplied.
•   The towel rails’ mounting components are adjustable vertically, horizontally and as regards depth (see 
   exploded diagram in the box), which makes correct installation easier. Positioning can be seen from 
   the figure on the drawing page.

fig. 1

fig. 2

for the correct installation of radiators it is essential that the fixing of the radiator 

is carried out in such a way that it is suitable for intended use aND predictable 

misuse. a number of elements need to be taken into consideration including the 

fixing method used to secure the radiator to the wall, the type and condition of 

the wall itself, and any additional potential forces or weights that may happen to 

be applied to the radiator, prior to finalising installation.

v3_RETTIG_FLORES_T - FLORES ET_MULTILANGUAGE.indd   7

28/04/15   13:49

Содержание Radson Flores ET

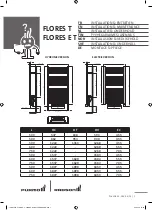
Страница 1: ...HYDRONIC VERSION 110 120 L L 55 EC 15 21 F L 30 155 150 mini 150 mini HC 310 HV HC HC HT 155 HC 310 30 125 135 110 120 300 300 L HC HT HV EC 500 547 638 593 455 500 862 953 908 455 500 1222 1313 1268...

Страница 2: ...pas jouer avec l appareil Le nettoyage et l entretien par l usager ne doivent pas tre effectu s par des enfants sans surveillance Pour viter tout danger pour les tr s jeunes enfants il est recommand...

Страница 3: ...du radiateur lorsque l appareil est situ pr s d un mur il est imp ratif de laisser une distance de 250 mm au minimum pour acc der au montage Utilisez des vis de fixations adapt es la nature de votre...

Страница 4: ...serviettes est rempli d une quantit pr cise de fluide caloporteur Les r parations n cessitant l ouverture du radiateur de salle de bains ne doivent tre effectu es que par le fabricant ou son service...

Страница 5: ...tien particulier 4 CONDITIONS D UTILISATION 5 CONSEILS D ENTRETIEN GESTION DES DECHETS DES EQUIPEMENTS ELECTRIQUES ET ELECTRONIQUES CONFORMEMENT A LA DIRECTIVE DEEE 2002 96 EC ROHS Conforme la directi...

Страница 6: ...s recommended that the appliance is installed so that the lowest heating bar is at least 600 mm above the floor The appliance is only intended for drying cloth washed in water If the power cable is da...

Страница 7: ...in a suitable location Secure the radiator to the wall using the screws supplied Make the electrical connection 2 2 Brackets For correct heater installation when the appliance is located close to a wa...

Страница 8: ...anufacturer its service agent or other qualified person This radiator is filled with a precise quantity of liquid any repairs that involve opening the radiator must be carried out by the manufacturer...

Страница 9: ...unit Use warm soapy water for cleaning the outside walls of the heater no abrasive or corrosive product This heating appliance is filled with an exact quantity of heat transfer fluid or glycoled water...

Страница 10: ...ud door de gebruiker niet uitvoeren door kinderen tenzij ze onder toezicht staan Om gevaar voor heel kleine kinderen te voorkomen is het aanbevolen om het toestel zo te plaatsen dat de laagste verwarm...

Страница 11: ...iging Voor een correcte plaatsing van het toestel moet u ten minste 250 mm afstand laten tot de wanden zodat u bij de bevestigingspunten van het toestel kunt Gebruik bevestigingsschroeven die geschikt...

Страница 12: ...der maakt het mogelijk om de temperatuur te verlagen als de geleider wordt verbonden met een aangepaste klok De geleider mag nooit met de aarde worden verbonden en moet worden ge soleerd als deze func...

Страница 13: ...rrect is uitgeschakeld Om de levensduur van uw radiator te verlengen bevelen we aan om de volgende tips in acht te nemen Gebruik een droge doek zonder oplosmiddel om de regelkast te reinigen Gebruik l...

Страница 14: ...aa leikki laitteella eiv tk kiivet pyyhekuivaimen l mp patterille Alle 8 vuotiaat lapset eiv t saa valvonnatta puhdistaa tai huoltaa laitetta Jotta laitteesta ei olisi vaaraa pienille lapsille laite s...

Страница 15: ...kiiloja laitteen suojaamiseksi Kuumavesiversiot Asennus Pyyhekuivain tulee asentaa vaakasuoraan sein lle mukana olevien sein kiinnikkeiden avulla Sein kiinnikkeet ovat s dett viss pysty sivu ja syvyy...

Страница 16: ...hingoittunut sen tilalle on vaihdettava erikoisjohto Virtajohdon vaihdon t ytyy suorittaa valmistaja heid n huoltonsa tai yht p tev henkil jotta v ltet n vaarat L mmitett v n pyyhekuivaimen t ytteen o...

Страница 17: ...essa on l mmittimen oltava kytkettyn pois p lt Varmista siis ett laite on pois p lt Jotta kuivaimesi kest isi suosittelemme seuraavien vinkkien hy dynt mist K yt ohjauslaitteeseen kuivaa kangaspyyhett...

Страница 18: ...res av barn med mindre de er over 8 r og er under tilsyn For unng fare for sv rt unge barn anbefales det at apparatet installeres slik at den nederste varmestangen er minst 600 mm over gulvet Apparat...

Страница 19: ...varmt vann Montering Apparatet skal monteres p vertikal vegg med medf lgende veggfester Apparatets oppheng kan justeres b de i h yden og i side og dybde se sammenstillingstegning i esken noe som gj r...

Страница 20: ...n skiftes ut med en spesifikk kabel Denne ledningens m for unng fare skiftes ut hos produsenten produsentens serviceavdeling eller av personer med lignende kvalifikasjoner Det oppvarmede h ndklestativ...

Страница 21: ...LD Vedlikehold skal utf res med apparatet sl tt av P se derfor at apparatet er sl tt av For at apparatet skal vare lenge anbefaler vi at du f lger disse r dene Bruk en t rr klut uten l semidler p kont...

Страница 22: ...gamla och under uppsikt F r att undvika fara f r mycket sm barn rekommenderar vi att apparaten monteras p ett s dant s tt att den l gsta uppv rmda st ngen r placerad minst 600 mm ovanf r golvet Appar...

Страница 23: ...f ljande v ggf sten Apparatens upph ngningsdetaljer r justerbara i s v l h jd som i sid och djupled se spr ngskiss i kartongen vilket underl ttar korrekt montering Placering framg r av figuren p ritni...

Страница 24: ...ns kundservice eller andra personer med motsvarande beh righet f r att undvika fara Handdukstorken inneh ller en noggrant avv gd m ngd v rmeledande v tska Reparationer som kr ver att badrumsv rmen ppn...

Страница 25: ...ollera d rf r att apparaten r avst ngd Vi rekommenderar att du f ljer tipsen nedan som syftar till att ge handdukstorken en s l ng livsl ngd som m jligt Anv nd en torr trasa utan l sningsmedel f r ren...

Страница 26: ...len noch am Handtuchtrockner hochklettern Die Reinigung und Pflege darf von Kindern ber 8 Jahren nur unter Aufsicht durchgef hrt werden Um jegliche Gefahren f r Kleinkinder zu vermeiden wird empfohlen...

Страница 27: ...einer Wand befindet muss f r eine korrekte Montage ein Mindes tabstand von 250 mm zur Wand eingehalten werden um es bei der Montage erreichen zu k nnen Verwenden Sie f r Ihren Wandtyp vorgesehene Bef...

Страница 28: ...eiter erm glicht eine Temperaturabsenkung wenn er mit einer passenden Uhr verbunden ist Der schwarze Leiter darf nie mit der Erdung verbunden werden und muss isoliert werden wenn diese Funktion nicht...

Страница 29: ...beiten ausgeschaltet sein Stellen Sie daher sicher dass das Ger t ausgeschaltet ist Um die Lebensdauer des Heizk rper zu verl ngern empfehlen wir die folgenden Hinweise zu beachten Benutzen Sie ein tr...

Страница 30: ...30 P16MI358 A03 04 15 INFORMATION product reference product model options purchase date supplier supplier phone number invoice n v3_RETTIG_FLORES_T FLORES ET_MULTILANGUAGE indd 30 28 04 15 13 49...

Страница 31: ...P16MI358 A03 04 15 31 v3_RETTIG_FLORES_T FLORES ET_MULTILANGUAGE indd 31 28 04 15 13 49...

Страница 32: ...v3_RETTIG_FLORES_T FLORES ET_MULTILANGUAGE indd 32 28 04 15 13 49...

Отзывы: