4826 Sterling Drive, Boulder, CO 80301
PH: 720.406.8946 [email protected] www.psaudio.com
Owner’s Guide 11
Owner’s Guide
©2013 PS Audio International Inc. All rights reserved.
®
Owner’s Reference
NuWave Phono Converter
If you do not yet have your turntable connected to the NPC it may be convenient to simply use an
iPhone or iPod to feed the Analog Inputs (not the Phono inputs) for this test. Set the output level
of the device to maximum, connect a 3.5mm male to dual RCA connecting cable and start playing
music on the mobile device. In the Properties menu of the Recording tab you will see a graphic
representation of a VU meter next to the NPC and this should show music playing if everything is
setup properly. If your computer monitor speakers are on, you should hear the music playing. If
you hear no sound it may be necessary to reboot your computer and follow the setup procedure
again.
Once you have verified everything is playing properly use any recording program, such as Audacity,
as you wish. Instructions on the use of Audacity or other similar recording programs are beyond
the scope of this manual. Please refer to the owner’s manual of the recording program you’re
using for further instructions.
To setup on a Mac computer there are no drivers to download and install with OSX. However,
we do recommend downloading and installing a free program from Rogue Amoeba called Line
In. This small program will help you make sure the NPC is working properly on your Mac. These
instructions will assume you have downloaded and installed Line In. Line In is available for free
download for Mac OSX here: http://www.rogueamoeba.com/freebies/.
Making sure USB is Enabled on the NPC screen A/D Mode, connect a USB cable to the Mac USB
input. Keep in mind there is a maximum length for USB cables that should be observed for good
communication between devices. 5 meters is generally accepted as the maximum length for a
USB cable but we would recommend something a lot shorter to be safe and yes, the quality of the
USB cable matters a lot to the sound quality. Don’t cheap out.
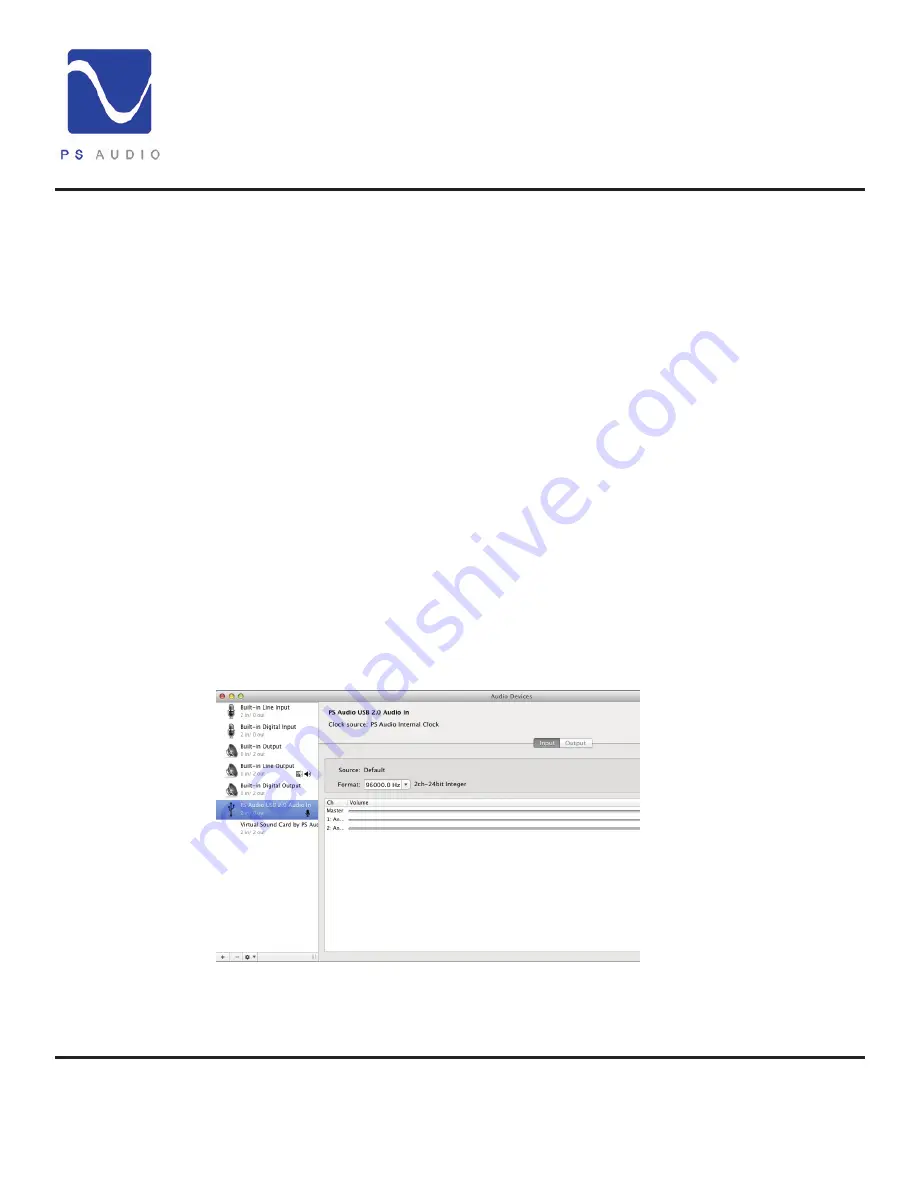
Next, go to Finder->Utilities-
>Audio Midi Setup and launch
it. You should see the NPC
displayed as a choice and it
will be called PS Audio USB 2,0
Audio In. Select this and, using
the secondary mouse option
(right click) choose
Use this
device for sound input.
If your
mouse does not have a right
click or secondary option, you
can alternatively hold the control
key on your keyboard down and
click the mouse. This will place a
small icon of a microphone next
to the NPC. If the NPC does not
show up as a device, make sure it has been enabled as above and the cable is connected. If you
still do not see the device, remove the USB cable and plug it in again. That should do the trick
and if not, reboot the computer.
Setup on a Mac
Launch the Audio
Midi Panel


