


IP-CAMERA User Manual -
20
C
C
C
h
h
h
a
a
a
p
p
p
t
t
t
e
e
e
r
r
r
5
5
5
R
R
R
e
e
e
m
m
m
o
o
o
t
t
t
e
e
e
C
C
C
o
o
o
n
n
n
f
f
f
i
i
i
g
g
g
u
u
u
r
r
r
a
a
a
t
t
t
i
i
i
o
o
o
n
n
n
1. Select a date at the "Date" pull down list, press "Add" button to add that date to the list box
on the right side and then move the scroll bar to set the schedule of that day.
2. Select a date in the list box on the right side, and press "Erase" to remove the schedule on
that day.
Press the "Save" button to save the settings.
Holiday schedule is prior to Week schedule.
5.4.4
Alarm Input Trigger
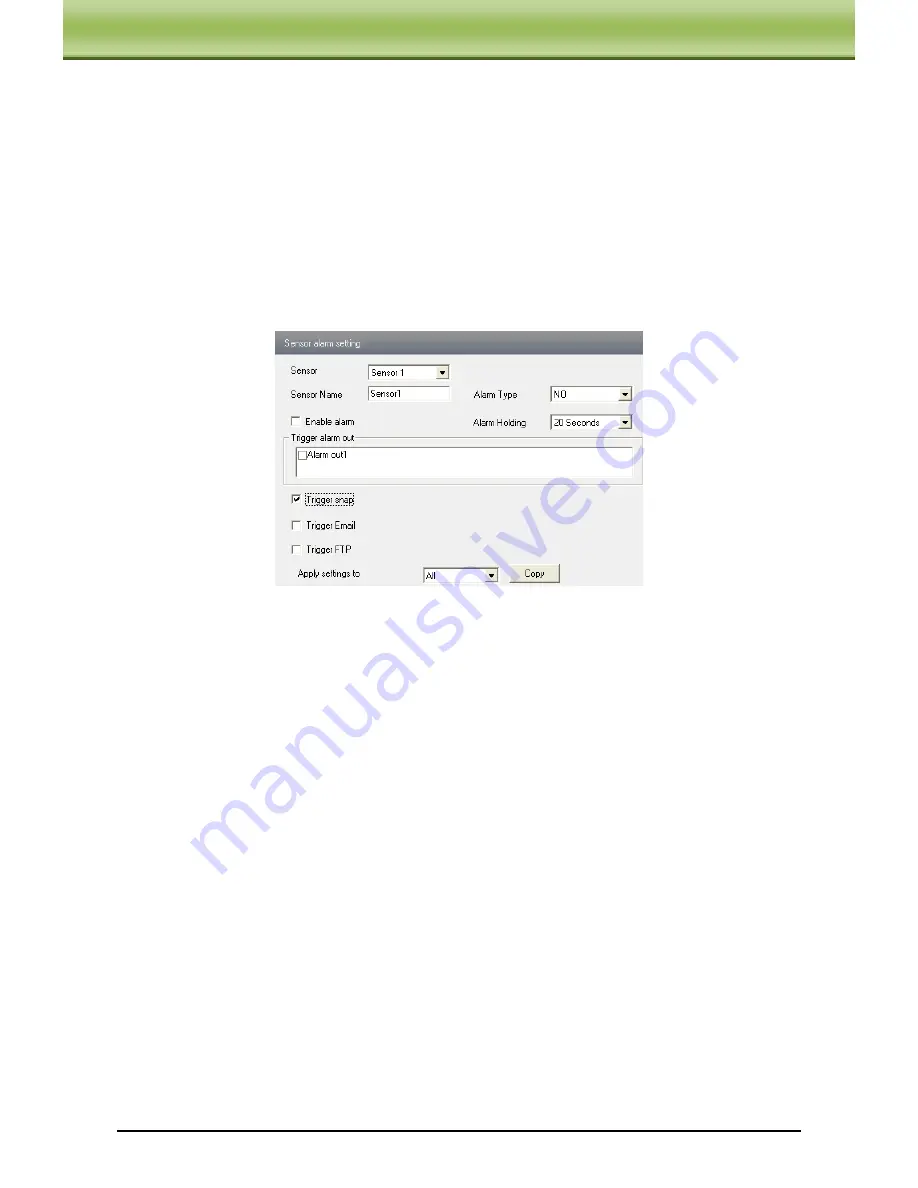
1. Enter “Alarm Configuration"
"Alarm Input Trigger" to see a screen as shown below:
2. Select the sensor at the "Sensor" pull down list and set the sensor name and alarm type: NO
and NC.
3. Enable alarm and select alarm holding time.
4. Set alarm trigger options. The setting steps are the same with that of motion detection
trigger. Please refer to motion detection trigger chapter for details.
5. Apply settings to all by clicking “Copy” button, which can quickly set the same settings for
all sensors.
5.4.5
Alarm Input Schedule
Enter into “Alarm Configuration"
“Alarm Input Schedule” as shown below:
1. Select the sensor which needs to setup the alarm parameter at the "Sensor" pull down list
2. The following setup steps are similar to Motion Detection Schedule’s. Please refer to
Motion Detection Schedule chapter for more details


