background image

Be careful to position all buttons A on the same side of the side of the leech, positioning the 

buttons B on the opposite side of the same leech. Choose for 1 or 2 or both together.

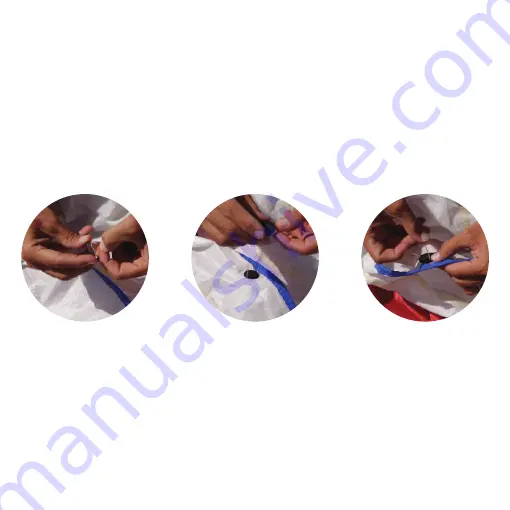
1. Buttons installation with sewing system

Remove the liner from the button (A) and glue it as close as possible to the edge of the 

sail, without overlapping it on the colored luff tape.

Repeat the operation with the button B, on the other side of the sail, making sure that 

the holes of the buttons A and B coincide; to facilitate the operation, after having glued 

in button A, insert two needles in two opposite holes of the button, turn the sail and 

insert the button B in the two protruding needles and glue.

Sew buttons A and B using the appropriate needle and thread.

2. Buttons installation with screw system

Without removing the liner, place the button A in the desired area and mark the position 

of the hole with a pencil or pen. (no marker pen because the ink expands a lot).

Hole the sail, or make 2 cross-cuts of 3mm with center the sign made.

After removing the liner of button B, position the button and insert the screw that will 

protrude on the other side of the sail where you will apply, removed the liner, button A.

Insert the nut in the special cavity of button A and screw it in place.

Threadlocker between the screw and nut is recommended to prevent loosening.

By choosing this method, the use of sewing is your discretion.

Repeat the operation for all buttons.

Содержание SPK

Страница 1: ...SPK 201909 V1 ENG ...

Страница 2: ...f our products are based on tests believed to be reliable but we would advise you to conduct your own test to determine their suitability for your applica tions This is because we cannot accept any responsibility or liability direct or consequential for loss or damages as results of our recommendations PATENT PENDING PROtect tapes e SPK logos are registered trademark of Pietro Parmeggiani S r l Fu...

Страница 3: ...Thank you for choosing SPK The box contains 8 buttons A with double sided adhesive 8 buttons B with double sided adhesive 8 screw and nut sets A B sewing holes screw and nut cavity groove ...

Страница 4: ... example for a gennaker of a 40 50 boat we recommend eight buttons for the head at a distance of about 1 2m 4 One of the parameters to be taken into consideration when determining the distance between the buttons is the wind range of the sail if it is a strong wind sail the buttons will be closer while if it is a sail for lighter wind the buttons will be more sparse For the tack the number of butt...

Страница 5: ... and insert the button B in the two protruding needles and glue Sew buttons A and B using the appropriate needle and thread 2 Buttons installation with screw system Without removing the liner place the button A in the desired area and mark the position of the hole with a pencil or pen no marker pen because the ink expands a lot Hole the sail or make 2 cross cuts of 3mm with center the sign made Af...

Страница 6: ...n A for at least two turns in the same direction already used for the first two turns clockwise or counterclockwise Repeat the operation for all buttons you wish to use Depending on the intensity of the wind you can decide to use all buttons or just some Once the sail is lowered it is advisable to remove the broken sail stops from the groove before repeating the packing operation However more packi...

Отзывы: