background image

BACK

NEXT

INSTRUCTIONS

4

Operating Your Thermostat


                                                                       19                                                                     User Manual

Setting the SYSTEM Control Mode


The System Control has 5 modes of operation – AUTO, COOL, OFF, HEAT and EMER. The mode can be selected 
by pressing the 

SYSTEM 

button to scroll through the different modes.

NOTE:  

Depending on how your thermostat was configured, some system modes may not be available.

AUTO

  The system will cycle between heating and 

     cooling automatically based on your program 
     

set points. AUTO will be displayed with 


either HEAT or COOL.  

COOL

  Only your cooling system will operate.

OFF


Heating and cooling systems are off.

HEAT

  Only your heating system will operate

EMER

  Operates a backup heat source 


(Emergency Heat) for heat pump 


systems only.

Содержание PRS6110

Страница 1: ...rence 2018 PROPARTS All Rights Reserved Made in China PRS6110 110 01 Read all instructions before proceeding PRS6110 Up to 2 Heat 1 Cool Heat Pump or Single Stage Conventional Up to 3 Heat 2 Cool Heat...

Страница 2: ...le 11 Programming a 7 Day Residential Schedule 14 Programming a 5 2 Day Residential Schedule 16 Programming a 7 Day Commercial Schedule 17 4 Operating Your Thermostat Setting the System Control Mode 1...

Страница 3: ...amming all 7 days at once Convenient HOLD feature lets you override the program schedule Large 5 sq in bright blue backlit display is easy to read Extra large display characters make viewing settings...

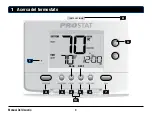
Страница 4: ...BACK NEXT INSTRUCTIONS User Manual 4 1 About Your Thermostat 1 2 9 3 4 5 6 7 8 10...

Страница 5: ...eturns to normal mode from program or setting modes FAN Button Selects the system fan mode Quick Reference Instructions Stored in slot located at top of thermostat Buttons Increases or decreases setti...

Страница 6: ...Options menu press and hold the RETURN button for approximately 3 seconds until the screen changes and displays the first User Option Press the or button to change the setting for the displayed User...

Страница 7: ...180 365 Selects a number of days before the thermostat will flash a Service Humid reminder in the display screen 4 Extended Hold Period LONG LONG Selects long permanent hold mode 24HR Selects 24 hour...

Страница 8: ...ress the RETURN button to reset the timer Select OFF or a set number of days before the reminder will appear Extended Hold Period User Option 4 The Extended Hold Period lets you select the period your...

Страница 9: ...n the non programmable mode if the keypad lockout security level is set to level 1 See Installer Manual Program Override Time Limit User Option 6 The Program Override Time Limit allows you to set a ma...

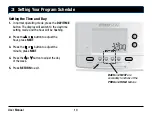
Страница 10: ...day time setting mode and the hour will be flashing 2 Press the or button to adjust the hour press NEXT 3 Press the or button to adjust the minute press NEXT 4 Press the or button to adjust the day o...

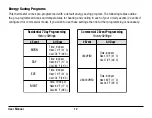
Страница 11: ...tons see pages 4 and 6 This thermostat has been configured with one of the following programming options Residential 7 day programming mode with 4 events per day default Residential 5 2 weekday weeken...

Страница 12: ...h to use these settings then no further programming is necessary MORN DAY EVE NIGHT Time 6 00 pm Heat 70 F 21 C Cool 78 F 26 C Time 8 00 am Heat 62 F 17 C Cool 85 F 29 C Time 6 00 am Heat 70 F 21 C Co...

Страница 13: ...C Time 6 00 am Heat 70 F 21 C Cool 78 F 26 C Time 10 00 pm Heat 62 F 17 C Cool 82 F 28 C 4 Event Time 6 00 pm Heat 70 F 21 C Cool 78 F 26 C Time 8 00 am Heat 62 F 17 C Cool 85 F 29 C Time 6 00 am Heat...

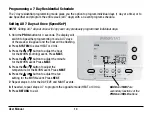
Страница 14: ...peedSet programming mode All 7 days of the week will appear and the hour will be flashing 2 Press SYSTEM to select HEAT or COOL 3 Press the or button to adjust the hour for the MORN morning event Pres...

Страница 15: ...MORN morning event Press NEXT 5 Press the or button to adjust the minute for the MORN event Press NEXT 6 Press the or button to adjust the temperature for the MORN event Press NEXT 7 Press the or but...

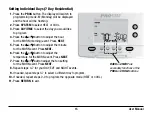
Страница 16: ...SYSTEM to select HEAT or COOL 3 Press the or button to adjust the hour for the MORN morning event Press NEXT 4 Press the or button to adjust the minute for the MORN event Press NEXT 5 Press the or bu...

Страница 17: ...edSet programming mode All 7 days of the week will appear and the hour will be flashing 2 Press SYSTEM to select HEAT or COOL 3 Press the or button to adjust the hour for the OCCUPIED event Press NEXT...

Страница 18: ...Press the or button to adjust the minute for the OCCUPIED event Press NEXT 6 Press the or button to adjust the temperature for the OCCUPIED event Press NEXT 7 Press the or button to adjust the fan se...

Страница 19: ...nt modes NOTE Depending on how your thermostat was configured some system modes may not be available AUTO The system will cycle between heating and cooling automatically based on your program set poin...

Страница 20: ...ing on how your thermostat was configured some fan modes may not be available AUTO The system fan will run only when your heating or cooling system is running ON The system fan stays on CIRC The syste...

Страница 21: ...5 2 or 7 day programmable mode the set temperature will change back to your original programmed settings when your next scheduled change in temperature occurs Extended Adjustment Press the HOLD butto...

Страница 22: ...nstaller Manual If enabled it is selected by pressing the SYSTEM button until AUTO HEAT or AUTO COOL appears in the display When Auto Changeover mode is enabled and selected the system automatically s...

Страница 23: ...ller Settings See Installer Manual If enabled the feature is automatically present while in programmable mode Adaptive Recovery Mode tries to reach your desired heating or cooling temperature at the t...

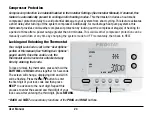
Страница 24: ...RN BACK and NEXT are secondary functions of the PROG and HOLD buttons User Manual 24 Compressor Protection Compressor protection is enabled disabled in the Installer Settings See Installer Manual If e...

Страница 25: ...valid code the thermostat will be locked or unlocked depending on its previous state When locked the word LOCKED appears in the display Figure 1 If an invalid code is entered the word NO will briefly...

Страница 26: ...remote sensing is achieved by installing a remote indoor sensor and is configured in the Installer Settings See Installer Manual If an indoor remote sensor was installed and properly configured in th...

Страница 27: ...ermostat if 24 volt AC power is not connected See Installer Manual If batteries become low a battery indicator will appear in the display You should change your batteries immediately when you see the...

Страница 28: ...ration of the warranty period from the original date of purchase by a professional service technician PROPARTS agrees to repair or replace at its option any PROSTAT thermostat under warranty provided...

Страница 29: ...ional Hasta 3 de Calefacci n 2 de Aire Acondicionado por Bomba T rmica Hasta 2 de Calefacci n 2 de Aire Acondicionado Convencional 2018 PROPARTS Todos los derechos est n reservados Hecho en China PRS6...

Страница 30: ...onfigurar el horario del programa 11 Programa residencial de 7 d as 14 Programa residencial de 5 2 d as 16 Programa comercial de 7 d as 17 4 C mo operar el termostato Configuraci n del modo de control...

Страница 31: ...ermite anular el horario del programa La pantalla grande de 5 pulgadas cuadradas con retroiluminaci n azul brillante es f cil de leer Los caracteres extra grandes de la pantalla permiten ver las confi...

Страница 32: ...Manual Del Usuario 4 1 Acerca del termostato BACK NEXT INSTRUCTIONS 1 2 9 3 4 5 6 7 8 10...

Страница 33: ...os de programa o configuraci n Bot n FAN Ventilador Selecciona el modo de ventilador del sistema Instrucciones de consulta r pida Se encuentran almacenadas en la ranura localizada en la parte superior...

Страница 34: ...men Opciones del usuario mantenga presionado el bot n RETURN durante 3 segundos aproximadamente hasta que la pantalla cambie y muestre la primera Opci n para el usuario Presione o para cambiar la con...

Страница 35: ...n n mero de d as que deben transcurrir antes de que el termostato muestre una luz recordatoria de servicio del bombillo UV en la pantalla 3 Monitor de servicio del OFF OFF Deshabilita monitorizaci n d...

Страница 36: ...presione el bot n RETURN Volver para reiniciar el temporizador Seleccione OFF Apagado o un n mero de d as antes de que aparezca el recordatorio Per odo de retenci n prolongado Opci n de usuario 4 El...

Страница 37: ...clado se configura en el nivel 1 consulte el Manual del instalador L mite de tiempo de anulaci n del programa Opci n de usuario 6 El l mite de tiempo de anulaci n del programa le permite configurar un...

Страница 38: ...guraci n D a Hora y la hora se emitir intermitentemente 2 Presione o para ajustar la hora y presione NEXT Siguiente 3 Presione o para ajustar los minutos y presione NEXT Siguiente 4 Presione o para aj...

Страница 39: ...Programar y HOLD Retener consulte la p gina 4 y 6 Este termostato ha sido configurado con una de las siguientes opciones de programaci n Modo de programaci n residencial de 7 d as con 4 eventos por d...

Страница 40: ...MORN Ma ana DAY D a EVE Tarde NIGHT Noche Hora 6 00 p m Calefacci n 21 C 70 F Aire acondicionado 25 C 78 F Hora 8 00 a m Calefacci n 17 C 62 F Aire acondicionado 29 C 85 F Hora 6 00 a m Calefacci n 2...

Страница 41: ...ire acondicionado 25 C 78 F Hora 10 00 p m Calefacci n 17 C 62 F Aire acondicionado 28 C 82 F 4 Eventos Hora 6 00 p m Calefacci n 21 C 70 F Aire acondicionado 25 C 78 F Hora 8 00 a m Calefacci n 21 C...

Страница 42: ...ar 2 Presione el bot n SYSTEM Sistema para seleccionar HEAT Calefacci n o COOL Aire Acondicionado 3 Presione o para ajustar la hora del evento para MORN Ma ana Presione NEXT Siguiente 4 Presione o par...

Страница 43: ...one o para ajustar los minutos para el evento MORN Ma ana Presione NEXT Siguiente 6 Presione o para ajustar la temperatura para el evento MORN Ma ana Presione NEXT Siguiente 7 Presione o para ajustar...

Страница 44: ...Presione o para ajustar la hora para el evento MORN Ma ana Presione NEXT Siguiente 4 Presione o para ajustar los minutos para el evento MORN Ma ana Presione NEXT Siguiente 5 Presione o para ajustar la...

Страница 45: ...la hora destellar 2 Presione el bot n SYSTEM Sistema para seleccionar HEAT Calefacci n o COOL Aire Acondcionado 3 Presione o para ajustar la hora para el evento OCCUPIED Ocupado Presione NEXT Siguien...

Страница 46: ...los minutos para el evento OCCUPIED Ocupado Presione NEXT 6 Presione o para ajustar la temperatura para el evento OCCUPIED Ocupado Presione NEXT Siguiente 7 Presione o para ajustar la configuraci n d...

Страница 47: ...modos del sistema podr an no estar disponibles AUTO Autom tico El sistema alternar autom ticamente entre calefacci n y aire acondicionado con base en los valores establecidos del programa AUTO Autom...

Страница 48: ...os de ventilador podr an no estar disponibles AUTO Autom tico El ventilador del sistema funcionar s lo cuando el sistema de calefacci n o aire acondicionado est funcionando ON Encendido El ventilador...

Страница 49: ...le para 5 2 o 7 d as el valor predeterminado de la temperatura volver a la configuraci n programada original cuando ocurra el siguiente cambio de temperatura programado Ajuste extendido Presione el bo...

Страница 50: ...t n SYSTEM Sistema hasta que AUTO HEAT CALEFACCI N AUTOM TICA o AUTO COOL AIRE ACONDICIONADO AUTOM TICO aparezcan en pantalla Cuando el modo de conversi n autom tica est habilitado y se ha seleccionad...

Страница 51: ...eshabilitada en las configuraciones de instalaci n consulte el Manual del instalador Si est habilitada la caracter stica est presente autom tica mente en el modo programable El modo de recuperaci n ad...

Страница 52: ...st presente autom ticamente en los modos aire acondicionado y o calefacci n Este termostato incluye un retardo de protecci n autom tica del compresor para evitar posibles da os al sistema provocados p...

Страница 53: ...Siguiente para avanzar al siguiente d gito Repita este proceso para introducir el segundo y tercer d gito del c digo de bloqueo Despu s de introducir el tercer d gito presione RETURN Volver BACK Atr s...

Страница 54: ...ta del interior La detecci n remota del interior se obtiene instalando un sensor remoto de interior y se configura en las configuraciones de instalaci n consulte el Manual del instalador Si se instal...

Страница 55: ...4 voltios de CA no est conectada Consulte el Manual del instalador Si la carga de las bater as se reduce aparecer en la pantalla un indicador de bater a baja Debe cambiar las bater as inmediatamente c...

Страница 56: ...a fecha de compra original por un t cnico profesional PROSTAT acepta reparar o reemplazar a su elecci n cualquier termostato PROSTAT que se encuentre bajo garant a siempre y cuando se devuelva con gas...

Отзывы: