background image


注意:


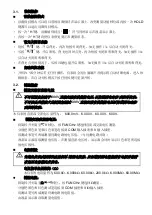
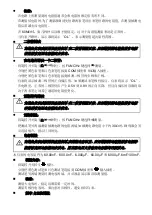
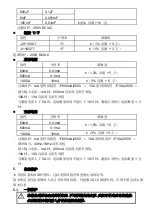
在电路上所测量到的电阻值通常会和电阻的额定值有所不同。


在测量低电阻时

,

为了测量准确请先短路两表笔读出表笔短路的电阻值

在测量被测电

阻后需减去该电阻值。


60M

档,要几秒钟后读数才能稳定。这对于高阻值测量来说是正常的。


当仪表开路时,显示器将显示

OL

,表示测量值超出量程范围。


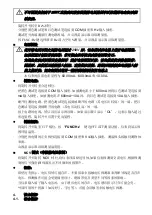
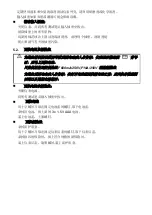
二极管测试


为避免仪表或被测设备的损坏

,

在二极管测量以前,应切断被测电路的所有电源

并将所有高压电容器充分放电。


在电路外测试一个二极管:


将旋转开关旋至

档位,按

FUNC/Hz

键选择

测量。


分别把黑色表笔和红色表笔连接到

COM

插座和

V/

输入插座。


分别把黑色表笔和红色表笔连接到被测二极管的负极和正极。


仪表将显示被测二极管的正向偏压值。如果测试表笔极性接反,仪表将显示

OL


在电路里,正常的二极管仍应产生

0.5V

0.8V

的正向压降;但反向偏压的读数将取

决于两表笔之间其它通道的电阻值变化。


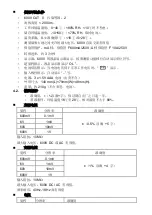
通断蜂鸣测试


为避免仪表或被测设备的损坏

,

在二极管测量以前,应切断被测电路的所有电源

并将所有高压电容器充分放电。


通断测量:


将旋转开关旋至

档位,按

FUNC/Hz

键选择

测量。


把测试笔另两端测量被测电路的电阻两端

,

如被测电路电阻小于约

30

时,蜂鸣器会发

出连续响声,指示灯同时亮。


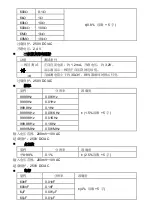
电容测量


为避免仪表或被测设备的损坏

,

在测量电容以前,应切断被测电路的所有电源并

将所有高压电容器充分放电。用直流电压文件确定电容器均已被放电。


本仪表的电容量程为

60.00nF

600.0nF

6.000

F

60.00

F

600.0

F,6mF,100mF


测量电容:


将旋转开关转至

檔位。


分别把黑色测试笔和红色测试笔连接到

COM

插座和

输入插座。


测试笔另两端测量待测电容两端,并从液晶显示器读取测量值。


注意:


测量大电容时,稳定读数需要一定时间。


测量有极性电容时,要注意对应极性,避免损坏仪表。


频率

/

占空比测量


Содержание MT-1236

Страница 1: ...MT 1236 3 5 6 True RMS Multimeter User s Manual 1st Edition 2020 2020 Copyright by Prokit s Industries Co Ltd...

Страница 2: ...e null if the meter is not properly operated The meter must be operated with great care when working in the vicinity of an exposed conductor or bus line The meter is prohibited from being used in the...

Страница 3: ...When appears the batteries must be replaced immediately The low level of a battery will result in incorrect reading on the meter which is likely to bring electric shock or personal injury to the opera...

Страница 4: ...ee to it that the meter cannot be in service unless it is proved conforming When the meter is left idle for a long period the operator shall remove the battery and place it in a place free from high t...

Страница 5: ...ata hold mode NCV Non contact AC voltage detection mode Automatic range measurement mode Unit of temperature Celsius Fahrenheit V mV V mV V the unit of volt Millivolt 1x10 3 or 0 001 volt A mA A mA Am...

Страница 6: ...rn off the illumination function It turns off automatically with no operation for 30S 2 4 Description of input socket Input socket Description COM All public input terminals to be measured are connect...

Страница 7: ...electric shock and or damage to the meter don t attempt to impose between any public terminal and ground any voltage whose valid value is over 600V for DC or AC current The meter provides DC AC voltag...

Страница 8: ...the test lead to measure the electric resistance of the circuit to be measured 4 Read the measured electric resistance value on LCD screen Notes The measured value of the electric resistance of the c...

Страница 9: ...s than 30 the beeper will sound continuously and the LED will be on 3 2 5 Capacitance measurement To avoid the meter or the measured equipment from damage do not attempt a capacitance measurement unle...

Страница 10: ...test lead in black to COM input socket Connect the test lead in red to a mA input socket when the measured current is less than 600mA connect the test lead in red to a 10A input socket when the measu...

Страница 11: ...frequencies and the indicator will be flashing Note 1 Voltage may still remain in the absence of any indication The operator shall not rely on non contact voltage detector to check the presence of vo...

Страница 12: ...AAA battery Dimensions 148mm L 79mm W 48mm H Weight approximately 210g not included batteries or test leads 4 2 Precision indicator Accuracy reading digit The accuracy warranty will run for 1 year up...

Страница 13: ...Accuracy 1 99 0 1 2 5 Reading 5 digits Input voltage range 200mV 10V AC valid value Overload protection 250V DC AC 4 2 5 Capacitor Measuring range Resolution Accuracy 60nF 0 01nF 4 Reading 5 digits 6...

Страница 14: ...on 10A DC AC valid value When the measured current is over 5A the duration of continuous measurement shall not be over 10 seconds The current measurement shall be carried out 1 minute after the comple...

Страница 15: ...f any abrading or chemical solvent The dirty or damp input socket may affect reading Steps for cleaning input sockets Disenable the meter and pull all test leads out of the input socket Clean up all d...

Страница 16: ...replacement When fuse is blown replace with the same type of fuse 1 Turn off the power of the meter and take out the holster 2 Use a screwdriver to remove the screw of back cover 3 Take off the back...

Страница 17: ...1 Pro sKit MT 1236 1 1 A B 60V DC 30V AC 3 1 5V AAA 600V...

Страница 18: ...AC DC 600 V European Union 1 2 600V 250V mA F600mA 250V A F10A 250V 2 2 1 LED...

Страница 19: ...2 2 NCV V mV V mV 1x10 3 0 001 A mA A mA 1x x10 3 0 001 MkHz Hz kHz 1x10³ MHz 1x10⁶ 1000 mF F nF F mF 1x10 3 0 001 F 1x10 6 0 000001 nF 1x10 9 0 000000001 k M k 1000 M 1 000 000 2 3 HOLD...

Страница 20: ...FUNC Hz Hz 15 3 30 2 4 COM V mA Hz mA 10A 10A 2 5 3 3 1 HOLD H H 15s 30s 30s 15 3 2 600V 600V 600 0mV 6 000V 60 00V 600V...

Страница 21: ...V FUNC Hz DCV ACV COM V 600 0 6 000k 60 00k 600 0k 6 000M 60 00M FUNC Hz COM V OL FUNC Hz COM V OL 0 5V 0 8V FUNC Hz COM V 30 60 00nF 600 0nF 6 000 F 60 00 F 600 0 F 6mF 100mF...

Страница 22: ...COM 250V Hz COM Hz FUNC Hz Hz 250V 60 00mA 600 0mA 10A mA A FUNC Hz COM 600mA mA 600mA 10A 10A OL FUNC Hz COM V NCV NCV...

Страница 23: ...0 1 18 28 600V mA F600mA 250V A F 10A 250V 3 6000 counts OL 3 x 1 5V AAA 148 mm L 79mm W 48mm H 210g 4 2 18 28 80 600mV 0 1mV 0 5 5 6V 0 001V 60V 0 01V 600V 0 1V 10M 600V DC AC 600mV 0 1mV 1 4 6V 0 0...

Страница 24: ...C 9 999Hz 0 001Hz 1 5 5 99 99Hz 0 01Hz 999 9Hz 0 1Hz 9 999KHz 0 001KHz 99 99KHz 0 01KHz 999 9KHz 0 1KHz 9 999MHz 0 001MHz 200mV 10V AC 250V DC AC 1 99 0 1 2 5 5 200mV 10V AC 250V DC AC 60nF 0 01nF 4 5...

Страница 25: ...250V DC AC 60mA 0 01mA 1 2 5 600mA 0 1mA 10 00A 0 01A 3 5 mA F600mA 250V 10A F10A 250V mA 600mA 10A 10A 5A 10 1 60mA 0 01mA 1 5 5 600mA 0 1mA 10 00A 0 01A 3 5 mA F600mA 250V 10A F10A 250V 40Hz 1kHz mA...

Страница 26: ...5 2 F600mA 250V F10A 250V 3 x 1 5V AAA...

Страница 27: ...MT 1236 3 5 6 1 Pro sKit MT 1236 1 1 A B 60Vdc 30Vac 3 1 5V AAA...

Страница 28: ...600V AC DC CAT 600 V European Union 1 2 600V 250V mA F600mA 250V A F10A 250V...

Страница 29: ...2 2 1 LED 2 2 NCV V mV V...

Страница 30: ...001 A mA A mA 1x x10 3 0 001 MkHz Hz kHz 1x10³ MHz 1x10⁶ 1000 mF F nF F mF 1x10 3 0 001 F 1x10 6 0 000001 nF 1x10 9 0 000000001 k M k 1000 M 1 000 000 2 3 HOLD FUNC Hz Hz 15 3 30 2 4 COM V mA Hz mA 10...

Страница 31: ...3 1 HOLD H H 15s 30s 30s 15 3 2 600V 600V 600 0mV 6 000V 60 00V 600V V FUNC Hz COM V 600 0 6 000k 60 00k 200 0k 6 000M 60 00M FUNC Hz COM V...

Страница 32: ...60M OL FUNC Hz COM V OL 0 5V 0 8V FUNC Hz 30 60 00nF 600 0nF 6 000 F 60 00 F 600 0 F 6mF 100mF COM...

Страница 33: ...250V Hz COM Hz FUNC Hz Hz 250V 60 00mA 600 0mA 10 00A COM 600mA mA 600mA 10A 10A OL FUNC Hz COM V NCV NCV 4 4 1...

Страница 34: ...0 70 RH 0 1 18 28 600V mA F600mA 250V A F 10A 250V 3 6000 OL 3 x 1 5V AAA 148 mm L 79mm W 48mm H 210g 4 2 18 28 80 600mV 0 1mV 0 5 5 6V 1mV 60V 10mV 600V 1V 10M 600V DC AC 600mV 0 1mV 1 4 6V 1mV 60V 1...

Страница 35: ...V 1 2mA 3 2V 30 250V DC AC 9 999Hz 0 001Hz 1 5 5 99 99Hz 0 01Hz 999 9Hz 0 1Hz 9 999KHz 0 001KHz 99 99KHz 0 01KHz 999 9KHz 0 1KHz 9 999MHz 0 001MHz 200mV 10V AC 250V DC AC 1 99 0 1 2 5 5 200mV 10V AC...

Страница 36: ...20 1000 1 1 3 4 1832 1 1 3 250V DC AC 60mA 0 01mA 1 2 5 600mA 0 1mA 10 00A 10mA 3 5 mA F600mA 250V 10A F10A 250V mA 200mA 10A 10A 5A 10 1 60mA 0 01mA 1 5 5 600mA 0 1mA 10 00A 10mA 3 3 mA F600mA 250V 1...

Страница 37: ...5 2 F600mA 250V F10A 250V 3 x 1 5V AAA...

Страница 38: ...MT 1236 12 0755 83692415 83692986 83246594 83247554 400 169 9629 0755 83692143...

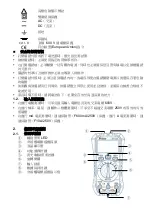
Страница 39: ...130 7 5 886 2 22183233 E mail pk mail prokits com tw 1365 25 403 5 0755 83692415 0755 83692143 400 400 1699 629 E mail shenzhen mail prokits com tw...

Страница 40: ...PROKIT S INDUSTRIES CO LTD http www prokits com tw E mail pk mail prokits com tw 2020 Copyright by Prokit s Industries Co Ltd C All right reserved...

Отзывы: