


PROLiNK User's Manual for PRO1911W, PRO2211W
www.prolink2u.com
Version 1.2 (Feb’09)
5
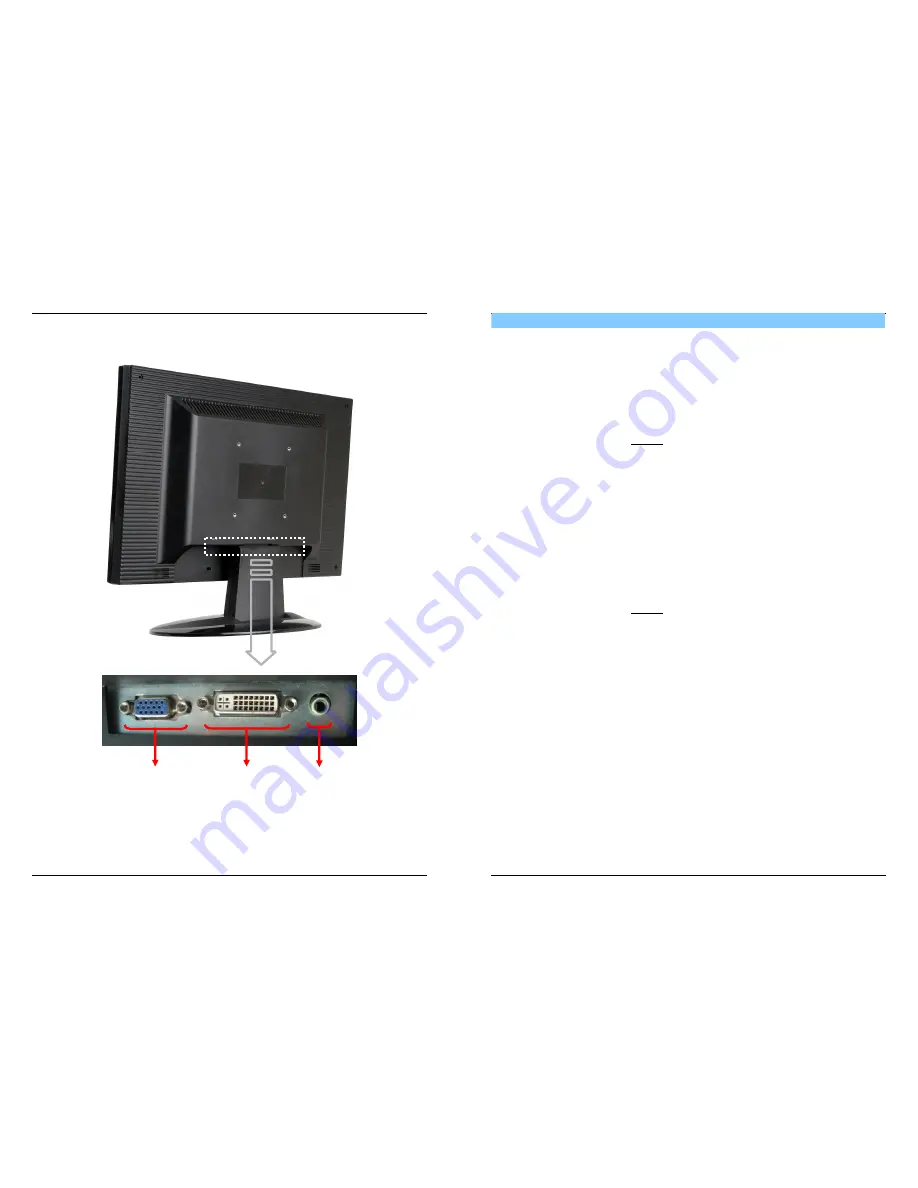
2.2
Front Panel overview
VGA
Connector
DVI
Connector
Audio
Connector
Note:
For VOLUME function, please ensure the audio is connected to the sound card of the computer or
to the output source of any media player with 3.5mm stereo socket.
PROLiNK User's Manual for PRO1911W, PRO2211W
www.prolink2u.com
Version 1.2 (Feb’09)
6
Chapter 3
Installation
Whenever you connect a video system to your set, ensure that all elements are switched off. Refer to
the documentation supplied with your equipment for a detailed connection instructions and safeguard
information.
3.1
Connecting a Computer
3.1.1 Unplug or disconnect the signal cord connector from your existing PC video connector
and
LCD/CRT
Monitor,
IF ANY,
3.1.2 Plug in or connect the signal cord connector to the PC video connector,
3.1.3 Plug in or connect the power cord to the LCD Monitor, and
3.1.4 Turn power plug socket switch ON to supply voltage to both PC and Monitor,
3.1.5 Turn power button switch ON for both PC and Monitor,
3.1.6 For most OS, Monitor is Plug & Play without driver installation required.
3.2
Connecting a Laptop
Ensure the Laptop comes with a video output connector, then follow the procedures stated
below:
3.2.1 Unplug or disconnect the signal cord connector from your existing PC video connector
and
LCD/CRT
Monitor,
IF ANY,
3.2.2 Plug in or connect the signal cord connector to the Laptop's video output connector,
3.2.3 Plug in or connect the power cord to the LCD Monitor, and
3.2.4 Turn power plug socket switch ON to supply voltage to both PC and Monitor,
3.2.5 Turn power button switch ON for both Laptop and Monitor,
3.2.6 Press video output button from Laptop with special key combination (different
combination in various type of laptop).
3.3 Connecting
an
Audio
3.3.1 Connect the stereo audio cable to the “PC AUDIO IN(STEREO)” jack to the rear of your
LCD monitor and the other end to the “Audio Out” jack of the sound card on your
computer.


