


11
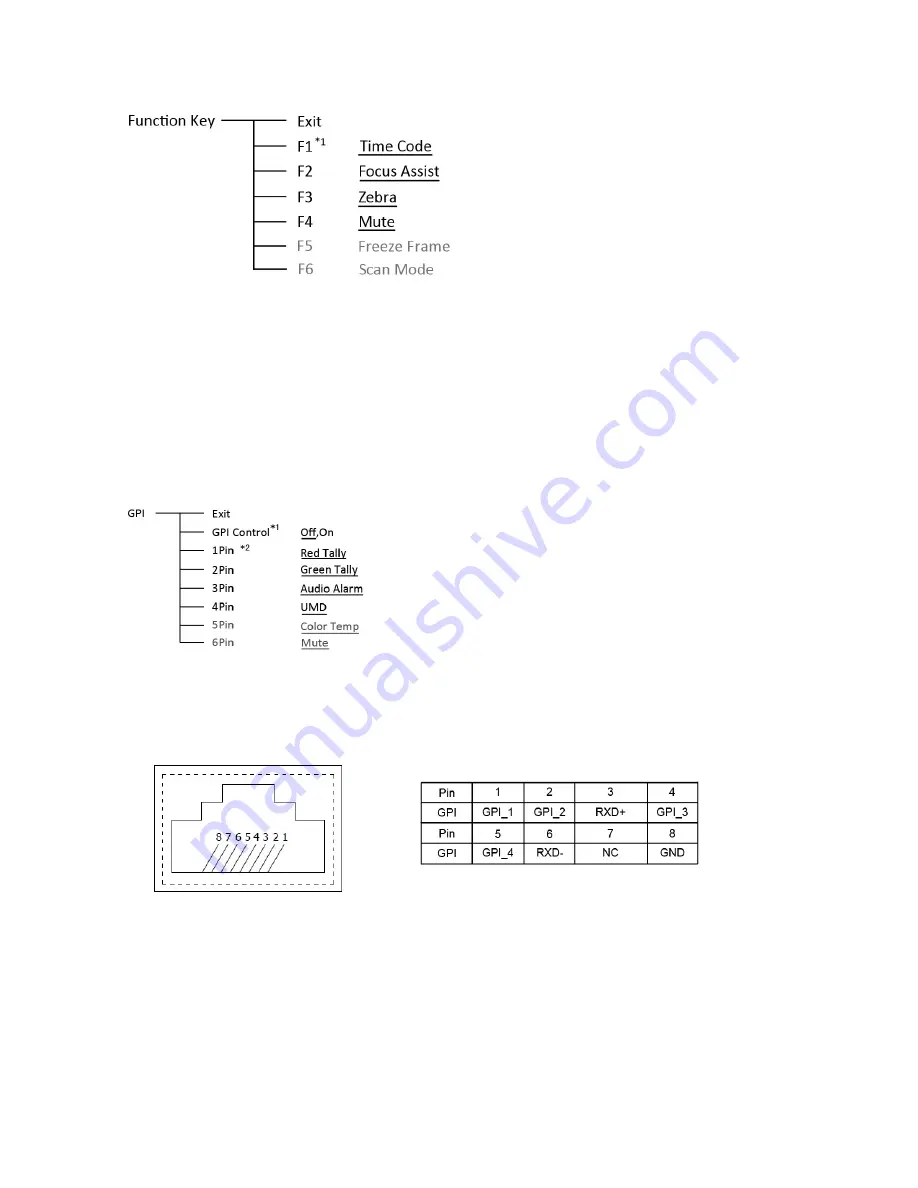
4. Function key
To define the F1
~
F4 function keys
*1 Function keys F1-F4 can be set as the down below functions:
Time code, Zebra, Audio Bar, False Color, AFD, H/V Delay, R/G/B/Mono, Marker, Color Bar, UMD,
Audio Alarm, Max backlight, Focus Assist, Aspect Ratio, Scan Mode, Zoom Mode, Mute, Freeze
Frame, Flip Mode, Color Temp.
For example: Set F3 to “R/G/B/Mono” under “Function key” submenu. User can press F3 on the front
panel to adjust the parameters of “R/G/B/Mono”, and the “R/G/B/Mono” will change and follow the
sequence: Blue Only →Red Only →Green Only →Mono →Off.
5. GPI
User can set GPI pins 1-4 to relevant functions to turn on or off this function.
*1 When “GPI control” is set to “On”, the monitor can be operated through external GPI control unit.
*2 The GPI pins can be set to the down below functions:
Red Tally, Green Tally, Yellow Tally, Aspect Ratio, Scan Mode, Zoom Mode, Mute, Freeze Frame,
Flip Mode, Color Temp, Time code, Zebra, Audio Bar, False Color, AFD, H/V Delay, R/G/B/Mono,
Marker, Color Bar, UMD, Audio Alarm, Max backlight, Focus Assist.
When connecting the GPI pin with ground, the setted function will be turned on, and goes out when
disconnecting.
Example 1: Under “GPI ” submenu, set “GPI control” to “On”, set “2 Pin” to “Red Tally”, when the
pin 2 of the extenal GPI control unit is connected with ground, the Tally light will display on the front
panel which will flashes in red around every second. When disconnected, the monitor will not display
tally light information.
Example 2: Under “GPI ” submenu, set “GPI control” to “On”, set “4 Pin” to “Scan Mode”, when the
pin 4 of the extenal GPI control unit is connected with ground, the Scan mode will change and follow
the sequence: “Normal” →”Overscan”→”Native” .