


REHATEAM s.r.l.—vicolo Negrelli
5
—
31040
Castagnole di Paese TV
-
www.rehateamprogeo.com
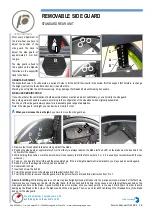
Service Manual JOKER R2 26
SERVICE MANUAL
“U” TUBE ALUMINIUM FOOTPLATE
C
C
C
C
A
B
Angle adjustment:
Loosen the bolt
A
and the grab screw
B
of both supports (right and left) just enough to be able to turn the footplate.
Adjust the inclination of the plate until the necessary angle.
Finally, tighten the bolt
A
first and then the grab screw
B
of both supports.
Position adjustment:
The “U” tubes are always mounted facing backward, whereas the footplate tubular facing frontward.
The footrest plate, with respect to the footplate tubular, can be fixed in two positions.
To change position, remove the 4 bolts
C
, move the plate and fix it using the other set of holes.
Other configurations are possible (not present in the order form), in fact, both the “U” tubes and the footplate tubular can
be facing frontward
and backward.
To reverse the entire footplate group (see pictures
1
,
2
and
4
), remove the bolts/washers/nuts that fix the footplate tubes to the frame (see
“
footplate distance
”) and remove the footplate.
Reverse the assembly of the entire group and fix it to the necessary height.
You will need to adjust the angle.
To reverse only the position of the footplate tubular (see pictures
1
,
2,
3
and
5
or
4, 2, 3
and
6
) remove the entire footpalte group as above
mentioned.
Loosen the bolts
A
and the grab screws
B
until you can slide the two tubes off the footplate tubular.
Reverse the assembly without tightening the bolts and grab screws. Insert the tubes to the necessary height.
Centre the footplate and adjust the angle as above mentioned while paying attention to keeping the two tubes parallel to each other.
To make inserting the tubes easier, if possible, remove the rubber adaptor from the frame and slide it along the footplate tube; that will
create more room for the passage of footplate tubes.
1
2
3 4
5 6
Tubes facing backward
and footplate frontward
Footplate group
Disassembled group
Tubes facing frontward
and footplate backward
Tubes fand footplate
facing backward
Tubes fand footplate
facing frontward
In addition to the height adjustment holes, the “U” tubes has other holes (
H)
meant to fix the footplate
adjustment support.
You can cut off, every 3 cm, the part of the tube where you fix the support. You will need to enlarge the
predrilled hole to 6 mm and fix the support with the bolt (spread some thread lock glue).
This operation may be necessary:
1)you need to increase the footplate distance, but the holes for height adjustment do not allow to do so.
2) to avoid interference between the curve of the tube and the caster’s rotation, in fact, you can adjust
the curve higher and the part of the tube with the support short in order to keep the same footplate dis-
tance of a configuration with the curve low and the support tube long.
height
adj.
holes
H


