background image

8

4

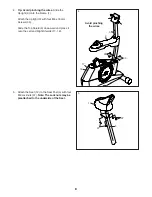
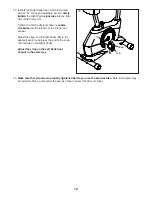
Avoid pinching 

the wires

4. 

Tip: Avoid pinching the wires. 

Slide the 

Upright (3) onto the Frame (1).

  Attach the Upright (3) with four M8 x 18mm 

Screws (35).

  Slide the Top Shield (9) downward and press it 

onto the Left and Right Shields (17, 18).

5.  Attach the Seat (12) to the Seat Post (5) with four 

M8 Locknuts (37). 

Note: The Locknuts may be 

preattached to the underside of the Seat. 

5

9

35

17

18

35

3

1

12

37

37

5

Содержание 115 Csx Bike

Страница 1: ...e using this equipment Keep this manual for future reference QUESTIONS If you have questions or if parts are damaged or missing DO NOT CONTACT THE STORE please contact Customer Care IMPORTANT Please r...

Страница 2: ...and request a free replacement decal Apply the decal in the location shown Note The decal s may not be shown at actual size WARNING DECAL PLACEMENT 2 IMPORTANT PRECAUTIONS 3 BEFORE YOU BEGIN 4 PART ID...

Страница 3: ...vel surface with a mat beneath it to protect the floor or carpet Make sure that there is at least 2 ft 0 6 m of clearance around the exercise bike 7 Inspect and properly tighten all parts regu larly R...

Страница 4: ...have questions after reading this manual please see the front cover of this manual To help us assist you note the product model number and serial number before contacting us The model number and the l...

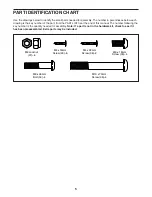
Страница 5: ...ngs below to identify the small parts needed for assembly The number in parentheses below each drawing is the key number of the part from the PART LIST near the end of this manual The number following...

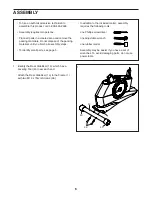
Страница 6: ...steps To identify small parts see page 5 In addition to the included tool s assembly requires the following tools one Phillips screwdriver one adjustable wrench one rubber mallet Assembly may be easie...

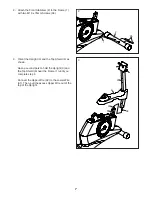
Страница 7: ...ent the Upright 3 and the Top Shield 9 as shown Have a second person hold the Upright 3 and the Top Shield 9 near the Frame 1 until you complete step 4 Connect the Upper Wire 32 to the Lower Wire 31 T...

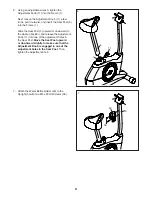
Страница 8: ...Attach the Upright 3 with four M8 x 18mm Screws 35 Slide the Top Shield 9 downward and press it onto the Left and Right Shields 17 18 5 Attach the Seat 12 to the Seat Post 5 with four M8 Locknuts 37...

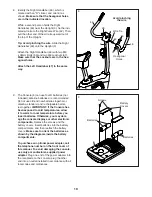
Страница 9: ...upward or downward to the desired position and release the Adjustment Knob 11 into one of the adjustment holes in the Seat Post Move the Seat Post upward or downward slightly to make sure that the Ad...

Страница 10: ...Console 6 can use four D batteries not included alkaline batteries are recommended Do not use old and new batteries together or alkaline standard and rechargeable batter ies together IMPORTANT If the...

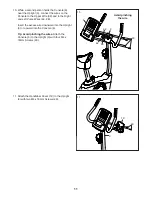
Страница 11: ...and Left Pulse Wires 42 28 Insert the excess wire downward into the Upright 3 or upward into the Console 6 Tip Avoid pinching the wires Attach the Console 6 to the Upright 3 with four M4 x 16mm Screw...

Страница 12: ...the left arm of the Crank not shown Adjust the strap on the Right Pedal 26 to the desired position and press the end of the strap onto the tab on the Right Pedal Adjust the strap on the Left Pedal not...

Страница 13: ...ove the seat post upward or downward slightly to make sure that the knob is engaged in one of the adjustment holes in the seat post Then tighten the knob HOW TO ADJUST THE PEDAL STRAPS To adjust the p...

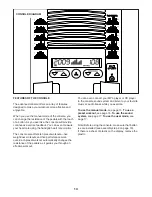
Страница 14: ...workouts and five performance work outs Each preset workout automatically changes the resistance of the pedals as it guides you through an effective workout You can even connect your MP3 player or CD...

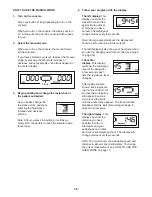
Страница 15: ...e approximate number of calories you have burned The display will change modes every few seconds Note During a preset workout the display will show the time remaining in the workout The left display w...

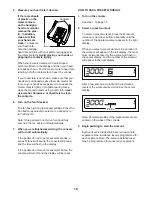
Страница 16: ...s the fan will turn off automatically 7 When you are finished exercising the console will turn off automatically If the pedals do not move for several seconds a series of tones will sound the console...

Страница 17: ...ee step 4 on page 15 5 Measure your heart rate if desired See step 5 on page 16 6 Turn on the fan if desired See step 6 on page 16 7 When you are finished exercising the console will turn off automati...

Страница 18: ...equipment does cause harmful interference to radio or television reception which can be determined by turning the equipment off and on try to correct the interference by one or more of the following m...

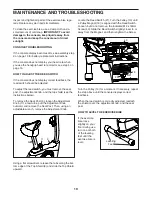
Страница 19: ...Seat Post 5 loosen the Adjustment Knob 11 a few turns pull the Adjustment Knob outward and remove the Seat Post Then using an adjustable wrench remove the Adjustment Knob Using a flat screwdriver rele...

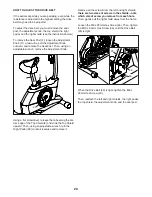
Страница 20: ...Using a flat screwdriver release the tabs along the bot tom edge of the Top Shield 9 and slide the Top Shield upward Then using an adjustable wrench turn the Right Pedal 26 counterclockwise and remov...

Страница 21: ...c Exercise If your goal is to strengthen your cardiovascular system you must perform aerobic exercise which is activity that requires large amounts of oxygen for prolonged periods of time For aerobic...

Страница 22: ...2 1 Upper Wire 33 1 M10 x 50mm Hex Screw 34 2 M4 x 25mm Screw 35 4 M8 x 18mm Screw 36 4 M10 x 75mm Screw 37 8 M8 Locknut 38 2 M4 x 22mm Screw 39 2 M10 Flange Nut 40 13 M4 x 16mm Screw 41 4 M4 x 12mm S...

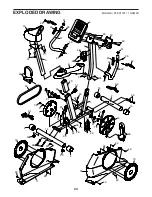
Страница 23: ...1 33 40 24 13 9 49 19 6 51 30 45 45 51 14 43 43 40 34 40 40 40 10 40 40 17 4 4 3 48 40 38 20 11 2 15 15 27 35 35 37 37 30 40 40 21 18 10 36 36 5 53 37 53 37 27 47 16 16 28 42 32 34 39 8 8 39 44 EXPLOD...

Страница 24: ...This warranty will automatically be voided if the product is used as a store display model if the product is purchased or transported outside the USA if all instructions in this manual are not followe...

Отзывы: