background image

Wall mount:
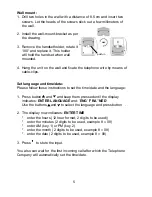
1. Drill two holes in the wall with a distance of 8.5 cm and insert two 

screws. Let the heads of the screws stick out a few millimeters of
the wall.

2. Install the wall-mount-bracket as per

the drawing.

3. Remove the handsetholder, rotate it

180° and replace it. This holder
will hold the handset when wall
mounted.

4. Hang the unit on the wall and fixate the telephone wire by means of

cable-clips.

Set language and time/date:
Please follow these instructions to set the time/date and the language:

1. Press button    and     and keep them pressed until the display

indicates: ENTER LANGUAGE and: 'ENG' 'FRA' 'NED'
Use the buttons    and    to select the language and press button   . 

2. The display now indicates: ENTER TIME

*

enter the hours (12 hour format, 2 digits to be used))

*

enter the minutes (2 digits to be used, example 8 = 08)

*

enter AM (key 1) or PM (key 2)

*

enter the month (2 digits to be used, example 8 = 08)

*

enter the date (2 digits to be used, example 8 = 08)

3. Press     to store the input.

You also can wait for the first incoming call after which the Telephone
Company will automatically set the time/date.

5

push-in

Содержание TX-178B

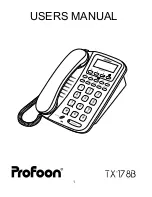
Страница 1: ...1 USERS MANUAL TX_178B...

Страница 2: ...yed by the TX 178B The Caller ID memory can hold 95 calls together with the time and the date of the call The caller ID is connected with the dialer of the telephone A received number can be called ba...

Страница 3: ...ng call 5 Outgoing call 5 Handsfree 5 Last number redial 5 Pause 5 Flash 6 Timer 6 Mute 6 Hold 6 Memories 7 Programming 7 Add a name 7 Dialing 7 Remarks 8 Caller ID 9 Functioning 9 Repeated call 9 Rea...

Страница 4: ...f the telephone Open the batterycover and install 4 pcs 1 5Volt size AAA batteries Always disconnect the telephoneplug from the telephone outlet during the installing or replacing of the batteries Whe...

Страница 5: ...w these instructions to set the time date and the language 1 Press button and and keep them pressed until the display indicates ENTER LANGUAGE and ENG FRA NED Use the buttons and to select the languag...

Страница 6: ...h the built in microphone and loudspeaker Be advised that the conversation is switching so please let the other party finish talking and avoid loud background noise Lift the handset to continue the co...

Страница 7: ...the timerfunction Press this button after the call to view the duration of the last telephone call MUTE button Press MUTE to temporary switch OFF the microphone Press again to continue the conversati...

Страница 8: ...a 2 digit code 00 16 through the keypad 4 the display gives the stored telephonenumber 5 press button 6 use the keypad to select the characters Press 2x button 3 to select the E press 3x button 8 to s...

Страница 9: ...r an old number This old number must first be erased A number can be erased by pressing button STORE followed by the memory location Than use button to erase all figures Press button STORE to confirm...

Страница 10: ...ers Please note that you must subscribe yourself for Caller ID Contact your provider Repeated call If a call comes in which has the same number as already in memory than the display indicates RPT repe...

Страница 11: ...Delete Look for the number to be deleted and press button twice In case all numbers have to be deleted press and hold button until the display reads NO CALL 11...

Страница 12: ...his number must be dialed manual ly In case the telephone is connected to a PABX which is capable for Caller ID than lift the handset of the telephone and dial the prefix most ly a 0 by the keypad of...

Страница 13: ...our PHONE MAIL MAINTENANCE Do not locate the telephone in direct sunlight or in a moist environment Never use chemical cleansers to clean the cabinet the cabinet may only be cleaned with a moist cloth...

Страница 14: ...on of your complaint He will collect the device together with this guarantee card and the dated purchase ticket and he will take care of a prompt repair respectively free sending to the importer THE G...

Отзывы: