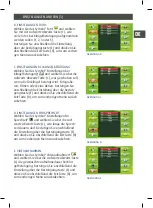
B. PHOTO SETTINGS
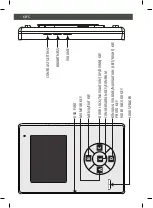
Select the “photo” icon and using the up/
down key (C) select how many photos must be
taken each time someone rings (1, 2, 3 or 5).
Confirm with the confirm key (E) and finally
press the exit key (B) to go back to the previous
menu.
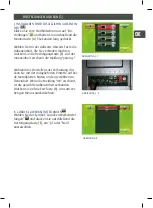
C. SETTINGS WHEN RINGING
Select the “settings when ringing”
icon and
use the up/down key (C) to set what must hap-
pen when someone rings: photos, filming or
no action. Confirm with the confirm key (E) and
finally press the exit key (B) to go back to the
previous menu.
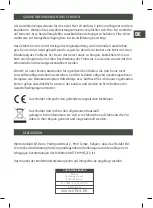
D. SETTINGS FOR SPEAKING TIME
Select the “settings for speaking time” icon
and use the up/down key (C) to set the length
of the speaking time. Confirm with the confirm
key (E) and finally press the exit key (B) to go
back to the previous menu.
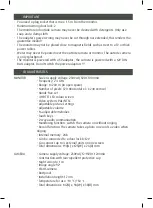
E. VIDEO RECORDINGS
Select the “video recordings”
icon and use
the up/down key (C) to set the required recor-
ding time when someone rings. Confirm with
the confirm key (E) and finally press the exit key
(B) to go back to the previous menu.
CHANGE SETTINGS (3)
PHOTO C
PHOTO B
PHOTO D
PHOTO E
UK
Содержание PAC120
Страница 3: ...SCHEMA 1 2 2 5 7 8 12 15V 12 15V 1 2 3 4 5 6 7 8 MATCHING 200689002_PAC120_IM januari 2016 NL...
Страница 15: ...SCHEMA 1 2 2 5 7 8 12 15V 12 15V 1 2 3 4 5 6 7 8 MATCHING 200689002_PAC120_IM januari 2016 FR...
Страница 27: ...SCHEMA 1 2 2 5 7 8 12 15V 12 15V 1 2 3 4 5 6 7 8 MATCHING 200689002_PAC120_IM januari 2016 DE...
Страница 39: ...SCHEMA 1 2 2 5 7 8 12 15V 12 15V 1 2 3 4 5 6 7 8 MATCHING 200689002_PAC120_IM januari 2016 UK...


