PC-BS3038_IM
27.03.19
32
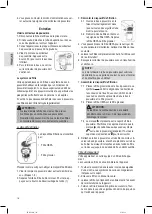
Nozzle Attachments
• You can attach the nozzle attachments
ot d rect y to t e connector on t e ap
-
p ance a we a to t e a ready mo nted
suction tube.
•
o detac t e no e attac ment p
t em o w e t rn ng t em g t y.
Floor Nozzle (12)
e oor no e fitted w t ro er or ea er g d ng.
o can c ean moot r ace and carpet w t t e oor
nozzle.
• Adjust the brushes outwards or inwards using the lever
(11).
Best use of the appliance depends on the texture of the
oor co er ng. e recommend t e o ow ng e:
• Use without brushes:
or ac m ng oor co er ng w t
a deep pile
• Use with brushes:
or ac m ng moot oor and
carpets with a shallow pile
Hard Floor Brush
For gentle cleaning of hard surfaces such as parquet,
laminate, tiles, etc.
Crevice Nozzle
For vacuuming dirt from corners, joints and small gaps.
Brush Nozzle
or remo ng d rt gent y rom t n p o tery and
mattresses. Also suitable for removing dust from sensitive
surfaces such as furniture or curtains.
Electrical Connection
• Before connecting the plug to the wall socket, check
whether the mains voltage is correct. Refer to the infor-
mation on the rating plate of the device.
•
onnect t e de ce to a cert fied wa oc et on y.
Switching the Appliance On / Off
rn t e app ance on y ng t e on o w tc .
O
= Off
I
= Low suction power
II
=
g ct on power
Assembly the Wall Holder
WARNING:
Make sure beforehand whether there are cables in the
wall which could be damaged!
1.
ea re t e e g t or t e wa o der. o d t e ac m
cleaner against the wall when it is assembled with the
te e cop c ct on p pe and t e oor no e.
2.
o d t e wa o der aga n t t e wa w t t e two dr
holes at the top and the bottom of the holder. Mark 2 drill
holes.
3. Drill the holes and insert the dowels into the wall.
4. Insert the screws through the holes of the wall holder.
rn t e crew w t t e wa o der nto t e dowe .
5.
g ten t e crew y and.
Using the Appliance
1.
nw nd t e power cord comp ete y.
2.
In ert t e ma n p g nto a correct y n ta ed power
socket.
3.
w tc on t e app ance w t t e on o w tc . e ect a
desired speed setting (
I
or
II
).
4.
d t t e oor no e w t t e e er depend ng on t e
oor co er ng.
5.
ac m at a teady peed. ere no need to e ert
pressure.
NOTE:
ay attent on to t e range t at can e co ered w t t e
cable length!
End of Operation
1.
rn t e ac m c eaner o y t e on o w tc and re
-
move the plug from the socket.
2.
et t e de ce coo down comp ete y.
3.
I yo a e a ready n ta ed t e wa
holder, hang up the vacuum cleaner.
4.
o can w nd t e power cord oo e y
around the handle and the dust collector.
Maintenance
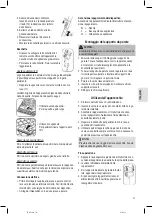
Emptying the Dust Collector
1. Disconnect the mains plug from the wall socket.
2.
I nece ary remo e t e ct on t e or t e no e
attachment from the appliance.
3.
o d t e app ance w t t e ottom p ate o t e d t co
-
lector over a dustbin.
4.
mpty t e content o t e d t
collector. Press the (10) button to
open the bottom panel.
5.
en c o e t e a e p ate aga n.
e oc on t e d t co ector m t
engage.

