background image

3

2) Turn the compressor on and
set the regulator to the proper
pressure for the size and type of
fasteners being used.
3) Connect the tool to the air
supply.

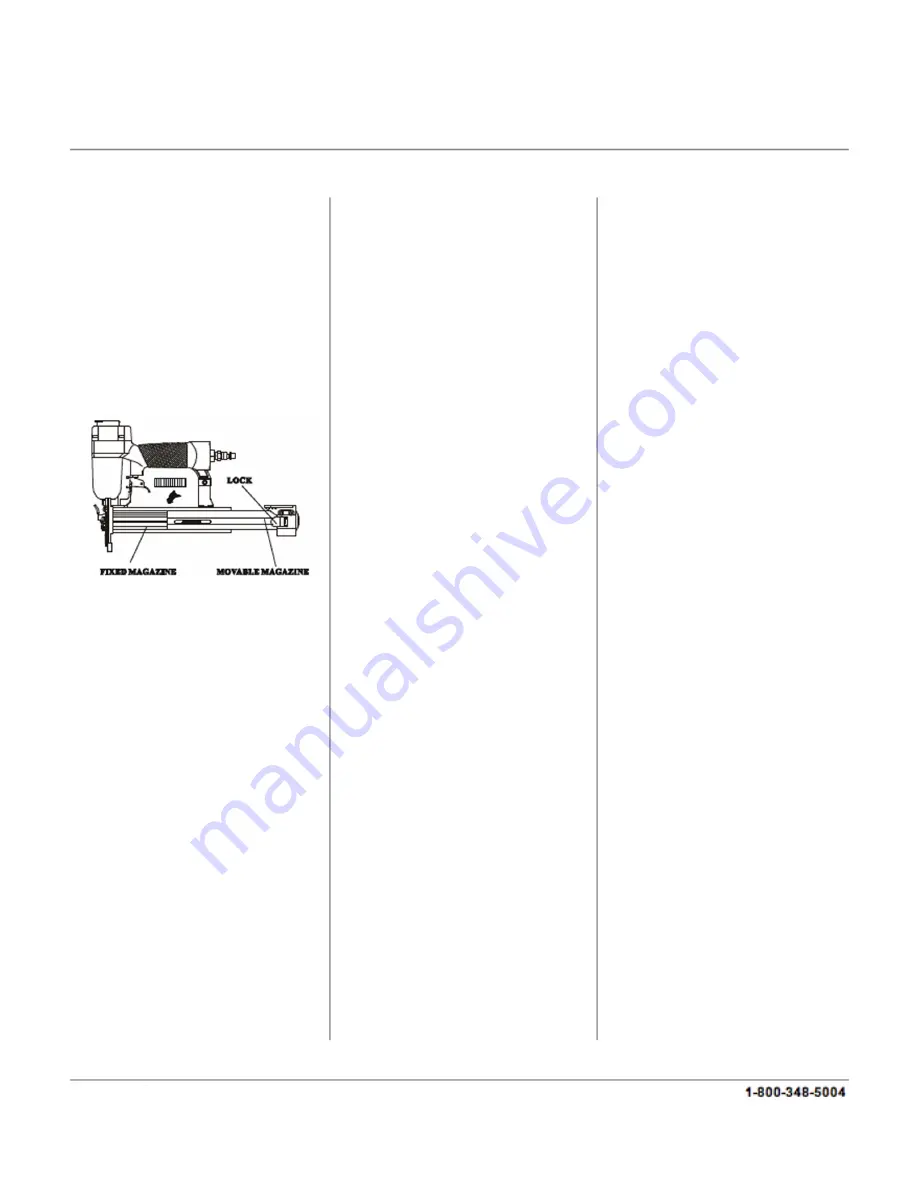
LOADING THE FASTENERS

1) Depress the lock to release
the movable magazine and pull
the magazine out fully as shown
below.

2) Place a full clip of the
specified type and size fasteners
on the fixed magazine, up to 100
fasteners may be loaded in the
magazine.
3) Push the movable magazine
assembly forward until it was
locked.

OPERATING THE TOOL

Test the driving depth in a
sample piece of wood before
using. If the fasteners are being
driven too far or not far enough,
adjust the regulator to provide
less air pressure or more air
pressure.
1) Connect the tool to the air
supply. Make sure the air
pressure is in correct range.
2) Load the fastener as above
the direction given in the 

LOAD

THE FASTENERS 

section.

3) Hold the body and press the
drive guide to the work surface.
Be sure the tool is straight and
then gently depress the trigger to
drive the fastener.
4) Lift the tool off the work
surface.
5) The tool has two driving
modes.

§

 Put the nose on the work

surface, lightly push the tool
towards the working surface until
the safe bracket is depressed.
Depress the trigger to drive the
fastener.

§

 Depress the trigger, then

repeatedly impact the safe
bracket. The tool can repeatedly
drive the fasteners. The tool will
drive one fastener when the safe
bracket is impacted one time.

REGULAR MAINTENANCE

1) Frequent, but not excessive,
lubrication is required for best
performance. Oil added through
the airline connection will
lubricate internal parts. An
automatic airline oiler is
recommended but oil may be
added manually before every
operation or after about 1 hour of
continuous use. Only a few
drops of oil at a time are
necessary. Too much oil will
collect inside the tool and be
blown out during the exhaust
cycle. ONLY USE PNEUMATIC
TOOL OIL. Do not use detergent
oil or additives as these
lubricants will cause accelerated
wear to the seal in the tool.
2) Use a small amount of oil on
all moving parts and pivots.

3) Dirt and water in the air
supply are major causes of
pneumatic tool wear. Use a
filter/oiler for better performance
and longer life. The filter must
have adequate flow capacity for
the specific application. Consult
the manufacturer’s instructions
for proper maintenance of your
filter.
4) Keep tools clean for better
and safer performance. Use
nonflammable cleaning
solutions (

CAUTION:

 Such

solutions may damage O-Ring
and other tool parts) only if
necessary. DO NOT SOAK.

[email protected]

Содержание 7552

Страница 1: ...gth 3 8 1 1 4 in Nail Size 18 Gauge Air Inlet 1 4 NPT Air Consumption 1 6 CFM CAUTION FOR YOUR OWN SAFETY READ INSTRUCTION MANUAL COMPLETELY AND CAREFULLY BEFORE OPERATING THIS BRAD NAILER Any failures made in following the safety regulations and instructions may result in an electric shock fire and or serious injury Model 7552 SAFETY INSTRUCTIONS 1 Read and understand tool labels and the manual F...

Страница 2: ...ers 18 Use the correct air connector The connector on the tool must not hold pressure when the air supply is disconnected If the wrong fitting is used the tool can be charged with air after being disconnected and still be able to drive a fastener 19 When connecting the air the tool can possibly fire the fasteners Therefore remove all the fasteners before connecting to the air 20 Do not depress the...

Страница 3: ... safe bracket is depressed Depress the trigger to drive the fastener Depress the trigger then repeatedly impact the safe bracket The tool can repeatedly drive the fasteners The tool will drive one fastener when the safe bracket is impacted one time REGULAR MAINTENANCE 1 Frequent but not excessive lubrication is required for best performance Oil added through the airline connection will lubricate i...

Страница 4: ...lace bumper or pusher spring Dirt in front plate clean drive channel of front plate Inadequate airflow to tool check hose and compressor fittings Worn or dry O Ring on piston Replace O Ring or lubricate Damaged O Ring on trigger valve Replace O Ring Cylinder cap seal leaking Replace Seal Joint guider is worn Replace joint guider Fasteners are wrong size or damaged Use the recommended and undamaged...

Страница 5: ...y or indirectly to misuse abuse negligence or accidents repairs or alterations or a lack of maintenance NATI shall in no event be liable for death injuries to persons or property or for incidental special or consequential damages arising from the use of our products To receive service under warranty the original manufacturer part must be returned for examination by an authorized service center Shi...

Страница 6: ...8907552 01 13 18 GAUGE 1 1 4 INCH BRAD NAILER Model 7552 For customer service call 1 800 348 5004 or email feedback natitools com 6 ...

Страница 7: ...Safe Guider 24 Front Plate 44 Cylinder 20 Spring Pin 38 Stopped Washer 14 Pin 39 O Ring 50 5x2 5 15 Washer 41 O Ring 28 3x3 17 Screw 42 Piston Assembly 18 Plate 43 O Ring 36 3x2 5 19 NO Description NO Description 01 Screw 25 Spring 02 Bushing 26 Safe Bracket A 03 Exhaust Cover 27 Safe Bracket B 04 Seal 28 Safe Bracket C 05 Screw 29 Spring Pin 06 Cylinder Cap 30 Seal 07 Gasket 31 Trigger Valve Head...

Отзывы: