PRODIM 2017 ©
Proliner Quick start guide - Training preparation
Page 10
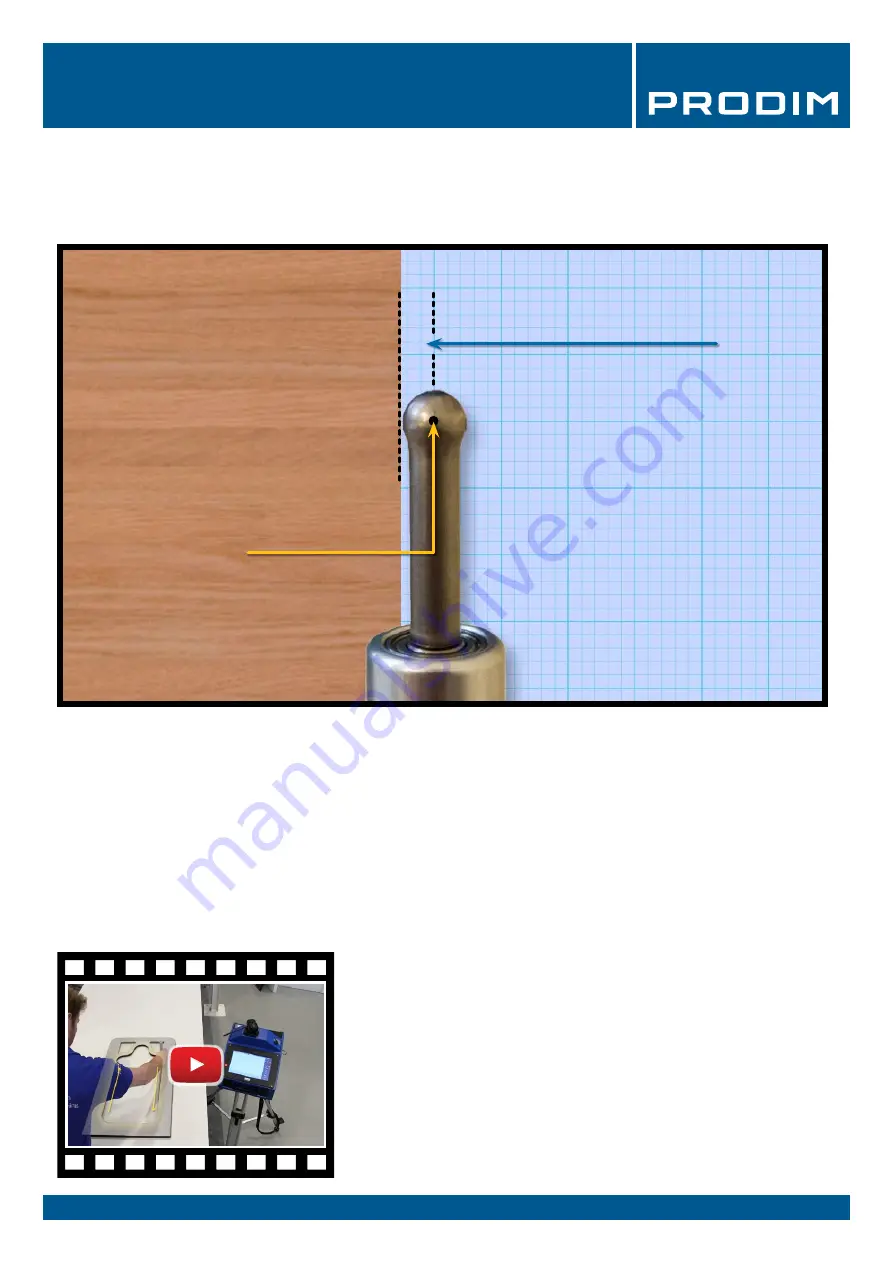
The measuring pen captures points from the absolute center of the pen tip.
During a measurement, the object is touched with the outside of the pen tip.
Due to the thickness of the pen tip, there is a difference of 2.5mm between the object that you are measuring and
what the Proliner pen captures. This can be corrected using the compensation settings beforehand or during
editing afterwards.
Depending on the choise for either
left
or
right
compensation, you have to measure in a specific direction. When
choosing
none,
The measurement results will not be compensated and if needed have to be corrected afterwards
using a CAD progam.
6. Compensation
Difference of 2.5mm between
the absolute center of the pen
tip and the object
The absolute center
of the pen tip
ATTENTION!
If you use a different measuring pen type, you have to adjust the
compensation values as well!
TIP: Check our website for other measuring pen solutions
There are several measuring pens and add-ons available for different
applications
.


