6
12.
After determining which wire is the positive and which is the negative, turn off the
ignition key and remove the battery’s negative cable (ground -).
13.
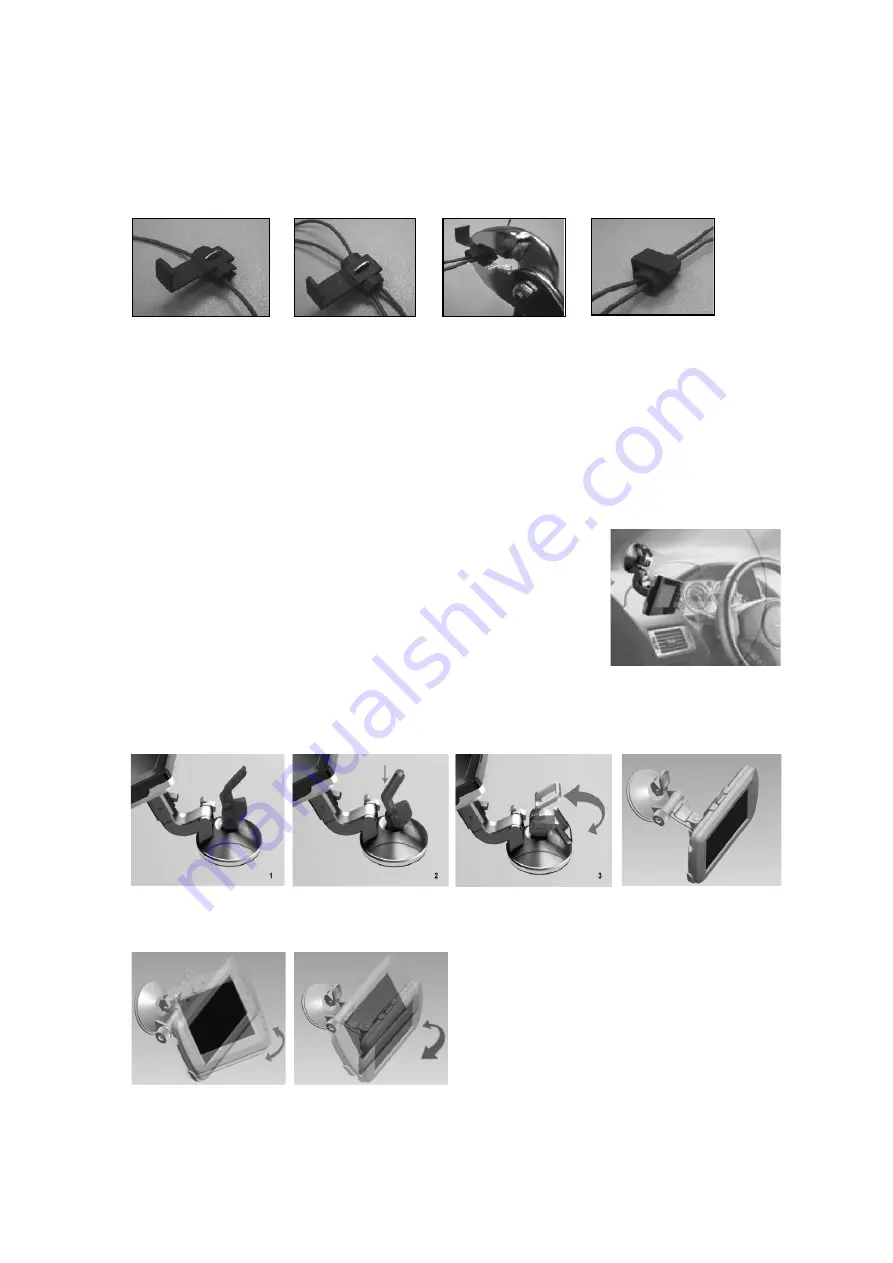
Splice the red wire using the supplied in-line wire connectors to the reverse light’s
positive (+) wire. Use a set of slip joint pliers to squeeze the TAP and insure good
connection.
14.
Next splice the black wire of the transmitter box power cable to the reverse light’s
negative (-) wire or ground.
15.
Replace the reverse light bulb, and then re-install the light socket. Secure all the
wires with cable ties or electrical tape.
16.
Re-attach the negative battery cable to the battery.
Monitor Installation
When choosing a location to mount the monitor, make sure the
monitor is in an area that will not obstruct your vision while
driving.
1.
Before mounting the monitor, clean the mounting surface
well.
2.
Position the suction mount to the smooth surface which suits
your requirement.
3.
Press the suction cap against the smooth surface and press the lock down to attach
and fix the mount to the surface. Snap in the monitor to the suction mount.
4.
Adjust the mounting arms to suit your view angle to the monitor and tighten the
screws on the mount to fix the position.
5.
Route the power cable to the vehicle’s cigarette lighter socket/12V power outlet. The
cable must not interfere with the safe operation of the vehicle.
Содержание APR043DC
Страница 52: ...52 NOTES ...
Страница 53: ...53 NOTES ...
Страница 55: ...55 ...
Страница 56: ...56 www pro user com ...


