background image

PRO-LINE RACING  /   PRO-FUSION SC 4×4  /  INSTRUCTION MANUAL

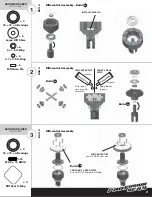
 × 3

18 × 12 × 4 Bearings

 × 6

Large Diff Shim

 × 6

8 × 1.5 O-Ring

 × 6

4.7 × 0.5 O-Ring

 × 6

Diff Drive Pin

 × 3

18 × 12 × 4 Bearings

 × 12

M2.5 × 10 BHCS

 × 3

Diff Seal O-Ring

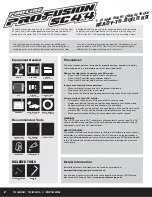
This assembly manual contains instructions for building your 
new PRO-Fusion SC 4×4. Please take your time building the kit 
according to the instructions and become familiar with the steps.

Pro-Line is continually improving our products; consequently, actual 
parts included in the PRO-Fusion SC 4×4 kit may appear slightly 
different than the images that appear in the manual.

Thank you for purchasing Pro-Line’s PRO-Fusion SC 4×4! For Over 
35 years, Pro-Line has designed and manufactured the best RC 
products in the world. This 1:10 scale 4×4 SC truck has been 

developed from the ground up for extreme performance, durability, 
versatility, and most importantly, fun! Thank you for choosing the 
PRO-Fusion SC 4×4 and joining Team Pro-Line in making history!

Precautions

To prevent serious personal injury and/or property damage, operate all remotely 
controlled models in a responsible manner as described herein.

Choose the right place to operate your RC model:

• 

Do not run RC vehicles on public streets or highways

• 

Do not run RC vehicles near people or animals

• 

Do not run RC vehicles where noise can disturb others

Inspect your vehicle before operation:

• 

Make sure that all screws and nuts are properly tightened

• 

Always use fresh batteries in your radio

• 

Always test the throttle and steering before setting the vehicle on the ground

After operation of your RC vehicle:

• 

To prevent a runaway, turn off the vehicle fi rst, then the radio

• 

Replace any battery that has puffed, has been dented, or has frayed wiring

• 

Keep your vehicle clean and free of excess dirt and debris

• 

Immediately after use, do not touch any equipment on the vehicle such as the 
motor or ESC, as they could generate high temperatures and cause burns

• 

Store your vehicle and battery in a place where a fi re cannot spread

WARNING! 

This is NOT a toy and is NOT suitable for children under 14 years of age. This RC 
vehicle contains many small parts which are potential choking hazards. Keep all 
components out of reach of small children.

HEALTH WARNING! 

This product contains chemicals known to the State of California to cause cancer, 
birth defects, or other reproductive harm. This RC vehicle is a high performance 
radio controlled model and can cause harm or personal injury. All liquids contained 
in this RC vehicle are not to be swallowed. Never touch rotating parts as this can 
cause injury.

Help & Information

Installation manuals and videos can be found on our website at 

www.prolineracing.com/pro-fusion-sc4x4.

If you need any technical assistance or have questions about your PRO-Fusion, 
please submit a Support Ticket at 

support.prolineracing.com.

PRECAUTIONS

Equipment Needed

RADIO


RECEIVER


SERVO

(HORNS INCLUDED)


ESC


MOTOR

550 SIZE OR 1:8 SIZE


LIPO BATTERY

2S, 3S, OR 4S


CHARGER


RC BODY & PAINT

SHORT COURSE


TIRES & WHEELS

SC OR 2.8" MT - 17MM HEX


Recommended Tools

HEX DRIVERS

1.5MM, 2MM, 2.5MM


NUT DRIVERS

5.5MM AND 7MM


SIDE CUTTERS

SERVO TAPE


THREAD LOCK

INCLUDED TOOLS

WHEEL WRENCH

17MM


HEX KEY

3MM


1:10 4WD SHORT COURSE TRUCK

READY-TO-BUILD KIT

Содержание PRO-Fusion SC 4x4

Страница 1: ...INSTRUCTION MANUAL INSTRUCTION MANUAL ...

Страница 2: ...ent a runaway turn off the vehicle first then the radio Replace any battery that has puffed has been dented or has frayed wiring Keep your vehicle clean and free of excess dirt and debris Immediately after use do not touch any equipment on the vehicle such as the motor or ESC as they could generate high temperatures and cause burns Store your vehicle and battery in a place where a fire cannot spre...

Страница 3: ...ential Assembly 2 HARDWARE USED ACTUAL SIZE BAG A BAG A 3 3 18 12 4 Bearings 18 12 4 Bearings 12 12 M2 5 10 BHCS M2 5 10 BHCS 3 3 Diff Seal O Ring Diff Seal O Ring Differential Assembly Differential Assembly 3 3 INSTALL DRIVE PIN FOR CENTER DIFF Use 44T MOD1 spur gear Build Build 3 Build Build 3 BLACK GREASE FRONT REAR DIFFS Apply liberally to gears FOR CENTER DIFF Fill to top of cross pins Do not...

Страница 4: ... FHCS 4 4 M3 25 SHCS M3 25 SHCS 2 2 18 12 4 Bearings 18 12 4 Bearings 1 1 Diff Gear Clip Diff Gear Clip Center Diff Steering Posts Center Diff Steering Posts 5 HARDWARE USED ACTUAL SIZE BAG B BAG B Front Diff Case Assembly Front Diff Case Assembly 6 THREAD LOCK NOTE ORIENTATION On all hinge pin inserts align the large dot pointing towards the marking on the mount This is the stock setting PRO TIP ...

Страница 5: ...e Pins 8 HARDWARE USED ACTUAL SIZE BAG C BAG C 4 4 Pivot Ball Inserts Pivot Ball Inserts 4 4 Pivot Ball Set Screws Pivot Ball Set Screws 2 2 18 12 4 Bearings 18 12 4 Bearings 2 2 16 8 5 Bearings 16 8 5 Bearings Front Hub Pivot Balls Build Front Hub Pivot Balls Build L R 9 NOTE ORIENTATION DO NOT OVERTIGHTEN PRO TIP Install using the included 3mm hex key included with the kit LOWER Use long hinge p...

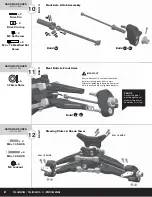
Страница 6: ...nt Arms Pivot Balls to Front Arms 11 HARDWARE USED ACTUAL SIZE BAG C BAG C 4 4 M3 10 SHCS M3 10 SHCS 4 4 M3 16 SHCS M3 16 SHCS 8 8 M3 Locknut M3 Locknut Steering Plates Shock Tower Steering Plates Shock Tower 12 1 4 3 2 Build Build 2 Build Build L R Build Build L R PRO TIP Access the pivot ball through the set screw using a 2mm hex driver not included IMPORTANT Ensure driveshaft is seated into out...

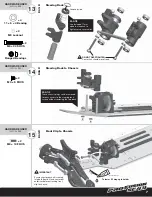
Страница 7: ...AG D 2 2 M3 10 FHCS M3 10 FHCS Front Clip to Chassis Front Clip to Chassis 15 PRO TIP Use included 17mm wheel nut wrench to tighten servo saver collar PRO TIP These chassis plugs can be removed for easy access to the steering rack screws without removing the top deck DO NOT OVERTIGHTEN Center link should move freely THREAD LOCK To lower B1 hinge pin holder To lower B1 hinge pin holder Groove insid...

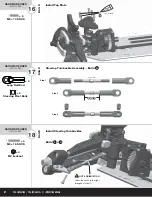
Страница 8: ...4 4 Steering Pivot Balls Steering Pivot Balls Steering Turnbuckle Assembly Build Steering Turnbuckle Assembly Build 2 17 HARDWARE USED ACTUAL SIZE BAG D BAG D 4 4 M3 16 SHCS M3 16 SHCS 4 4 M3 Locknut M3 Locknut Install Steering Turnbuckles Install Steering Turnbuckles 18 THREAD LOCK 22mm actual size actual size Build Build L R NOTE ORIENTATION Orient the notch to the right throughout the kit Step ...

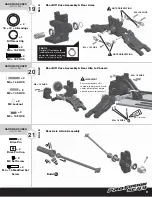
Страница 9: ... FHCS M3 10 FHCS Rear Diff Case Assembly Rear Clip to Chassis Rear Diff Case Assembly Rear Clip to Chassis 20 HARDWARE USED ACTUAL SIZE 2 2 Drive Pin Drive Pin 2 2 Drive Pin Cup Drive Pin Cup 2 2 M3 Set Screw M3 Set Screw 2 2 M4 16 Modified Set M4 16 Modified Set Screw Screw 21 THREAD LOCK PRO TIP Optional HD outdrive clip included for use with extreme power May require snap ring pliers not includ...

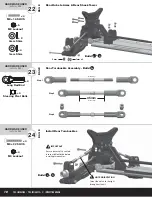
Страница 10: ...Long Rod End 4 4 Steering Pivot Balls Steering Pivot Balls 23 HARDWARE USED ACTUAL SIZE BAG E BAG E 4 4 M3 22 SHCS M3 22 SHCS 4 4 M3 Locknut M3 Locknut Install Rear Turnbuckles Install Rear Turnbuckles 24 Build Build L R Rear Turnbuckle Assembly Build Rear Turnbuckle Assembly Build 2 actual size Build Build L R NOTE ORIENTATION Orient the notch to the right throughout the kit IMPORTANT Ensure driv...

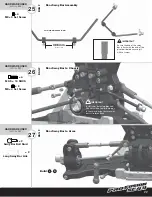
Страница 11: ...SED ACTUAL SIZE BAG F BAG F 2 2 Sway Bar Ball Stud Sway Bar Ball Stud 2 2 Long Sway Bar Link Long Sway Bar Link Rear Sway Bar to Arms Rear Sway Bar to Arms 27 Build Build L R FOR REAR SWAY BAR Use 2 7mm bar thinner of 2 bars 38 5mm actual size IMPORTANT Ensure the end of the sway bar is flush with the end of the pivot ball before securing it with set screw IMPORTANT Install sway bar using brackets...

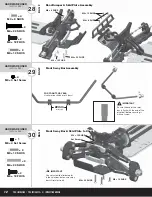
Страница 12: ... Plate Assembly Rear Bumper Skid Plate Assembly Front Sway Bar Assembly Front Sway Bar Assembly 28 HARDWARE USED ACTUAL SIZE BAG F BAG F 4 4 M3 3 Set Screw M3 3 Set Screw 29 HARDWARE USED ACTUAL SIZE BAG F BAG F 1 1 M3 4 Set Screw M3 4 Set Screw 2 2 M3 12 SHCS M3 12 SHCS 2 2 M4 22 SHCS M4 22 SHCS 2 2 M4 12 FHCS M4 12 FHCS Front Sway Bar Skid Plate to Chassis Front Sway Bar Skid Plate to Chassis 30...

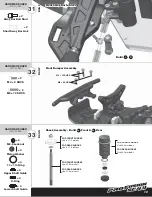
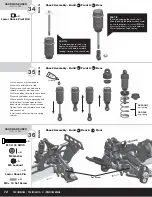
Страница 13: ...ED ACTUAL SIZE BAG G BAG G 4 4 M2 5 Locknut M2 5 Locknut 4 4 Piston Washer Piston Washer 4 4 10 10 1 1 O Ring O Ring 4 4 Upper Shaft Guide Upper Shaft Guide 4 4 X Ring X Ring 4 4 Lower Shaft Guide Lower Shaft Guide Shock Assembly Build Shock Assembly Build 2 Front Front 2 Rear Rear 33 Build Build L R FOR FRONT SHOCKS Use 6 1 4 pistons FOR REAR SHOCKS Use 6 1 6 pistons FOR FRONT SHOCKS Use 38 5mm b...

Страница 14: ...ding it through the shock body PRO TIP To avoid damaging the shock shaft when threading the bottom shock eyelet on use shock pliers not included OR use a 5mm nut driver not included to hold the 2 5mm locknut on top of piston 1 With shock shaft fully extended fill shock to within 2mm of top 2 Slowly move shaft up and down to remove air from under the piston 3 Wait for bubbles to come to the surface...

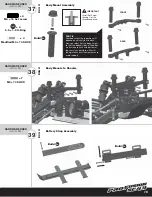
Страница 15: ...Mounts to Chassis 38 HARDWARE USED ACTUAL SIZE BAG H BAG H Battery Strap Assembly Battery Strap Assembly 39 IMPORTANT Install Set Screw leaving of the threads exposed Build Build 4 Build Build 2 Build Build 2 PRO TIP Your body mount hole position will depend on which style of body tires you select Set the body height so that the bottom sides of the body are as close to flush with bottom of the cha...

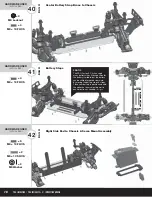
Страница 16: ...RDWARE USED ACTUAL SIZE BAG H BAG H 5 5 M3 10 FHCS M3 10 FHCS 2 2 M3 10 SHCS M3 10 SHCS 2 2 M3 Washer M3 Washer 42 PRO TIP The PRO Fusion SC 4 4 accepts many battery sizes Stock position for the battery is middle but the battery can be shifted forward or rearward by moving the battery stops straps Place your battery in position and add the adhesive foam strips to pad it in each direction as needed...

Страница 17: ...E BAG I BAG I For 550 Motor For 550 Motor 2 2 M3 5 FHCS M3 5 FHCS 2 2 M3 10 FHCS M3 10 FHCS For 1 8 Motor For 1 8 Motor 2 2 M4 10 FHCS M4 10 FHCS Motor Mount Motor Mount 45 IMPORTANT Feed servo wire through channel in center diff case Secure the wire to keep it from getting damaged by spur gear 1 Select the servo horn that matches the spline count on your servo 23 Airtronics JR KO 24 Hitec 25 Futa...

Страница 18: ... gear mesh inserts to properly set gear mesh depending on the pinion size you select See the chart below to set the correct orientation when attaching your motor mount to the chassis It is recommended to use thread lock to secure the motor mount IMPORTANT Only use MOD1 pinion gears NOTE ORIENTATION All four inserts must have the same orientation FRONT OF VEHICLE BOTTOM OF CHASSIS Setting Gear Mesh...

Страница 19: ...re cutting or making holes in the body if the body is not pre cut put the unpainted body on the chassis to mark mounting position and locations for the body post holes 2 Before painting wash the inside of the body with mild detergent such as dish soap then rinse and dry thoroughly 3 Apply window masks to inside of body as well as any masks for painting your design For painting tips visit prolinera...

Страница 20: ...and handles bumps better WHEELBASE The wheelbase on the PRO Fusion SC 4 4 is adjustable up to 4mm by moving the spacers next to the rear hub carriers The stock setting is in the middle A longer wheelbase is typically more stable while a shorter wheelbase will turn sharper CAMBER This is the angle of the tires as they lean in towards the center of the vehicle The front camber angle is adjustable by...

Страница 21: ...he motor system from overheating If the battery is extremely hot and or the motor is so hot that you cannot touch it use a smaller pinion gear Pinion Size 14 15 16 17 18 19 20 21 Final Gear Ratio 12 6 11 7 11 0 10 4 9 8 9 3 8 8 8 4 Rollout Inches per motor revolution 1 30 1 40 1 49 1 58 1 67 1 77 1 86 1 95 RIDE HEIGHT This is the height of the chassis in relation to the surface It is an adjustment...

Страница 22: ...vy Silverado Pro Touring Clear Body 3457 00 Pre Cut Monster Fusion Clear Body 3498 17 1956 Ford F 100 Pro Touring Clear Body 3514 00 Option Parts SAND PAW 2 8 PRIME 2 8 TRENCHER 2 8 BADLANDS MX28 2 8 ROAD RAGE 2 8 A must for sand and snow conditions to throw up huge roosts 1186 18 Premounted on F 11 17mm hex wheels The best option for street or for speed runs 10116 18 Premounted on F 11 17mm hex w...

Страница 23: ...rt 1 4005 29 A1 Inner Hinge Pin Holder w Insert 1 4005 30 D1 Inner Hinge Pin Holder w Insert 1 4005 31 C1 Inner Hinge Pin Holder w Insert1 4005 32 A2 Inner Hinge Pin Holder w Insert 1 4005 33 B2 Inner Hinge Pin Holder w Insert 1 4005 35 Center Steering Linkage 1 Battery Stop 2 Center Battery Strap Brace 1 Rear Sway Bar Bracket 2 Servo Adapter 1 Servo Arm Left 1 Servo Arm Right 1 Servo Saver 1 Serv...

Страница 24: ......
Отзывы: