3
•
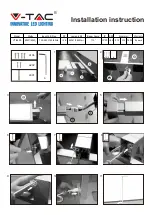
Pass the cable up the lower half of the lamp post and screw it onto the
base unit.
•
Repeat with the upper half post and screw it onto the lower half post.
•
Pass the cable through the top collar and screw that to the top of the
post.
•
There should be sufficient mains cable projecting through to attach
to the power splitter. It can be trimmed slightly if required but excess
cable can be pushed back down the post.
•
Remove the cover on the power splitter and connect the supply cable
as follows:
Connect the positive supply wire (brown or red) to the terminal
marked L.
Connect the neutral supply wire (blue or black) to the terminal
marked N.
•
Refit the terminal cover to the power splitter.
•
Feed the power cable on the support arm through the hole in the top
collar and slot the lamp support arm into the collar by sliding down
until it engages.
•
Repeat for the other two support arms.
•
Connect the three power cables to the sockets on the power splitter
and lower it down inside the top collar.
•
Fit the post top cap so it clips firmly into position.
•
Assemble each lantern by sliding in the glazing sheets.
•
Attach the lanterns by engaging the lugs around each lamp holder
and turning to locate securely.
•
Fit an appropriate lamp E27 Max 11W (not supplied) to each lamp
holder.
•
Attach the capping onto each lantern by engaging the lugs and turn it
to locate securely.
•
Fit the finial onto the capping by turning it until it locks into place
•
Restore the mains supply.


