background image


4


3. 

Изберете


в


прозореца


да


отворите

 Wi-Fi; 

4. 

Отворете

 Wi-Fi 

настройки

5. 

В


изведения


списък


ще


видите


всички


точки


за


достъп

 (AP) 

в


околността

Докоснете


желаната


връзка

 (

име

за


свързване


към

 AP; 

6. 

Ако


преди


това


има


успешна


връзка


към


тази

 AP, 

информацията


за

 AP 

ще


бъде


съхранена


в


изскачащия


прозорец

С


избирането


на

 "Connect" (

свързване

започвате


връзката

с

 "forget" (

забрави

изтривате

 AP 

информацията

7. 

Ако

 AP 

не


е


криптирана

в


изскачащия


прозорец


изберете

 "Connect", 

за


да


стартирате


връзката

8. 

Ако

 AP 

е


криптирана

в


изскачащия


прозорец


въведете


парола


и


изберете


"Connect", 

за


да


стартирате


връзката

9. 

Когато


интернет


връзките


са


успешни

в


лентата


на


състоянието


се


появява


икона


за


безжична


връзка

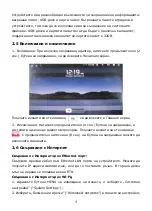
3. 

Операции


за


въвеждане


3.1 

Чувствителен


на


допир


екран


Екранът


следи


допира


и


траекторията


на


пръста

Вижте


по

-

долу


начина


на


работа


с


него

Забележка

Моля


не


поставяйте


предмети


на


повърхността


на


екрана

за


да


не


го


надраскате


или


пукнете

Кратко


докосване

:


Изберете


икона


и


докоснете


кратко


иконата


или


опциите

Дълго


докосване

при


докосване


и


задържане


на


икона

можете


да


я


изведете


на


десктопа

Провличане


и


пускане

 (Drag and Drop):


С


провличане


на


десктопа


можете


да


превключвате


между


три


екрана

Вместо


върха


на


пръста


можете


да


ползвате

 „

писалка

” (

стилус

). 


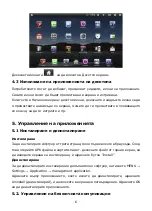
4. 

Десктоп


4.1 

Лента


на


състоянието


В


горната


част


на


екрана


е


лентата


на


състоянието

в


която


се


появява


Содержание MID-10

Страница 1: ...1 PRIVILEG MID 10 1 2 2 1 1...

Страница 2: ...2 2 MID 10 2 2 SD File Browser SD card SD 1 2 3 4 2 3 USB USB USB 2 2 USB 2 4...

Страница 3: ...3 USB USB 32GB 2 5 1 2 2 4 8 2 6 Ethernet Ethernet LAN IP ETH Wi Fi 1 MENU System Settings 2 Wireless networks...

Страница 4: ...4 3 Wi Fi 4 Wi Fi 5 AP AP 6 AP AP Connect forget AP 7 AP Connect 8 AP Connect 9 3 3 1 Drag and Drop 4 4 1...

Страница 5: ...5 SD Wi Fi 3G Ethernet 4 2...

Страница 6: ...6 4 3 5 5 1 APK Install MENU Settings Application management application Uninstall OK 5 2...

Страница 7: ...ngs 5 3 MENU Settings Applications Management applications MENU Settings Applications Development 6 SD MENU Settings TF card device storage Storage devices TF SD TF SD SD MENU Settings TF card device...

Страница 8: ...8 8 z z z z AC z...

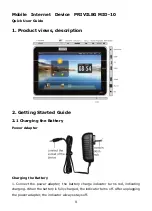
Страница 9: ...tting Started Guide 2 1 Charging the Battery Power Adapter Charging the Battery 1 Connect the power adapter the battery charge indicator turns red indicating charging When the battery is fully charged...

Страница 10: ...ved Note 1 Insert card to in the correct position Otherwise the card will be damaged 2 Once the card has been locked it can not be formatted or written 3 Don t insert and remove the card repeatedly in...

Страница 11: ...e shut down User can long press 8 seconds the power button to shut down the machine 2 6 Connecting to the Internet Connecting to the Internet via Ethernet Insert the network cable into the Ethernet po...

Страница 12: ...creen senses the finger movements Note Please do not place objects on the touch screen surface they may scratch or crush it Click Select an icon click on it and then you can select the icon or an opti...

Страница 13: ...Home screen The Tablet main screen contains two modes Desktop Gadgets mode and Application mode the two modes can be switched via the central button Desktop Gadgets screen is shown below Click the ic...

Страница 14: ...click Install button and then the device will begin to install the application Uninstall To uninstall installed third party software press MENU Settings Application management application Click the a...

Страница 15: ...er to remove the SD card in a safe way please press the MENU Settings TF card device storage Unmount SD card Internal device storage Press the MENU Settings TF card device storage internal device stor...

Страница 16: ...ched by items placed on or against them Pay particular attention to the point where the cord connects to the device z Only use the AC adapter included with the device Using any other power adapter voi...

Отзывы: