background image


22 

www.printek.com

   |  P: 888.211.3400  |  F: 269.925.8539  |   E: 

[email protected]


Integrating the Printer into your Business Applications           
Step by Step 

– Creating a Link from Host to Printer 


A. 

Windows Desktop Computers 


Print Drivers 

You may download the appropriate Windows driver from our website.  Install the printer driver by the 
standard method for your version of Windows.  
 

I. 

SERIAL 

a)  Install the printer driver onto your host


before connecting the printer.  Follow prompts 

displayed during installation.   

b)  Plug the printer into a serial port on your host system using data/power cable.    
c) 

Using the “Add Printer” wizard, install the printer using the driver file obtained from Printek 
and the serial COM port number that the printer is connected to. 

d) 

After the printer driver installs, the printer will appear as “Printek 3-inch printer” under the 
“Printers and Faxes” heading of your Windows “Devices and Printers” screen. 

II. 

USB 

e)  Install the printer driver onto your host


before connecting the printer.  Follow prompts 

displayed during installation.   

f)  Plug the printer into a USB port on your host system using a mini-USB cable.    
g) 

The printer will appear in the “Unspecified” devices section.  Right click on the icon. 

h)  In the popup window, select the Hardware tab.  Note the USB port number displayed. 
i) 

Using the “Add Printer” wizard, install the printer using the driver file obtained from Printek 
and the USB port number noted above. 

j) 

After the printer driver installs, the printer will appear as “Printek 3-inch printer” under the 
“Printers and Faxes” heading of your Windows “Devices and Printers” screen. 

a) 

Install the printer driver.  Using the “Add Printer” wizard, install the printer using the driver 
file obtained from Printek and the COM port number noted above. 

b) 

After the printer driver installs, the printer will appear as “FP530si-

serial #

” under the 

“Printers and Faxes” heading of your Windows “Devices and Printers” screen. 

III. 

Wi-Fi  


Note:

 The following instructions are fundamentally the same for an Infrastructure or Wi-Fi Direct (peer 

to peer) setup.  They also assume that you have already configured your Wi-Fi interface via the 
FP530si printer web page (see the section on Configuration). 
 

a)  Perform a configuration printout to verify the printer Wi-Fi setup and to record the IP 

address assigned and the Port number. 

b)  Install the printer as a local printer using the USB instructions above. 
c) 

In the “Devices and Printers” screen, right click the printer icon representing your mobile 
printer. 

d) 

Under Printer Properties, select the Ports tab, then select “Add a Port” 

Содержание DP-530si

Страница 1: ...Printek LLC 2515 Lakeshore Drive Saint Joseph MI 49085 2977 269 925 3200 www printek com Printek LLC A Company Part Number 7666 Rev A FP 530si DP 530si Operator s Manual...

Страница 2: ...approved by Printek LLC could void the user s authority to operate the equipment Canadian Department of Communications Radio Interference Statement This device complies with Industry Canada license e...

Страница 3: ...he user warranty and may make the product unsafe to operate The print head and motors get hot during use Wait until they cool before touching them Make certain the printer is disconnected from AC powe...

Страница 4: ...odes 21 A ASCII Based Print Jobs 21 B Graphic Based Print Jobs 21 Integrating the Printer into your Business Applications 22 Step by Step Creating a Link from Host to Printer 22 A Windows Desktop Comp...

Страница 5: ...face Complete specifications may be found in Appendix A FieldPro 530si Printer Specifications The remainder of this manual focuses on preparing the printer for initial use and performing tasks that wi...

Страница 6: ...ty of tickets receipts and labels IP54 rated for water and dust resistance plus rated for repeated 6 foot drops to concrete Print speeds up to 5 ips Extensive fonts character sets bar codes and graphi...

Страница 7: ...4 www printek com P 888 211 3400 F 269 925 8539 E info printek com Quick Start Instructions A Paper Load...

Страница 8: ...Printer automatically turns on when power is applied D Control Panel Control Panel Power Button Power Up Power Down Toggle IP over USB on off Press Release Press Hold Press twice Paper Feed Button Adv...

Страница 9: ...6 www printek com P 888 211 3400 F 269 925 8539 E info printek com E Performing a Printer Self Test With power on press the paper feed button twice quickly...

Страница 10: ...a USB cable between the printer and a PC 3 To access the FP530si web page push the Power button twice rapidly This will put the printer into Configuration mode 4 When the printer is in Configuration...

Страница 11: ...in the battery icon when the printer is plugged into an external power source To return the printer to normal operating mode double click the Power button The POWER LED will be returned to a solid lig...

Страница 12: ...ing on the optional interface installed you will see either Bluetooth Config or WI FI Config In the detailed descriptions an asterisk indicates the factory default value RS 232 Config Note these value...

Страница 13: ...le values Disabled Xon Xoff Sets the handshaking protocol Parity Possible values Disable Even Odd Sets the Parity bit End of Job Timout Possible values 0 5 through 9 5 seconds at 5 intervals Sets the...

Страница 14: ...sing the IP address defined DHCP printer will acquire an IP address from your network DHCP server Personal Area Network The printer will broadcast itself as a network connection The Power LED will fla...

Страница 15: ...se access points or Remove to delete it from printer Currently Configured Networks access points added through Add Edit They may not have been connected yet Select Remove to delete access point from p...

Страница 16: ...om WPA EAP or IEEE8021X These are Enterprise network settings Consult your server manual for recommended settings Upload Digital Certificate If your enterprise network uses digital certificates as ano...

Страница 17: ...need for a driver AUTOIMAGE selected when mixed PDF and POSTSCRIPT images are sent to the printer The printer will determine which type of file has been sent This can increase printer response time PD...

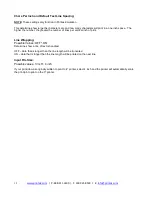
Страница 18: ...mber the greater the number of lines per vertical inch of print Line Wrapping Possible Values OFF ON Determines how a line of text is handled OFF data that is longer than the line length will be trunc...

Страница 19: ...or millimeters If you change units do so before entering other settings Max Paper Speed Possible values 1 0 to 5 5 ips Default 5 0 When using labels or heavy paper stock you may need to decrease the p...

Страница 20: ...ls without a Black Mark adjust this setting to insure the label stops at the gap in between labels 1 Remove 2 labels from the backing paper and close the lid so the backing is over the paper sensor No...

Страница 21: ...ute warning before shutting off D Fonts Upload Font File Truetype Fonts ttf otf ttc and bdf can be uploaded here Languages like ZPL and CPCL can use the fonts by referring to them by their Font Family...

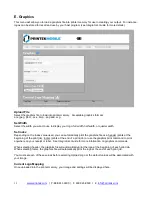
Страница 22: ...on the Index value used you can automatically print the graphics file as a header prints at the beginning of the print job footer prints at the end of a print job or use the graphics print command to...

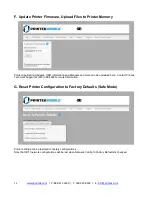
Страница 23: ...s OEM information and Manuals and more can be uploaded here Contact Printek Technical Support at 800 368 4636 for more information G Reset Printer Configuration to Factory Defaults Safe Mode Printer s...

Страница 24: ...supported B Graphic Based Print Jobs The host assembles the printed image as a series of lines of dots and transmits this image as a sequence of data bytes that represent the dot patterns assembled O...

Страница 25: ...on Right click on the icon h In the popup window select the Hardware tab Note the USB port number displayed i Using the Add Printer wizard install the printer using the driver file obtained from Print...

Страница 26: ...rt window j Now in the Printer Properties dialog box your IP address or the familiar name you assigned above will appear in the list of ports available Select it to configure the port k Windows defaul...

Страница 27: ...te description of our consumables and accessory products B Black Mark Media Position For automatic ticket printing the Black Mark should be positioned as shown in the figure below When using Mark Sens...

Страница 28: ...k Mark Sensor below the print head Clean the Tear Bar Clean the Platen Roller Turn the Platen Roller with your finger to clean the entire surface If a Magnetic Card Reader is installed pass and MCR Cl...

Страница 29: ...roblem Possible Cause Solution Printer will not turn on D connector not plugged in Remove and reinstall the 9 pin D connector on the side of the printer No power Check pin 8 of the D connect for posit...

Страница 30: ...Print Garbled Improper Interface configuration Verify printer and host settings match Paper Door not fully closed Verify door is closed Printer will not print Paper not loaded correctly Check paper pa...

Страница 31: ...pports direct printing of Postscript PDF PBM JPG PNG BMP SVG TIFF files Print Media Paper Type Direct Thermal Roll Roll Size Maximum roll diameter 2 0 51 mm roll widths up to 3 125 80 mm Roll Capacity...

Страница 32: ...r is powered on or reset DHCP Dynamic Host Configuration Protocol A method used to centrally control the assignment of IP addresses on a network dpi Dots per inch Generally used to refer to graphics d...

Страница 33: ...on that controls the connection between systems on a network top of form The vertical position where the first line is printed on the paper Also the position the paper is advanced to when a form feed...

Страница 34: ...s B i features 29 form 29 Front Paper Sensor Threshold 11 Gap Paper Sensor Threshold 12 GateWay 9 General Error Conditions 22 Graphics 13 IMAGE 10 Image Parameters 10 infrastructure 28 interface 28 IP...

Отзывы: