


17
Specifications
Product specifications
Model name
L17HCN 00ABA
L17HMN 00ABA
LCD display
43
cm measured diagonally TFT LCD module
Resolution (max.)
SXGA 1280
×
1024 pixels
Displayable colors (max.)
Approx. 16.2 million colors (6 bit + FRC)
Brightness (max.)
250
cd/m
2
Dot pitch
0.264
(H)
×
0.264
(V) mm
Contrast ratio
430
:
1
Angle of visibility
Left-right 170° ; up-down
150°
(contrast ration
≧
5
)
Screen display size
Horizontal
337.92
mm
×
270.34
mm
Video signal
Analog: Analog RGB (0.7 Vp-p) [75
Ω
]
Digital
:
DVI standard based on 1.0
Sync signal
Separate SYNC (TTL level
:
+/-), Sync on Green,
Composite Sync (TTL level
:
+/-)
Expansion compensation
Digital scaling (Enlarges VGA/SVGA/XGA etc.
to full screen size.)
Plug & Play
VESA DDC2B compatible
Power management
VESA
:
based on DPMS
DVI
:
based on DMPM
Speaker output
1W
+
1W
Input signal terminal
Analog
:
15pin mini D-sub ( 3 rows )
Digital/Analog
:
DVI-I 29 pin
Screen tilt
Upward approx. 0 - 20°
;
downward approx. 0 - 5°
Screen swivel
Approx. 90° from left through right (Turn table
type)
Power supply
AC100 – 240 V, 50/60 Hz
Temperature of operating environment
5 - 35°C
Power consumption
[L17HCN 00ABA]
33W(with no audio input)
(36W maximum, 1.6W when in power-saving
mode)
[L17HMN 00ABA]
35W (with no audio input)
(38W maximum, 1.6W when in power-saving
mode)
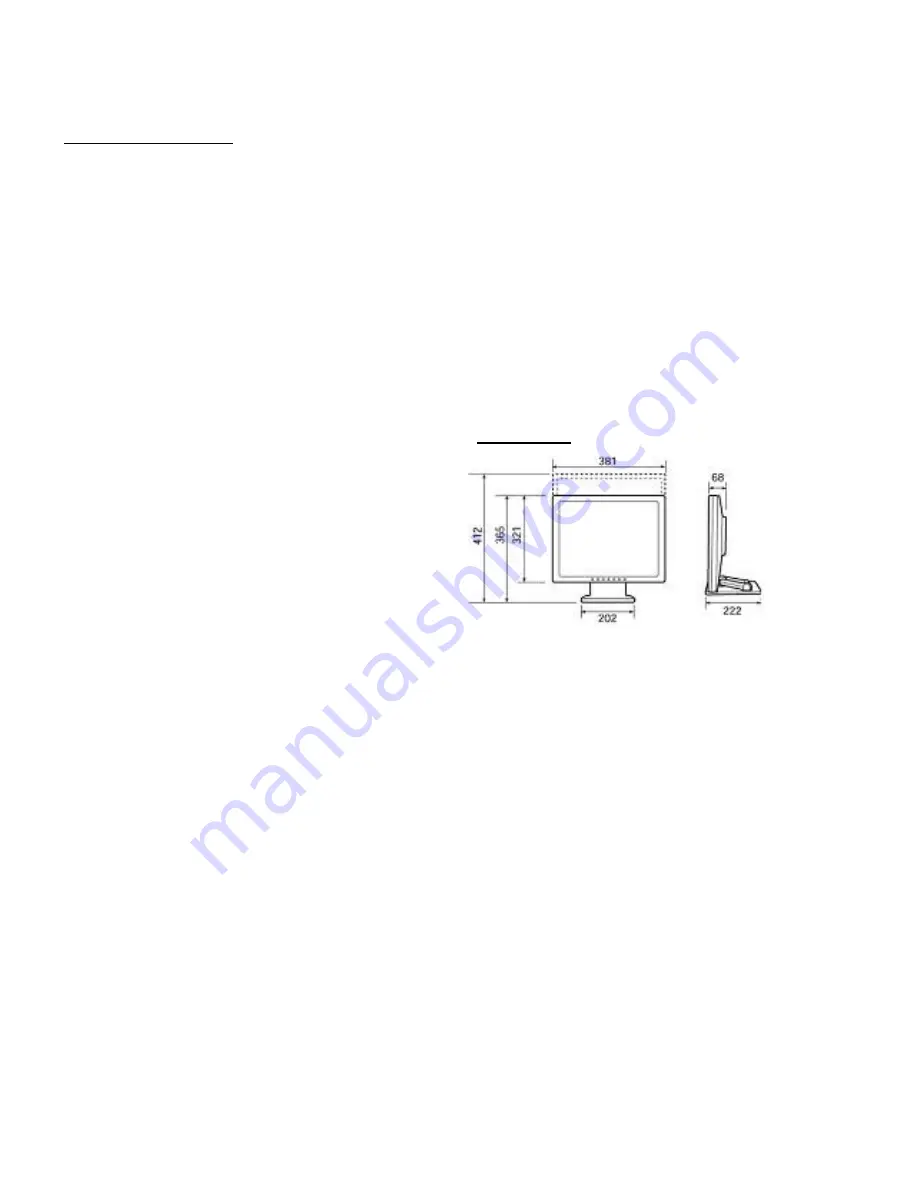
Dimensions
Approx.
381
(W)×222(D)×
365
–
412
(H) mm
Weight
Approx.
6.3
kg (approx.
4.1
kg excluding stand)
(Excluding signal cable.)
Dimensions
(Units: mm)
- Analog signal cable: approx. 1.8 m
-
Audio cable: approx. 1.8m
[L17HMN 00ABA]
- Digital signal cable: approx. 1.8 m


