background image


6


H


Unpacking 

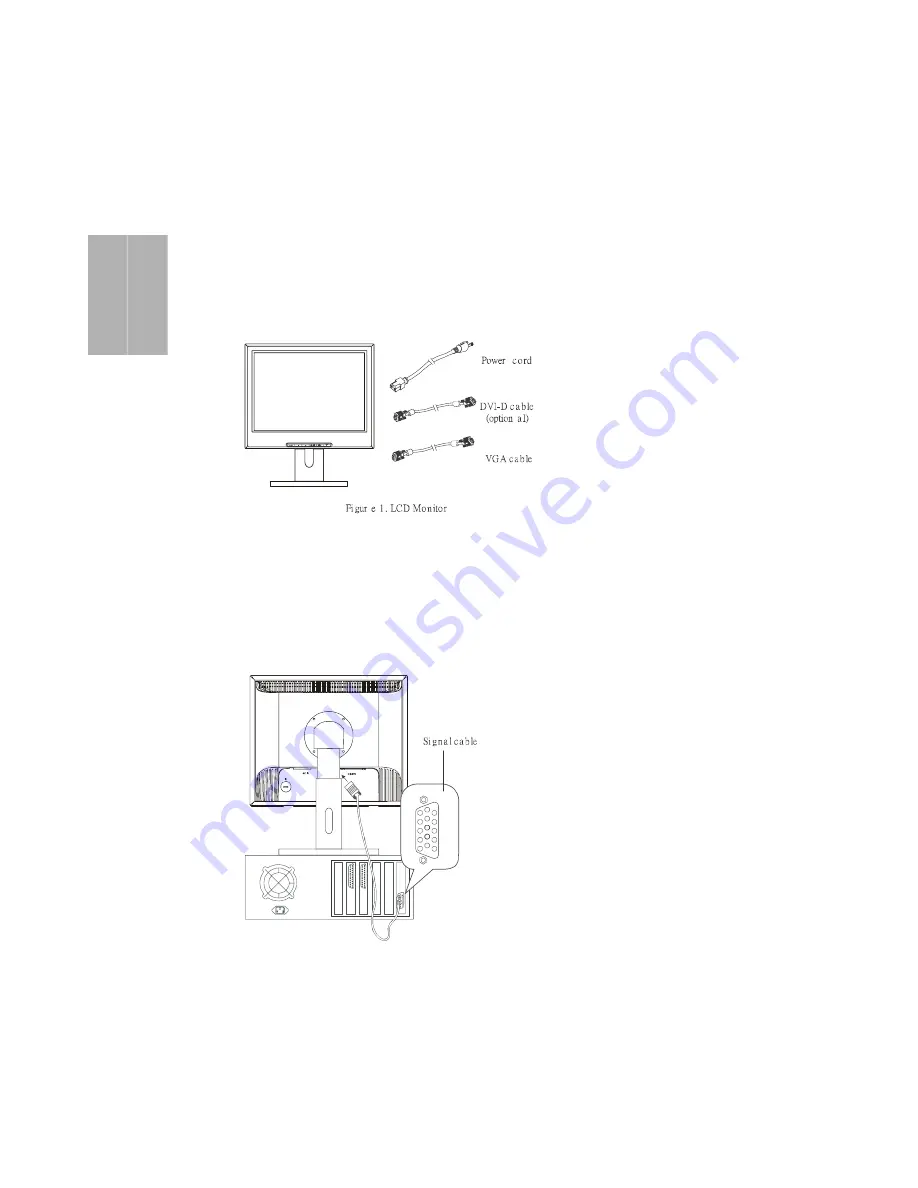
Carefully lift the LCD monitor out of the packaging and make sure that all the components 
are included.  Please save the original box and packaging materials for future shipments. 


Connecting


To connect the monitor to your PC:  

1. 

Make sure that the PC and monitor are unplugged. 

2. 

Connect the 15-pin signal cable to the monitor and the PC 


Содержание LCD2000

Страница 1: ...R E F E R E N C E M A N U A L LCD2000 ations this...

Страница 2: ...lowing measures Reorient or relocate the receiving antenna Increase the separation between the equipment and receiver Connect the equipment into an outlet on a circuit different from that to which the...

Страница 3: ...rd supplied with the product However if another type of power cord is required power cord H05VV F or VW 1 18AWG x 3G should be used Do not overload wall outlets or power cords Be sure that the total o...

Страница 4: ...Instructions 2 Getting Started Package Contents 4 Unique Features 4 Precautions 5 Cleaning the TFT LCD Monitor 5 Quick Installation 6 Operation Front Control Panel 9 Hot Key 9 OSD Main Menu 9 COLOR S...

Страница 5: ...LCD Color Monitor Video cable DB15 DVI Cable DVI D Power Cord This Reference Manual Monitor Features High resolution High Contrast color Active Matrix TFT LCD providing sharp vivid and flicker free im...

Страница 6: ...not place heavy objects on the power cord adapter video or audio cables If smoke abnormal noise or strange odor occurs immediately turn the LCD monitor off and call your dealer It is dangerous to con...

Страница 7: ...nd make sure that all the components are included Please save the original box and packaging materials for future shipments Connecting To connect the monitor to your PC 1 Make sure that the PC and mon...

Страница 8: ...card with a digital DVI connector 24 pin socket then connect one end of the DVI cable to the DVI connector of your monitor and the other end to the computer 4 Connect one end of the Power cord to the...

Страница 9: ...atic image adjustment feature This will adjust the image parameters to their optimal settings for the current graphics mode Press AUTO button to launch the automatic adjustment Selecting the Input Sig...

Страница 10: ...s or 3 Press the MENU button to activate the selected function or associated submenu 4 If you select a submenu and select the function you want to use now press the MENU button then press the and OSD...

Страница 11: ...sition within the display area oh the LCD V Position Controls Vertical image position within the display area oh the LCD Color Temperature Four different color temperatures are available sRGB 9300 K 7...

Страница 12: ...ackground OSD Timeout Determines the time in seconds to wait before the OSD menu is automatically closed when no changes are made Mode Message Shows the current operating mode If activated a message w...

Страница 13: ...se time 15ms Fall time 10ms typical 250 cd m 2 typical Video analog D SUB and DVI I and digital DVI D 16 7 mill colors 30 83kHz horizontal 50 86 Hz vertical 162 MHz pixel rate 1600 1200 60 Hz Input AC...

Страница 14: ...x480 35 000 66 667 composite VESA 800x600 35 156 56 250 VESA 800x600 37 879 60 317 VESA 800x600 48 077 72 188 VESA 800x600 46 875 75 000 MAC 832x624 49 715 74 535 composite VESA 1024x768 48 363 60 004...

Страница 15: ...to change without notice Princeton Digital USA Corp is not responsible for printing or clerical errors Windows is a registered trademark of Microsoft Corporation Apple and MacintoshTM are registered...

Отзывы: