background image

Power Chairs

Power Chairs

Power Chairs

Power Chairs

Power Chairs

Power Chairs

Power Chairs

Power Chairs

Power Chairs

Power Chairs

Power Chairs

Power Chairs

Power Chairs

Power Chairs

Power Chairs

Power Chairs

Power Chairs

Power Chairs

Stylish Design and Premium Performance

®

Owner’s Manual

Exeter, PA

St. Catharines, ON

1-800-800-8586

www.pridemobility.com

ATTENTION:

Please read the content

of your owner’s manual

before operating your

power chair.

Содержание JET 1HD

Страница 1: ...r Chairs Power Chairs Power Chairs Power Chairs Power Chairs Power Chairs Power Chairs Power Chairs Power Chairs Stylish Design and Premium Performance Owner s Manual Exeter PA St Catharines ON 1 800...

Страница 2: ...t and or commonsense aswellasthatofyourprovider caregiver and orhealthcareprofessional Prideisnotresponsible forinjuriesand ordamageresultingfromanyperson sfailuretofollowthewarnings cautions andinstr...

Страница 3: ...C O N T E N T S I INTRODUCTION 4 II SAFETY 6 III EMI RFI 14 IV THE JET 1 HD 16 V ASSEMBLY 21 VI COMFORT ADJUSTMENTS 24 VII DISASSEMBLY 28 VIII OPERATION 29 IX BATTERIES AND CHARGING 36 X CARE AND MAI...

Страница 4: ...his owner s manual is compiled from the latest specifications and product information available at the time of publication We reserve the right to make changes as they become necessary Any changes to...

Страница 5: ...naccesstointerviews stories recreationideas dailylivingtips productandfundinginforma tion andinteractivemessageboards ThesemessageboardsinvitedyoutocommunicatewithotherPridecustom ers as well as Pride...

Страница 6: ...ouwillprobablyencountersituationsinwhichyouwill need some practice Simply take your time and you will soon be in full and confident control as you maneuver through doorways on and off of elevators up...

Страница 7: ...heel failure causing serious per sonal injury and or damage to your Jazzy WARNING Inflate your power chair drive tires from a regulated air source with an avail able pressure gauge Inflating your tire...

Страница 8: ...ave a maximum slope of 5 Therefore Pride recommends that the maximum slope of an incline you attempt to safely ascend or descend on your power chair does not exceed 5 See figure 1 WARNING Any attempt...

Страница 9: ...th a manual freewheel lever to allow for manual maneuverability by a trained attendant For more information about how to place your power chair into and out of freewheel mode see IV The Jet 1 HD WARNI...

Страница 10: ...owly forward to push the door open Or drive your power chair gently and slowly backward to pull the door open Elevators Modern elevators have a door edge safety mechanism that when pushed reopens the...

Страница 11: ...is will help to keep your feet from getting caught on the footrest or the leg rests during the transfer n Reduce the distance between your power chair and the object you are transferring onto WARNING...

Страница 12: ...lean or reach for objects if you have to pick them up from the floor by reaching down between your knees Movements such as these may change your center of gravity and the weight distribution of the p...

Страница 13: ...imitations Some medications and limitations may impair your ability to operate your power chair in a safe manner Alcohol The power chair user must exercise care and common sense when operating his her...

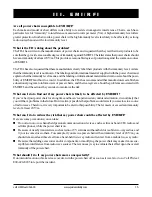
Страница 14: ...ers If my power chair is affected by EMI RFI what kind of motion should I expect This is hard to predict It would depend on a number of factors n Strength of the radio waves n Construction of the powe...

Страница 15: ...rs about the problems associated with EMI RFI and the actions they can take to minimize the risk What can I do to find out if my power chair is likely to be affected by EMI RFI Ifyou vehadyourpowercha...

Страница 16: ...ee figures 2 2a and 3 Typically the seating assembly includes the armrests seat back seat base and a controller The Jet seat may also have some optional accessories attached to it such as a basket a c...

Страница 17: ...H Feb03 www pridemobility com 17 ARMREST Figure 2a Rear View ARMRESTWIDTHADJUSTMENTKNOBS I V T H E J E T 1 H D ARMREST HEIGHT ADJUSTMENT SETSCREWS Figure 3 Onboard Battery Charger AC Power Cord ELECTR...

Страница 18: ...Clearance 3in TurningRadius 19 5 in OverallSize Length 38 5in Width 24 5in SeatingOptions Medium back standard Highbackwithheadrest Drivetrain Twomotor mid wheel Batteries NF 22 batteries Range Up to...

Страница 19: ...ontroller andcontinuenormaloperation Ifthemaincircuitbreakercontin ues to trip repeatedly contact your authorized Pride provider Onboard Battery ChargerAC Power Cord Receptacle This is where the AC po...

Страница 20: ...motors are disengaged unless you are in the pres ence of an attendant Do not disengage the drive motors when the Jet is on an incline The chair could roll down on its own causing injury To engage or...

Страница 21: ...l of the seat if they do so resulting in personal injury and or damage to the chair Parts List Quantity Seatbackmountingscrews 4 Knobs armwidthadjustment 2 Expandablearm 1 Expandablearmwithjoystick 1...

Страница 22: ...lored dots The dots are positioned so that the flat side of the male connector aligns with the flat side of the femaleconnectorwhilemakingtheconnection Seefigure11 WARNING Failure to properly align th...

Страница 23: ...Jet1HD RevH Feb03 www pridemobility com 23 V A S S E M B L Y SLIDE CONTROLLER INTOBRACKET SETSCREW Figure 12 Controller And Bracket Figure 11 Charger Inhibit Connector BRACKET...

Страница 24: ...onsult your healthcare professional before changing the seat position or making any other adjustment Some adjustments may de grade you Jet s performance and safety by changing its cen ter of gravity S...

Страница 25: ...up so that it is per pendiculartothefloor 2 Use a 1 2 in wrench to loosen the jam nut See figure 16 3 Use a 1 2 in wrench to loosen the adjust ingscrew 4 Turnthescrewclockwisetolowerthefront of the ar...

Страница 26: ...key and a 1 2 in box wrench See figure 18 To adjust the footrest angle 1 Loosen the jam nut 2 Turnthesetscrewclockwisetolowerthefrontofthefoot rest 3 Turn the setscrew counterclockwise to raise the f...

Страница 27: ...stop your Jet tips forward exces sively n Theanti tipwheelsconstantlyrubtheground RequiredTool 13 mm wrench NOTE Each drive tire must have at least 30 psi of air pressure in order for the anti tip wh...

Страница 28: ...ler is on the left swivel the seat counterclockwise and then pull the seat upward Body Shroud Removal The body shroud is a one piece molded plastic body that covers the power base frame It helps prote...

Страница 29: ...cs tray Joystick The joystick controls the direction and speed of your power chair When you move the joystick from the center neutral position the electromagnetic brakes release and allow your power c...

Страница 30: ...se an off board charger the charger current should not exceed 13 amps Contact your authorizedPrideproviderformoreinformation CAUTION Only chargers with Neutrik NC3MX plugs should be connected to the c...

Страница 31: ...oltage Check batteries battery wiring WARNING Understrenuousdrivingconditions itispossibleforthebottomandsidecasetempera ture of the Pilot to exceed 105 F DO NOT touch the side or bottom of the contro...

Страница 32: ...6 3 pinchargerinhibitconnector Typically theVSIismountedtooneofthe armrests and is connected to the motors batteries and the onboard charger at the electronicstray Figure 24b VSI Controller V I I I O...

Страница 33: ...t in the VSI or the electrical system Refer to VSI Error Codes n Rippleupanddownoflights Thejoystickwasnotintheneutralpositionwhenthecontrollerwasturnedon If you get ripple up and down of lights turn...

Страница 34: ...more information Controller Connector This connects theVSI to the power chair s batteries motors and motor brakes 3 pin Charger Inhibit Connector This connects the VSI to the onboard battery charger T...

Страница 35: ...Check the connections to the battery If the connections are good try charging the battery 2 The left motor has a bad connection Check the left motor connection 3 The left motor has a short circuit to...

Страница 36: ...electronics tray The ammeter is located on the electronics tray for easy viewing The charger has an in line fuse that protects the ammeter The ammeter indicates the rate of charge necessary to fully...

Страница 37: ...dontheelectronicstray Thisactivatestheinhibitfunction 4 Plug the 3 pin extension cable to the charger then into the electronics tray connector 5 Plugthechargerintothewalloutlet 6 The ammeter indicates...

Страница 38: ...ow often must I charge the batteries Many factors come into play when deciding how often to charge the batteries You may use your Jet all day on a daily basis or you may not use it for weeks at a time...

Страница 39: ...sely with our battery manufacturer to provide a battery that best suits your Jet s specific demands FreshbatteriesarriveregularlyatPrideandarepromptlyshippedwithafullcharge Duringshipping thebatteries...

Страница 40: ...t in a warm dry environment Avoid temperature extremes such as freezing and excessively hot conditions and never attempt to charge a frozen battery Acold or frozen battery should be warmed for several...

Страница 41: ...of 18 F and 122 F n In extremely cold temperatures the batteries may freeze The specific temperature at which they will freeze depends on a number of factors such as battery charge usage and compositi...

Страница 42: ...thorized Pride provider if necessary n EnsurethatallpartsofthecontrollersystemaresecurelyfastenedtoyourJet Donotovertightenanyscrews n Calibrate the joystick if a noticeable difference in performance...

Страница 43: ...wheel See figure 28 5 Pullthewheelofftheaxle 6 Remove the old tube from the pneumatic tire and replace it with a new tube 7 Slide the wheel back onto the shaft 8 Reinstallthedrivewheelboltintothecent...

Страница 44: ...shes may become susceptible to wear over a long period of time The motor brushes are the two contacts located inside the motor assembly that supply power to the motor They are designed to provide seve...

Страница 45: ...t up when you turn on the power n Check the harness connections Make sure they are tight n Check the circuit breaker Reset it if necessary n Check the battery connections If the above conditions prove...

Страница 46: ...removable cane and crutch holder is mounted to the back of the seat by means of the accessory bracket Walker Holder The removable walker holder is mounted to the back of the seat by means of the acces...

Страница 47: ...without prior consent All transportation costs and shipping damage incurred while submitting parts for repair or replace mentaretheresponsibilityoftheoriginalpurchaser Warranty Exclusions n ABS plast...

Страница 48: ...inspected your Jet 1 HD The following checkmarks indicate that it has been driven and inspected Model ______________ Serial ______________ Pride keeps a more detailed report on file at the factory Dat...

Отзывы: