Pride Mobility APEX ALUMALITE Скачать руководство пользователя страница 14


Batteries and Charging


Batteries and Charging


Your scooter uses one long-lasting Lithium-Ion battery. This battery is sealed and maintenance-free. Since 
it is sealed, there is no need to check the electrolyte (fluid)  level. Lithium-Ion batteries are designed to 
handle a longer and deeper discharge. Though they are similar in appearance to automotive batteries, 
they are not interchangeable. Automotive batteries are not designed to handle a long, deep discharge, 
and are unsafe for use in scooters.


MANDATORY! Wear goggles and gloves when handling batteries and wash hands after 
handling.


WARNING! Contact your authorized Pride Provider if you have any questions regarding 
the battery in your 

scooter. 


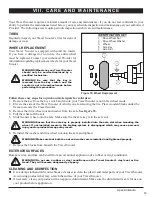
Charging the Battery


The battery charger is essential in providing long life for your scooter battery. It is designed to optimize your 

scooter’s  performance  by  charging  the  battery  safely,  quickly,  and  easily.  The  battery  charger  is  only 
functional when the charger power cord is plugged into an electrical outlet.


PROHIBITED!  Removal  of  grounding  prong  can  create  electrical  hazard.  If  necessary, 
properly install an approved 3-pronged adapter to an electrical outlet having 2-pronged 
plug access.


PROHIBITED!  Never  use  an  extension  cord  to  plug  in  your  battery  charger.  Plug  the 
charger directly into a properly wired standard electrical outlet.


PROHIBITED!  Do  not  allow  unsupervised  children  to  play  near  the  scooter  while  the 
battery  is  charging.  Pride  recommends  that  you  do  not  charge  the  battery  while  the 
scooter is occupied.


MANDATORY! Read the battery charging instructions in this manual and in the manual 
supplied with the battery charger before charging the battery.


WARNING!  Explosive  gases  may  be  generated  while  charging  the  battery.  Keep  the 
scooter and battery charger away from sources of ignition such as flames or sparks and 
provide adequate ventilation when charging the battery.


WARNING! You must recharge your scooters battery with the supplied off-board charger. 
Do not use an automotive-type battery charger.


WARNING! Inspect the battery charger, wiring, and connectors for damage before each 
use. Contact your authorized Pride Provider if damage is found.


WARNING! Do not attempt to open the battery charger case. If the battery charger does 
not appear to be working correctly, contact your authorized Pride Provider.


WARNING!  Be  aware  that  the  battery  charger  case  may  become  hot  during  charging. 
Avoid skin contact and do not place on surfaces that may be affected by the heat.


WARNING! If the battery charger is equipped with cooling slots, then do not attempt to 
insert objects through these slots.


WARNING!  If  your  battery  charger  has  not  been  tested  and  approved  for  outdoor  use, 
then do not expose it to adverse or extreme weather conditions. If the battery charger is 
exposed to adverse or extreme weather conditions, then it must be allowed to adjust to 
the  difference  in  environmental  conditions  before  use  indoors.  Refer  to  the  manual 
supplied with the battery charger for more information.


Li


Lithium


13 

Содержание APEX ALUMALITE

Страница 1: ...APEX ALUMALITE LITHIUM BATTERY...

Страница 2: ...to our products may cause slight variations between the illustrations and explanations in this manual and the product you have purchased The latest current version of this manual is available on our w...

Страница 3: ...nd them completely WARNING Indicates a potentially hazardous condition situation Failure to follow designated procedures can cause either personal injury component damage or malfunction On the product...

Страница 4: ...h your Travel Scooter Please become familiar with all the warnings and safety information found in the Consumer Safety Guide and refer to this resource often Read and follow the information in the own...

Страница 5: ...ng your Travel Scooter during daily activities you will probably encounter situations in which you will need some practice Simply take your time and you will soon be in full and confident control as y...

Страница 6: ...ROHIBITED Do not expose the tiller console to moisture In the event that the tiller console does become exposed to moisture do not attempt to operate your Travel Scooter until the tiller console has d...

Страница 7: ...gh the key can be left in the key switch when the Travel Scooter is powered down we recommend removing it to prevent unauthorized use of your Travel Scooter WARNING If the key is moved to the off posi...

Страница 8: ...is restricted day or night REAR COMPONENTS The manual freewheel lever anti tip wheels and motor transaxle assembly are located on your Travel Scooter as shown see figure 7 WARNING Before placing your...

Страница 9: ...al freewheel levers enable you to disable the drive system in order to maneuver the Travel Scooter manually See figure 8 WARNING Do not use the Travel Scooter while the drive motors are disengaged Do...

Страница 10: ...rized by your Provider WARNING The anti tip wheels may cause interference with the smooth transition of your Travel Scooter when ascending or descending a curb Contact your authorized Provider for mor...

Страница 11: ...the charger power cord receptacle the main circuit breaker reset button and the battery pack fuse See figures 9 and 10 IDENTIFICATION KEY 1 Battery Pack 5 Main Circuit Breaker ResetButton 2 Battery P...

Страница 12: ...k protects the tiller console electronics See figure 9 In the event any component of the tiller console is not responding check this fuse See VII Basic Troubleshooting for fuse replacement instruction...

Страница 13: ...rear tie down straps directly behind the rear securement points on the Travel Scooter The front tie down straps should anchor to floor points that are spaced wider than the Travel Scooter to provide...

Страница 14: ...r while the battery is charging Pride recommends that you do not charge the battery while the scooter is occupied MANDATORY Read the battery charging instructions in this manual and in the manual supp...

Страница 15: ...onnected and charging the scooter The LED will be GREEN when the scooter has finished charging Note The LED should always be orange when the scooter is initially plugged in If the LED immediately goes...

Страница 16: ...does not overcharge the battery Can I use a different battery charger You should use the charger supplied with the scooter It is the safest most efficient tool to charge the battery We do not recommen...

Страница 17: ...teries are continually recharged after only being partially discharged they lose their ability to hold a full charge We work closely with our battery manufacturer to provide a battery that best suits...

Страница 18: ...ttery should be warmed for several days prior to recharging What about public transportation The Pride supplied Lithium Ion batteries are designed for application in scooters and other mobility vehicl...

Страница 19: ...setting and secured into place See V Comfort Adjustments Is the key fully inserted into the key switch and turned clockwise to the on position Does the Travel Scooter s horn work properly Is your prop...

Страница 20: ...Scooter 4 Make certain that the seat is secured into position 5 Carefully and safely get out of the seat and stand to the side of your Travel Scooter 6 You can leave the seat facing to the side to fac...

Страница 21: ...side of the seat base secures the seat into several positions See figure 24 1 Pull up on the seat rotation lever to disengage the seat 2 Rotate the seat to the desired position 3 Release the lever to...

Страница 22: ......

Страница 23: ...metal tab on the right side of the belt into the plastic housingontheoppositestrapuntilyouheara click Seefigure29 2 Pull the strap on the right side of the belt until it is secure but not so tight as...

Страница 24: ...ooter WARNING Do not pick up the seat frame or scooter by the armrests They are free to pivot and you may lose control of the seat if they do so IDENTIFICATION KEY 6a 1 Seat 1 2 Under seat Storage 3 R...

Страница 25: ...ear half of the Travel Scooter slightly back on the anti tip wheels as shown in figure 33 1 Use the frame release lever to lift the front section as you align the frame hooks of the front section with...

Страница 26: ...turned back on DIAGNOSTIC CODE CONDITION SOLUTION 1 Battery voltage is too low to operate the Travel Scooter Charge batteries as soon as possible 2 Battery charge is too low Charge batteries 3 The Tra...

Страница 27: ...echnician check and or replace the fuse Ensure both ends of the charger power cord are connected properly If the battery pack fuse continually blows contact your authorized Provider for service What i...

Страница 28: ...g the tire Place wooden blocks under the frame to elevate the Travel Scooter 3 Remove the drive wheel nut and washer from the axle See figure 35 4 Pull the wheel off the axle 5 Slide the new wheel ont...

Страница 29: ...repair it See your authorized provider if there is a problem Visually inspect the tiller cable Make sure that it is not frayed cut or has any wires exposed See your authorized provider if there is a...

Страница 30: ...reused as it may cause damage to the nylon insert resulting in a less secure fit Replacement nylon insert lock nuts are available at local hardware stores or through your authorized Provider STORING Y...

Страница 31: ...Apex Alumalite 29 NO TE S...

Страница 32: ...hnology co Ltd No 68 XinFa Road Suzhou Industrial Park Jiangsu China 215123 EU Representative SWEMO GmbH Adenauerstrasse 6 52146 Wuerselen Germany UK Distributor Pride Mobility Ltd 32 Wedgwood Road Bi...

Отзывы: