


5
PRESTIGIO P178
ENG
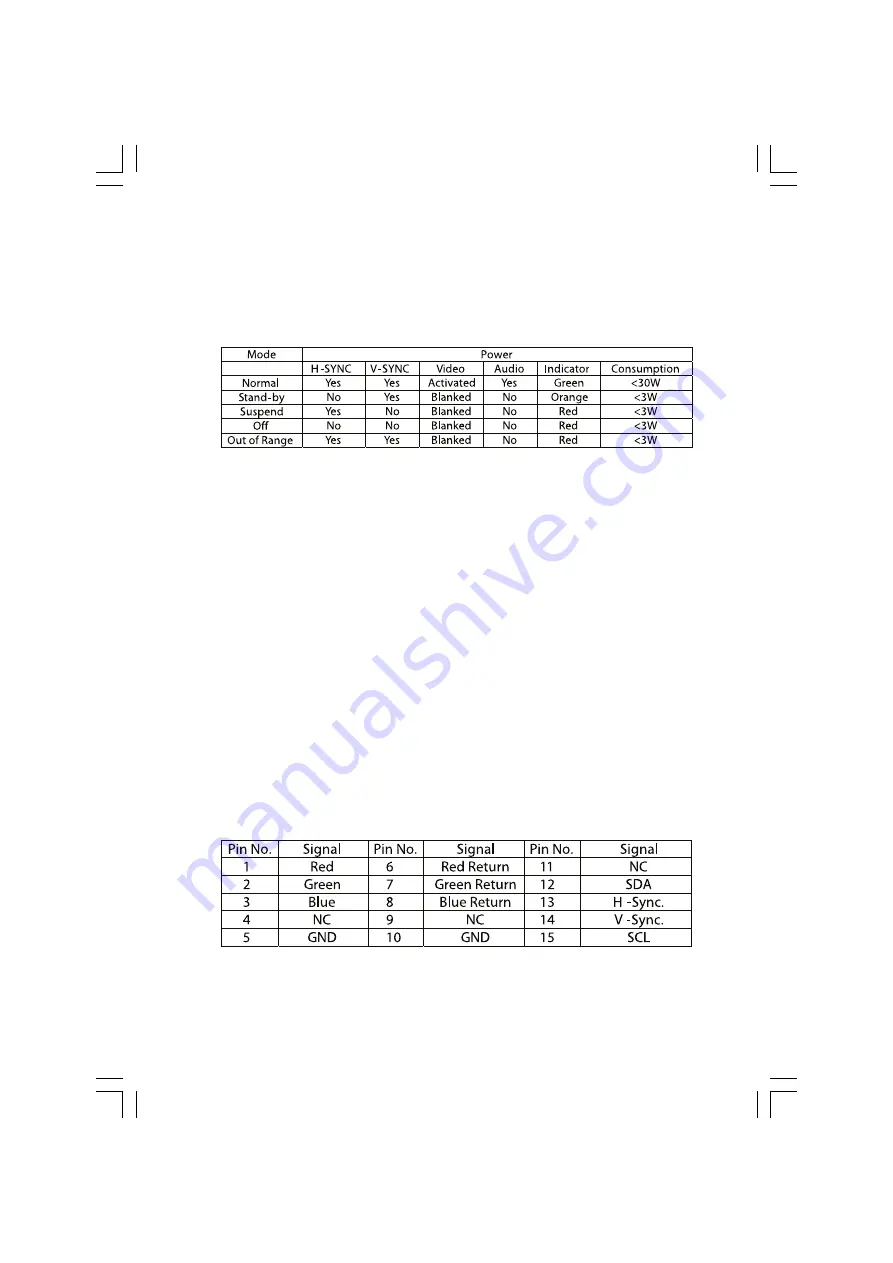
5.POWER MANAGEMENT
This monitor meets the power management standards as set by the VESA or the United States Environmental Protection
Agency (EPA) . This feature is designed to conserve electrical energy by reducing power consumption. This function is
activated by an operating system or Windows utility program which turns off the monitor display and also turns off
or changes the color of the monitor’s power LED.
6.TROUBLE SHOOTING
6-1. Problem : No picture appears on the screen
If power LED is off: check if power cable is securely connected
If power LED is RED in color: check if video cable is securely connected. Also check if your computer is switched on.
If power LED is GREEN in color: check if H SYNC frequency is out of range. Adjust the brightness and contrast control.
7.TECHNICAL INFORMATION
7-1. Precautions
Only a qualified service technician should open the monitor case. Components inside of the monitor can cause serious
electric shock. Do not attempt to remove the back cover of the monitor by yourself. Contact your monitor dealer or
authorized service personnel if your monitor needs to be repaired.
To prevent fire or shock hazard, do not expose this monitor to rain or moisture.
7-2. Weight
Approx. 4kgs(net)
7-3. VIDEO PIN ASSIGNMENTS


