5
2
Getting Started
2.2
Step 2: Add a Control Device
StudioLive™ Series III Rack Mixers
Owner’s Manual
2.2
Step 2: Add a Control Device
Control and Audio Data Connections
You can connect your mixer to UC Surface as follows:
4
Wired to a standard LAN network (control only).
4
Wired to a computer via USB (control and audio).
In the sections that follow, we will describe all these configurations in detail.
Power User Tip:
WPA and WPA2 are protocols created to make wireless networks secure.
WPA stands for “Wi-Fi Protected Access,” and WPA2 is a later version that conforms to the
IEEE 802.11i networking standard. Most routers have settings that manage their security
protocols; consult the documentation for your router to learn how to change these
settings.
2.2.1
Wired LAN Networking (Ethernet)
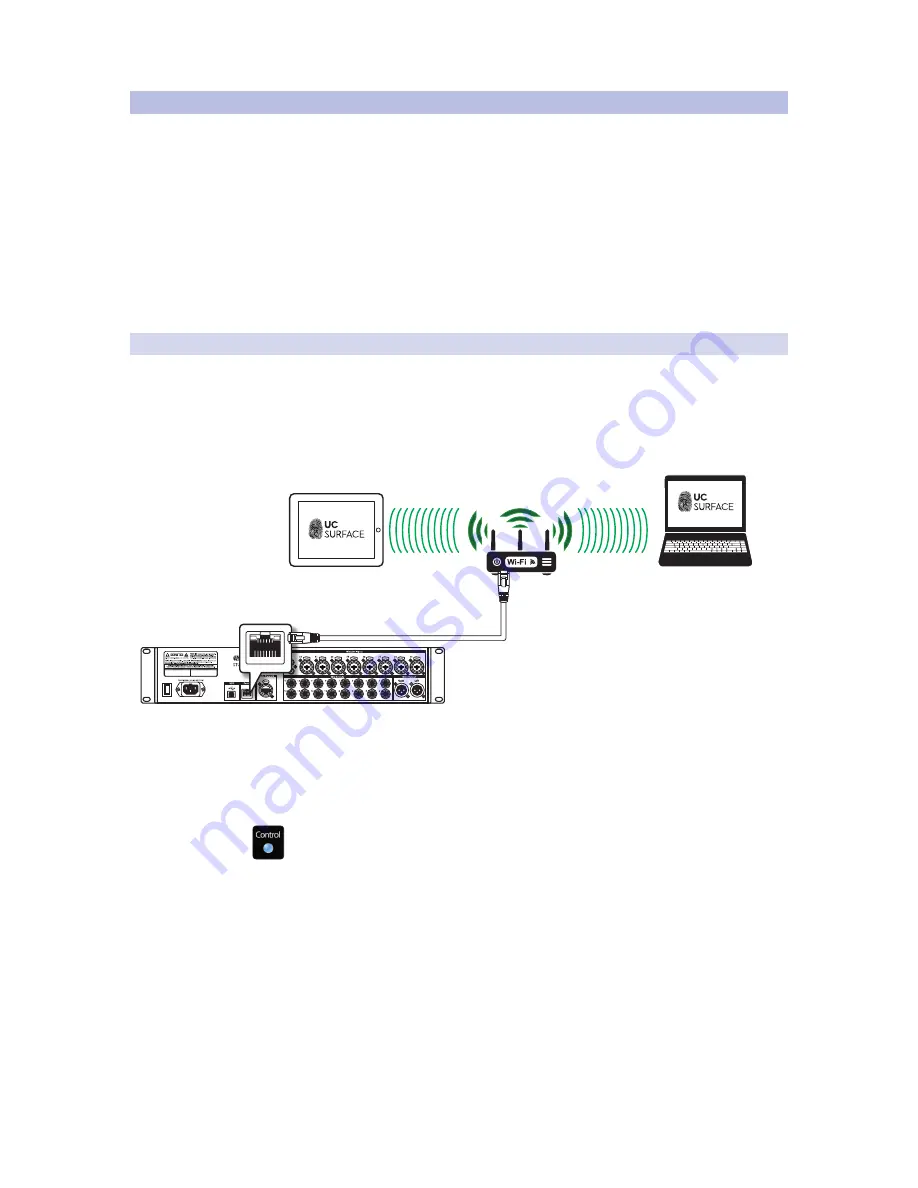
The easiest way to configure your control network is to connect your mixer
and devices (computer, iPad, or Android) to a wireless router. This allows you to
quickly connect devices for remote control using UC Surface and QMix-UC.
1. Connect your StudioLive Series III Rackmount mixer
to a wireless router with an Ethernet cable.
2. Power on the router and then power on the mixer.
3. Connect your computer, Android and iOS device to the wireless
network. You can also connect your computer directly to the
wireless router using an Ethernet cable if you prefer.
4. The Control LED on the front of your StudioLive mixer will turn blue once it is
connected and communicating properly to the network.
Laptop with
UC Surface
Tablet control
UC Surface
Ethernet cable


