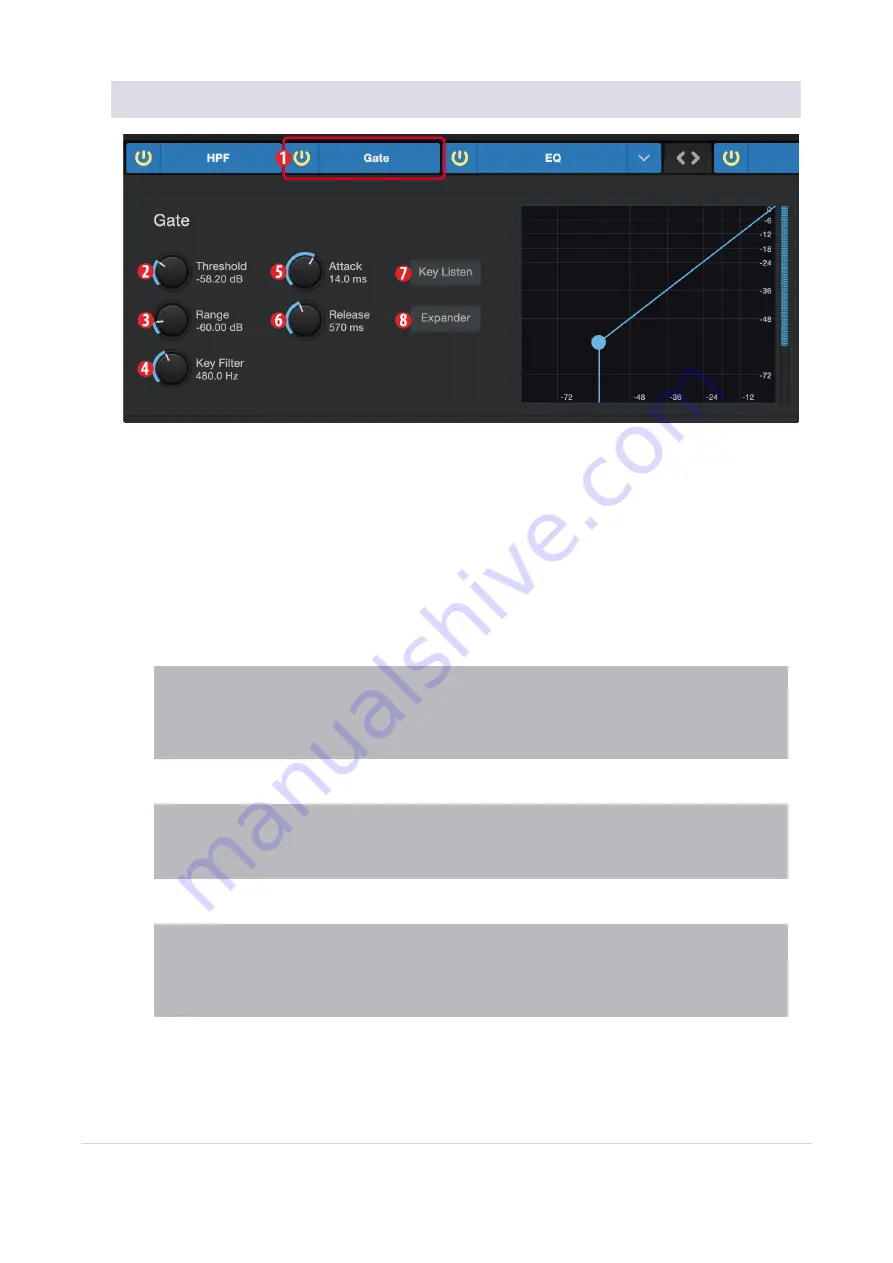
7.2.2 Noise Gate
1.
On/Off.
Turns the Noise Gate on or off in the signal chain.
2.
Threshold.
Sets the signal level that bisects the signals you wish to keep from the signals you want
to attenuate. Signals below this level are attenuated according to the setting of the Range parameter.
Signals above this level pass through unaffected.
3.
Range.
Sets the amount of attenuation applied to a signal when its level falls below the Threshold.
Lower settings pull signal level down further, all the way to -∞, if desired. Higher settings pull the sig-
nal down to a lesser extent, de-emphasizing noise and other nuisance signals more subtly (without a
“hard” cut-off). Note:
Range is disabled when the Expander is engaged.
4.
Key Filter.
This sets the frequency at which the gate will open. Setting a specific frequency, in addi-
tion to a specific decibel level, provides more sonic shaping.
Power User Tip:
A properly set key filter on a gate can greatly improve the overall sound quality of a
mix. For example, if you are recording outside, the road noise may be loud enough to open the gate. This
is where a key filter can come in handy. By setting the key filter to remove some of those low frequencies,
the gate won’t be as apt to open for the next passing car
.
5.
Attack.
Sets the time it takes for the gate to “open” when a signal passes the threshold.
Power User Tip:
A fast attack rate is crucial for percussive instruments. Slow-rising signals such as
vocals and bass guitar require a slower attack; with these signals, a faster attack can cause an audible
click. All gates have the ability to click when opening but a properly set gate will never click.
6.
Release.
Sets the time it takes for the gate to “close” when a signal falls beneath the threshold.
Power User Tip:
Gate release times should typically be set so that the natural decay of the instrument or
vocal being gated is not affected. Shorter release times help to clean up the noise in a signal but may
cause “chattering“ with percussive instruments. Longer release times usually eliminate chattering and
should be set by listening carefully for the most natural release of the signal.
7.
Key Listen.
Press the button to engage or disengage the Key Listen function. It will illuminate to indic-
ate that the Key Listen is active. When Key Listen is enabled, you will be listening to the frequency
7.2.2 Noise Gate
71
Содержание Revelator Dynamic
Страница 1: ...Professional dynamic USB mic for recording and streaming vocalists podcasters and more Owner s Manual...
Страница 13: ...1 3 4 Step 4 Download and Install Studio Magic Optional 13...
Страница 47: ...That s it 4 1 1 Changing Preset Button Slots 47...
Страница 49: ...3 Enter the name you d like to use 4 Click Store 4 1 2 Storing New Presets 49...
Страница 107: ...Professional dynamic USB mic for recording and streaming vocalists podcasters and more Owner s Manual Part 70 12000173 A...


