The charging ports are located on the backside of the GPS device. The charging clip is
compatible with any computer USB port, most A/C chargers* (see note below), and USB ports
found in automobiles.
*Note: AVOID THE USE OF QUICK-CHARGE A/C ADAPTERS TO CHARGE YOUR GPS GOLF BAND
DEVICE. DAMAGE MAY OCCUR AND VOID THE WARRANTY. COMPATIBLE A/C ADAPTERS DO NOT
EXCEED 5.0V. CHECK THE VOLTAGE RATING ON ANY A/C ADAPTERS PRIOR TO USING.
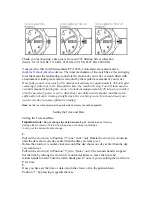
When the device is connected to the USB cradle (shown
above) and plugged-in, it will display the screen shown
in the image to the left. The scrolling battery icon at the
bottom of the screen indicates that the battery is charging.
When the battery is fully charged, the battery icon will stop
scrolling and remain full, and the center of the screen will
show 100%.
Charging/Connected Screen
Full/Connected Screen
1. Align the tab located on
the non-cable side of the
clip with the notch on the
button side of the device.
2. Lock the clip into place
on the non-button side of
the device.
(To remove, use the handle
on this side of the clip to
pull the tab out and lift
away from the device).
CHARGING THE BATTERY
TO CONNECT THE USB CLIP TO YOUR DEVICE:
3.
Содержание GPS GOLF BAND
Страница 1: ...PPGB UM_Rev04 March 2016...


