12
8.0
Adjustments
8.1
Table movement
8.1.1
Raise and lower
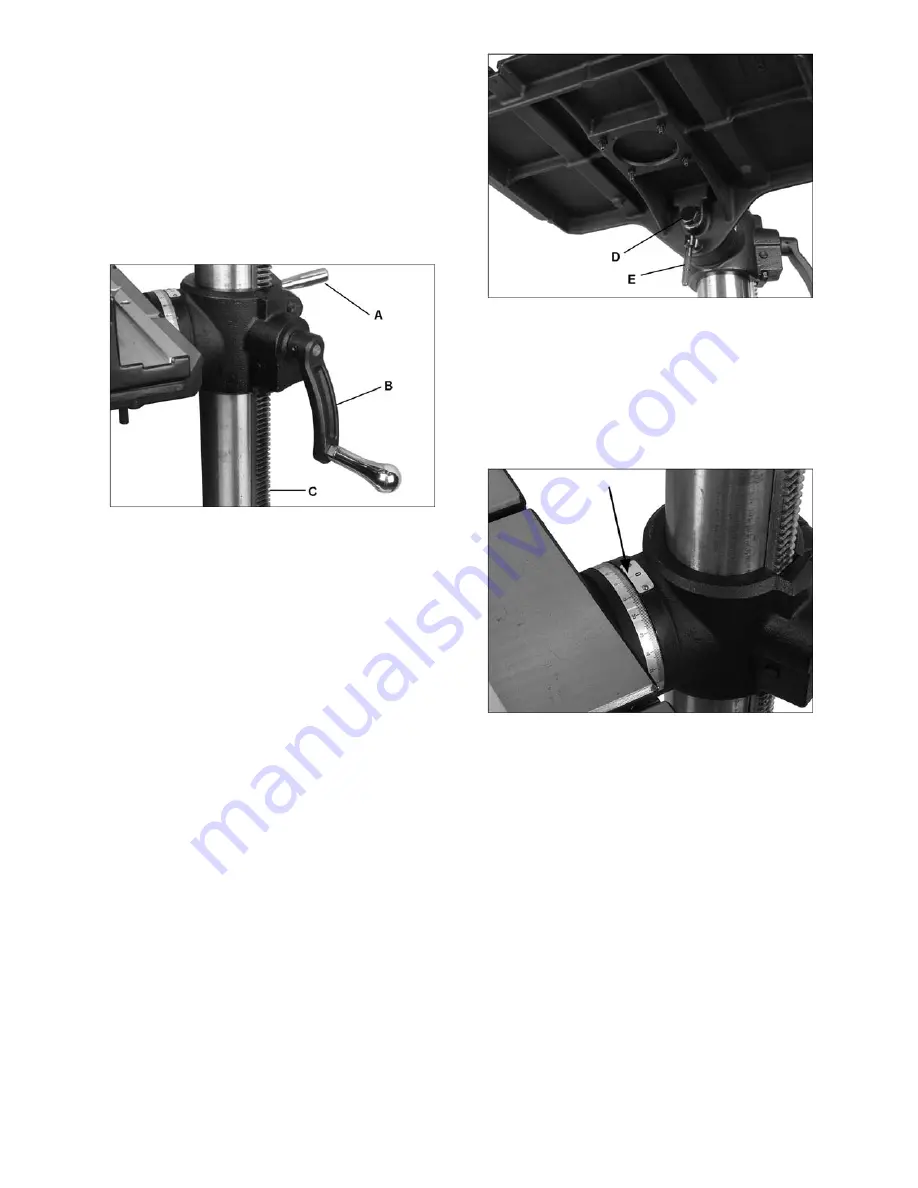
Referring to Figure 13:
Loosen column locking handle (A, Figure 13). Turn
table elevating handle (B) to raise or lower table
along column rack. Re-tighten locking handle (A)
before attempting to drill.
Figure 13
8.1.2
Swing table away
Referring to Figure 13:
When drilling into a long workpiece, swing table out
of the way and use drill press base as your table.
Slots in the base can be used to mount work
holding devices.
1. Loosen column locking handle (A).
2. Swing table to desired position. If rack (C)
tends to bind, you will need to nudge the top or
bottom end of the rack around the column
while swinging table.
3. Tighten column locking handle (A).
8.1.3
Tilt table
Referring to Figures 14 and 15:
1. To tilt table, slightly loosen bolt (D) and loosen
handle (E).
Figure 14
2. Pivot table to desired angle by aligning scale
on table to line on indicator plate (Figure 15).
3. Re-tighten bolt (D) and handle (E).
4. When returning table to horizontal position,
loosen handle (E) and bolt (D), tilt table back
to zero degrees on scale, and tighten handle
(E), then tighten bolt (D).
Figure 15
8.2
Chuck and arbor removal
Referring to Figure 16:
1. Disconnect machine from power source.
2. Lower quill assembly with the downfeed
handles to expose slot. Rotate chuck to align
slots.
3. Insert drift key into slot.
4. Tap drift key into slot until chuck and arbor fall
out.
NOTE:
Hold on to chuck to prevent it
being damaged as it falls.


